
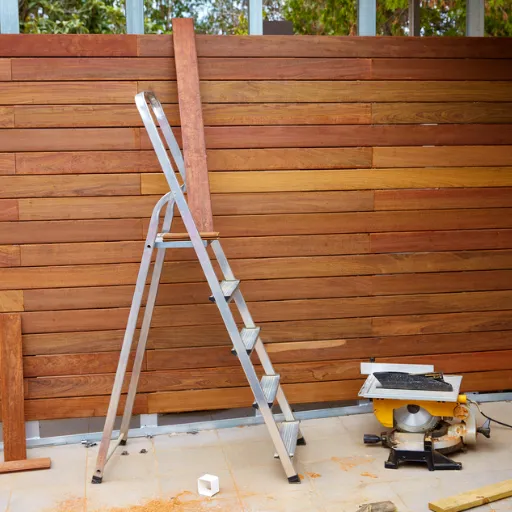
How to Install a Fence: A Step-by-Step Guide for Wood Fences
Erecting a wooden fence around your house is not only a minor enhancement but also a way to improve privacy, enhance your house's curb appeal, and provide a nice border for your garden. Whether you are a proficient DIYer or a curious novice, clear, accurate instructions are the most essential factor in building a fence that will stand for many years. Our detailed procedure will give you all that stuff, practical tips, and professional guidance, helping you to master everything from planning and material selection to post installation and finishing touches. Surely, you will find the solution at the end where you take this nice project and brighten up your yard like a lovely and secure thing.
Introduction
Installing a fence requires careful planning and proper procedures to ensure a wall that is both durable and visually appealing. The first step is to identify your needs, such as privacy, security, or marking your property boundaries. After that, select the appropriate materials, which could be wood, vinyl, or metal, based on your budget and taste. Also, inquire about local laws and if needed, get a permit. Having a detailed plan makes it possible to measure, install posts, connect panels, and perform touch-ups, thereby gradually building a strong, long-lasting fence.
The Importance of Proper Fence Installation
The quality of the fence in terms of durability, functionality, and aesthetics largely depends on the installation process. An improperly installed fence can lead to a variety of issues such as being weak in structure and causing disputes among neighbors. Proper fence installation is therefore essential for the following five reasons:
Increased Protection
A well-put-up fence marks out your land in a way that is difficult for intruders to get through, and at the same time, it adds protection for your house and family.
Life Span and Strength
Proper installation techniques coupled with quality materials can lead to a fence that will last a long time and thus, regular maintenance and even replacement will not be necessary.
Adherence to Local Laws
Proper installation takes your fence right within the limits of local zoning laws and permits so you will not have to worry about fines or legal issues with your neighbors.
Better a Property Value
A fence that has been installed properly will not only make your property look more attractive, but it will also make its price go up, thus, it will be more appealing to potential buyers.
Lower Maintenance Costs
Fences installed correctly do not lean or deform, so you will not need to spend time or money on future maintenance.
Benefits of Installing a Wood Fence
Natural Aesthetic Appeal
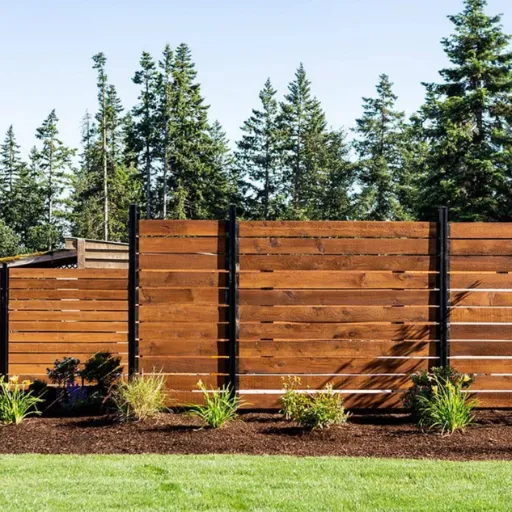
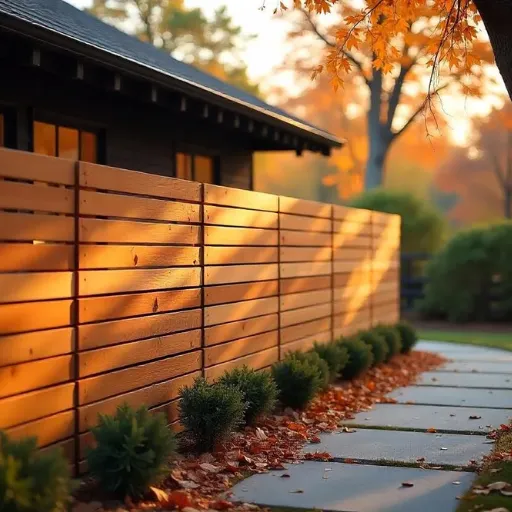
Wooden fences provide a timeless and natural beauty which is a great advantage for almost any homestead design. Therefore, their classic style not only contributes but also radiates warmth and beauty throughout the property, creating a facade that is both inviting and attractive.
Customizable Designs
Wooden fences are highly customizable and can be built to your specifications. The possibilities are nearly endless from heights and styles such as picket, split-rail, or privacy fences, plus stains or paints, you are creating the rules for a fence that matches your home's style.
Cost-Effectiveness
Wood fences are, in most cases, less expensive to install than materials such as vinyl or wrought iron. The initial cost is low, and a wood fence can last for many years with proper maintenance, providing long-term value.
Eco-Friendly Option
Wood is an ecological resource because it can be regenerated; therefore, it is a green choice. Choosing wood from a sustainable forest not only cuts down on your carbon footprint but also, at the end of their lifespan, wooden fences can be recycled or repurposed.
Durability and Strength
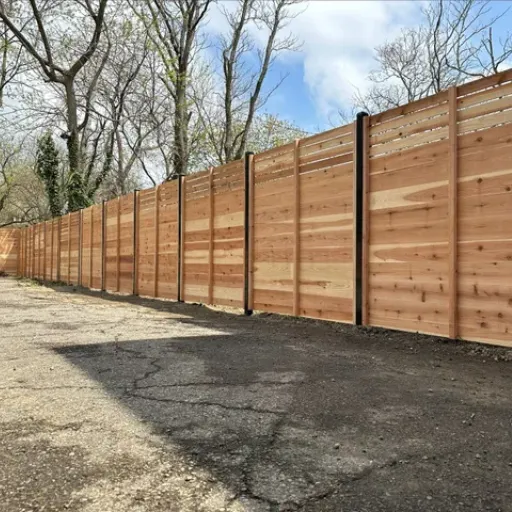
Wooden fences will withstand any weather if properly treated and maintained. Besides, they will form a strong and reliable barrier which can be used for privacy, security, and noise reduction, so they are a long-lasting option for the property owners.
Overview of the Installation Process
The process of wooden fence installation consists of several phases whose primary aim is to create a fence that is durable, functional, and aesthetically pleasing. Here is the installation process with latest insights and suggestions included:
Planning and Inspection
Initially, make up your mind regarding the fencing purpose, like whether it is for providing privacy, security, or merely for decoration purposes. Next, measure your property's buffering area and confirm local laws or HOA guidelines concerning fence height, style, and location. Lastly, do not hesitate to get in touch with the utility companies; for instance, via the U. S. service 811, to make sure no underground utilities are present at the spot where you plan to dig.
Material Selection
Opt for the highest-quality, eco-friendly wood such as cedar, redwood, or pressure-treated pine, which will not only last a long time but also withstand the harshest weather conditions and insect infestations. Industry insiders report that cedar is the preferred wood due to its natural resistance to decay and insect infestations.
Preparing the Area
Remove weeds, stones, and other debris from the installation site to improve work efficiency. Make use of stakes and string lines to layout the post holes, making sure they are in straight lines and equally spaced apart. Experts recommend spacing fence posts 6 to 8 feet apart for optimal stability.
Digging Post Holes
Using either a power auger or a hole digger, cut holes about one-third of the pole length and 6 inches wider than the post. For 8-foot poles, the holes would need to be approximately 2.5 to 3 feet deep. To maintain drainage and prevent rot, place 6 inches of gravel at the bottom of each hole.
Installing and Securing Posts
Slide the wooden poles into the holes and verify they are upright and level. The poles will be fixed in place with cement; pour cement into the hole and let it dry for at least 24 to 48 hours. It has been found that well-cured concrete merely adds up to the fence's longevity and sturdiness.
Attaching Rails and Panels
The first thing to do after securing the posts is to connect them with horizontal rails creating a skeleton. Based on the fence design, either panels or single pickets can be nailed to the rails afterwards. Additionally, for greater resistance, professionals recommend using galvanized nails or screws.
Finishing Touches
Sand down sharp edges to smooth them, then apply a waterproof stain or sealer to create a barrier against moisture, UV rays, and other environmental factors. According to studies, seals can extend the life of wooden fences by up to 30%, as reported by the U.S. Forest Service.
Homeowners who strictly follow these steps will not only have a durable, aesthetically pleasing wooden fence, but also a permanent one. It is true that proper maintenance like resealing every other year, checking for damage on a regular basis, and so on is necessary for the long-term satisfaction of all involved.
Materials Needed to Install a Wood Fence
If you want to have a spectacular wood fence that will endure, you must use the following materials:
Wooden Fence Panels
Amongst the choices of treated wood, cedar and redwood, you can choose the one that is the most appealing to you according to your budget and beauty. Treated wood offers a less expensive yet sturdy option, whereas cedar and redwood have naturally occurring characteristics that make them more convenient for wood resisting insects and decay. The number of panels required, along with their length and height, will depend on your fencing requirements.
Fence Posts
The fence posts are the backbone of any fencing system. Most of the time, 4x4 treated wood posts are the starting point for most fencing applications. To keep posts strong and sturdy, they should be set a minimum of 2 feet into the ground. For taller fences and sloped areas, use the longer posts which are 8 to 10 feet.
Concrete Mix
Concrete keeps the fence posts firmly anchored in the ground and prevents them from being toppled by harsh weather. A quick-set concrete mix is usually the most practical, as it requires about 1-2 bags per post, depending on the size of the postholes.
Gravel/Base Rock
Each posthole has gravel or base rock at the bottom to let the water drain properly and hence, it becomes less likely that the posts will decay from water damage over a long period of time.
Deck Screws/Nails
The best screws/nails are galvanized or stainless steel since they resist corrosion. For an average-sized fence of about 100-200 feet, you will most probably have to get a few hundred screws or nails.
Fence Post Caps
In addition to enhancing the fence's appearance, fence post caps prevent moisture absorption and UV damage, extending their service life.
Wood Stain or Sealant
The fence should be used only for its intended purpose if the wood stain or sealant is applied after installation. It is a barrier against nature's enemies- weathering, UV rays, and moisture. It is essential to choose UV-resistant, water-repellent products to ensure your fence has the longest lifespan.
Painting or Staining Tools
Brushes, rollers, or sprayers will be needed for the proper application of the wood stain or sealant. Keep drop cloths and cleaning supplies on hand to minimize the mess.
Measuring Tools
Measuring tools like tape, string, and stakes should be used to outline the fence location. If using a level, the fence panels and posts will be properly set, and thus will be perfectly aligned.
Saw and Cutting Tools
One cannot install an aesthetically pleasing fence unless he/she has the tools that will help to adjust the size of the fence panels and posts with a circular saw or handsaw.
Post Hole Digger or Auger
These are the tools for digging holes for post installation. A post hole digger is a good choice for smaller projects, while an auger is more practical and quicker for large installations.
Protective Gear
Essential protective gear for installation includes safety goggles, gloves, and ear protection. They are required to ensure that no accidental injuries occur while handling tools and materials.
To determine the materials needed for a particular job, first measure the area’s perimeter, and then it will be clear how many panels and posts to purchase. For instance, a standard fence of 150 feet may require about 20 panels and 21 posts, based on how far apart you want them. Always buy slightly more material than you expect to need to account for potential errors or changes in plan.
Types of Wood Fencing Materials
Wood fencing materials are typically durable, adaptable to a variety of uses and designs, and come in a wide range of options. Below are the most popular wood fencing materials and their descriptions along with the most recent update on their features and advantages:
Cedar
Cedar is arguably the most popular wood for fencing because of its inherent resistance to decay and insect damage. In addition to all that, cedar has a gorgeous reddish color and a pleasing smell so that it is a practical as well as an aesthetic choice. Under optimal maintenance conditions, cedar wood fencing typically has a lifespan of 15 to 20 years. Cedar, due to its light yet stable character, is easy to install, and the risk of bending or contracting over time is low. Current data indicate that the mean cost of cedar fencing ranges from $15 to $30 per linear foot.
Redwood
The natural beauty and rich color of redwood still make it a premium choice for fencing. No doubt, it is highly resistant to decay, and redwood has an insect-repelling property. The price of redwood is very high compared to other wood options, ranging from $20 to $40 per linear foot. However, considering the high cost, the strength and longevity of redwood, sometimes even more than 25 years, make it a worthwhile investment for those who care equally about the aesthetics and functionality in the long run.
Pine
Pine is the cheapest among the most common types of wood used for the fence, and thus the dealers and sellers of wood products usually go for it. Among the different species of pine, treated pine is the most common because it lasts longer (it is not susceptible to decay, insects, and moisture) and is also more affordable than raw pine. It is common to have a pine fence last anywhere from a decade to a decade and a half, depending on maintenance and weather. The price of treated pine fencing is usually between $10 and $20 per linear foot. However, untreated pine is more likely to warp and sustain damage as time goes by.
Spruce
The first thing that comes to one's mind when offering the price point of spruce is that it is simply too good to be true. The wood is not as decay-proof as redwood or cedar, so it is better to use for temporary fencing. A spruce fence has a life span of about 7 to 10 years and costs $8 to $16 per linear foot. Applying the appropriate stain and sealant can further extend the lifespan of your fence.
Cypress
Cypress is a decent alternative to cedar and redwood, particularly in the south. This is due to the natural oil cypretine, which is responsible for its insect- and decay-resistance. In the best of circumstances, cypress wood is said to be as durable as cedar (15-20 years) and costs about $12 to $28 per linear foot depending on the grade and location.
Bamboo
Bamboo fencing is a green, eco-friendly option that has emerged over time and is in demand. Its appearance differs, but it is rugged, insect-resistant, and durable when implemented correctly. Bamboo fencing is generally seen around in modern and decorative fencing solutions. The price for bamboo fencing ranges from $15 to $25 per linear foot.
Among all the woods used for fencing, each has its unique advantages and disadvantages. When choosing the right material, consider your budget, your location's climate, and how long you want it to last. Also, regular maintenance, such as staining and sealing, is essential to ensure the durability and appearance of your wooden fences.
Tools Required for Installation
Erecting a wooden fence means a lot of different tools will be necessary which will not only make the process faster but also a stable and long-lasting fence. Below is a complete rundown of several indispensable tools along with their functions:
Measuring Tape
Purpose: To provide the measurements and visualize the positions of the fence posts correctly.
Data Note: Afted master measuring tapes for the most part have tapes ranging from 25 feet to 100 feet in length and the 1 inch width is the most user-friendly dimension.
Post Hole Digger or Auger
Purpose: For the digging of holes for the setting up of the fence posts. A manual digger will suffice for a small fence, while a powered auger will be able to take care of the large installation.
Data Note: The size of a standard hole is usually 1/3 the height of the post and 6-12 inches wide depending on the size of the post.
Level
Purpose: It reveals if the posts and panels are aligned according to the scheme and thus a nice fence without highs and lows is produced.
Data Note: Among the various types of levels, bubble and laser models are the most common, with the latter being the most accurate.
Hammer or Pneumatic Nail Gun
Purpose: For nailing together the fence boards, rails, and hardware to the posts.
Data Note: Air-powered nailers enhance productivity and reduce manual labor, especially in medium and large-sized jobs.
Saw
Purpose: Saws are used for cutting the fence boards, posts, and rails to the required lengths. Circular saws and miter saws are usually chosen for their capability to make clean and precise cuts.
Data Note: Blades with higher tooth counts (e.g., 60 teeth for a circular saw) are recommended for smoother cuts.
Screwdriver or Power Drill
Purpose: To insert screws for an exceptionally robust attachment of brackets, hinges, or other fixtures of hardware.
Data Note: The torque-adjustable cordless drills work best with all wood densities.
String Line and Stakes
Purpose: Aids in the erecting and spacing of fence posts such that there is an invisible straight and even line across the property.
Data Note: The string of choice is nylon because it is strong and will not break under tension.
Shovel
Purpose: For leveling the area around the posts or loosening the soil around their heads.
Data Note: Flat-edged shovels are great for scooping whereas pointed ones are most suitable for digging.
Concrete Mix and Mixing Tools
Purpose: Concrete provides the foundation for fence posts, ensuring they remain in the ground and remain strong. Mixing tools like wheel barrows or motorized mixers can add to the convenience and quickness of the concrete mixing process.
Data Note: Flash-setting cement can harden in as little as 20 to 40 minutes, reducing installation time.
Protective Gear
Purpose: For the installation of the fence the protection needs to be ensured. Typical items include gloves, safety goggles, and earmuffs.
Data Note: The use of sturdy work gloves and ANSI-rated safety glasses is highly recommended.
Tools and equipment mentioned above not only speed up the fence-building process for both homeowners and contractors but also assure the same quality as from professionals. Furthermore, it is advisable to check with local authorities and utility companies and get their regulations before the project.
Understanding Local Building Codes
In every construction project where fences are installed, the first step is to comply with local building codes. The major aims of building codes which are regulations set up for that purpose are safety, uniformity, and keeping in line with the standards set by the local authorities. These codes can vary significantly from one locality to another, and thus, it is essential to check and find out what the specific requirements of your area are.
The height and placement of fences are usually the primary issues addressed in fencing regulations. For instance, most counties in the U. S. allow the height of 6 feet for backyard fences and 4 feet for front fences. Property owners may also be required to maintain a certain distance from property lines, which are typically governed by zoning laws. For example, some areas may require a fence to be set back at least 2 feet from the property boundary.
The next step is to secure the necessary permits. A fence permit is a prerequisite in several locales and that requirement becomes even more pronounced if the design entails features like retaining walls or structural reinforcement. Not obtaining the required permits could result in fines, orders to remove the fence, or complications when selling the property in the future.
Utilities must not be overlooked either. Before you begin digging holes for posts, contact the U.S. 811 "Call Before You Dig" program to locate underground utilities. Striking a utility line can not only create a dangerous situation but also lead to lawsuits, fines, and related penalties.
Why not just familiarize yourself with the local building codes and regulations? That way, the residents and the workers will not have to coexist with the legal issues and the risk will be lower. Moreover, it is strongly recommended that you either contact your city's permitting office directly or visit their website to obtain the latest rules and requirements.
Step-by-Step Installation Guide
Installing a fence entails a lot including planning, compliance with regulations, and finally building a fence that is both safe and long-lasting. Just follow the steps below, and before you know it, you will have your fence up:
Decide where to place the Fence
Use stakes and string to outline the area where the fence will be erected. Double-check the property boundaries and confirm that the plan is not encroaching on your neighbor's land or the public land.
Acquire knowledge on local building requirements to find out the maximum height, materials, and distances from the property line that are allowed. Fence heights range from 4 to 8 feet, and most residential codes allow a maximum height of 6 feet for fences that surround backyards.
Obtain Required Permits
Contact your town or city's permitting office to obtain the necessary permits. Generally, municipalities require permits for fences taller than 6 feet, and some may also limit them under HOA regulations.
The permit fee for acquiring a building permit for a fence usually ranges from $20 to $150 depending on where you are located.
Locate Underground Utilities
Before digging holes for posts, call 811 or contact your local utility locator to determine where gas, water, or electric lines are buried. Accidents involving these cables can lead to dangerous and costly repairs.
Choose Materials
Select high-quality materials that are most appropriate for their intended use. If privacy or security is a concern, then wood or vinyl panels would be a good choice, but if one is looking for decorative fencing then aluminum or wrought iron might be employed. Pressure-treated wood is one of the most common materials for fencing because it resists weather damage and insect damage.
Set Fence Posts
Dig the holes for the posts with a post-hole digger, making sure that the depth is at least one-third the length of the post (for example, a 6-foot post requires a 2-foot hole). Put gravel at the bottom for drainage.
Setting the posts in concrete is the method used to assure stability, and during the operation, a level should be used to verify that the posts are perpendicular. Three to four hours are required for the concrete to harden.
For uniformity and sturdiness, post spacing should be the same, usually 6-8 feet apart.
Attach Fence Panels or Rails
Fix horizontal rails or ready-made panels to the posts with galvanised nails or screws. If it's a wood fence, leave small gaps between the boards to allow for the natural enlargement that happens.
Regularly check alignment so that the fence remains straight and level.
Gates and Hardware Installation
Locate the gates at the designated entry points and ensure that the hinges are robust and leveled so that the gate will open and close correctly. Either latches or locks can be used to add an extra layer of security.
Before proceeding, test the gate for opening and closing several times to make sure it operates smoothly.
Finish the Fence
Apply a weatherproof sealant, stain, or paint that not only gives the fence a longer lifespan but also maintains the aesthetic you want. To keep the protection at its peak, reapply every 2-3 years.
The area should be cleaned up and all the waste material should be disposed of as required.
Your fence will be durable, beautiful, and customized according to your tastes and preferences by simply following this guide and keeping up with the latest rules and suggestions.
Measuring and Marking the Property Line
Measuring and marking your property line accurately is very important step when planning a fence. It ensures correct positioning of the fence, and at the same time, it minimizes disagreements with neighbors and the risk of infringing on local laws. Follow these steps by the latest guidance:
Check Title and Survey Records
Begin with your deed or the plat map of the property if any. These documents often have the property lines detailed with precise measurements and notations. If you do not have these records, you can either go to the local government office and request for copies or also check property records online.
Get a Survey done by the Professionals
If the property boundaries are unclear to you, make sure you bring in a licensed surveyor. Professional land surveys usually cost between $500 and $1,000 on average, depending on the size and complexity of the property. The surveyor will use cutting-edge tools like GPS and theodolites to identify the property corners with no room for error.
Put Up Markers for the Property Corners
When you have confirmed the property boundaries, the next step is to set up permanent markers for the corners. Among different types of markers you have the option of using wooden stakes, PVC pipes, or colorful metal pins (which have been painted for visibility). The markers must be tough enough to last the weather but also easily seen while the project is going on.
Mark the Lines with the Help of Measuring Tools
Using a long measuring tape, a laser distance measurer, or a GPS boundary mapping tool, you can find out the exact distance separating the corner markers. Depending on the terrain, you can either make the lines straight or adjust for natural barriers. It is said by the professionals that laser tools can boost accuracy in measurement and thus eliminate the factor of human error.
Be Aware of the Local Setbacks
Most municipalities have rules on how far buildings should be from the property lines, and so such rules must be followed. For instance, residential fences are sometimes required to be 2-4 inches within the boundary. To avoid paying fines or moving your fence sooner, check with the local government or homeowners association.
Talk to Neighbors
It is good practice to inform your neighbors about your plans as it can help avoiding any misunderstandings. Furthermore, one can also gain their cooperation and thus prevent conflicts by informing them about the property boundaries being marked, including the where and how aspects.
Verify Measurements Again
Simply reviewing each measurement may save time and resources. If your marked lines are in accordance with the official records, property boundary apps (e.g., Google Maps with parcel overlays, LandGlide) will help tell you this. Moreover, always go back and verify your work against the professional survey, if one has been done, as it will save you from making mistakes.
When you have been through the taxing task of taking measurements and marking the property line, you will have no worries in starting the fencing process since you are already certain that it will be compliant with the local rules and also placed in a visually appealing and harmonious way across the borders.
Digging Holes and Setting Posts
According to the post's location and size, proper hole digging and post setting techniques are the chief technical factors that fencelines would eventually possess in terms of strength and longevity. While marking the locations of your fence posts, it would be advisable to use disconnects such as spray paint or wooden stakes after determining the spacing, which is generally 6 to 8 feet apart. In addition, if there would be gates in the fence, it is imperative to include gate posts in your count as they usually need more support.
For bigger projects, a post hole digger or an auger is, at least, the most suitable tool for digging fence post holes. The holes must be one-third of the post's height deep for good stability or 2 to 3 feet deep based on the fence height, in general; however, the diameter of the hole must also be measured; it should be roughly three times that of the post. A 4-inch post, for instance, would require a hole with a diameter of about 12 inches. Moreover, it is best to make the bottom of the hole wider than at the top, this way a broader footing is created and the post's life span is lengthened.
When post holes drilling has been completed, place some gravel at the base of the holes to facilitate water drainage and prevent water accumulation around the posts. Now take the posts and place them in the holes while making sure they are even and straight. At this point, keep the posts secured in their place with a level and braces. Instead of using soil tamping, which would result in less stability, use quick-setting concrete to fill the hole around the post and make it strong. Put the dry mix around the post and then pour the desired amount of water according to the manufacturer's instructions. Then, wait for the concrete to firm up for about 24 to 48 hours before putting up panels or attaching rails.
In the case that you are conscientious about the execution of these steps, and you are very precise, then you would have formed an unyielding foundation for your fence that would not only be able to sustain the ravages of time but also weather conditions.
Attaching the Fence Panels
Once the posts have been driven into the ground and the concrete has set, the next procedure is to attach the fence panels. In the first place, confirm the distance between the posts is enough for the panels to place correctly. Different types of fencing materials such as wood, vinyl, and metal come along with different installation methods. The latest polling indicates that wood is still the king among the fence materials in the US, as it not only gives a classic look but also is cheaper, however, vinyl with its durability and low upkeep is giving strong competition and is coming close behind.
Do this to attach the panels:
Position the Panel – The very first panel needs to be set in between the two fence posts and aligned perfectly. It is a good idea to use a leveling tool to check the placement since even the smallest slope can take away the whole fence's aesthetic.
Secure the Panel – Use hardened screws or rustproof brackets for the purpose, particularly in places with damp or rainy climates. Proceed from the top of the fence panel to the bottom, attaching it tightly to the fence posts.
Keep Even Distances – Between the panels, a spacer can be placed or the same measuring method used, making the installation faster and granting a clean, uniform look as a result.
Stability Check – Push the panel lightly after securing it to see if it is stable and tightly secured. If it shifts, reposition.
For extra sturdiness, some contemporary setups propose horizontal support brackets or reinforcements especially for long panels which can bend over time. When dealing with the panels, be aware of local building regulations or homeowners’ association rules that could dictate specific materials, heights, or installation techniques.
Surveys reveal that around 70% of homeowners prefer fences that are easy to install and durable over a long period. This has consequently led to the emergence of the innovative modular fencing systems. These systems are usually supplied with pre-notched posts and panels which can easily be snapped or slid into place thus significantly reducing the installation time.
Fences that are both secure and aesthetically pleasing can be achieved by implementing these steps and opting for the best solutions that are designed for durability and user-friendliness.
Finishing Touches and Adjustments
Once the primary structure of your fence is securely set, it is time to start with the final touches that will not only the fence but also the fence's lifetime. Start with the wooden or composite panels and get rid of all the roughness and defects, the best way to do it is sanding. This not only makes the fence more attractive but also reduces the risk of splinters. If you apply a weatherproof stain or paint on the fence, its life will be extended considerably. Most professionals believe that a well-treated wooden fence, which is also stained or painted, may last up to 20 years or more depending on the level of maintenance and the type of surrounding.
Furthermore, the use of post caps is another way of protecting the posts from water damage and at the same time giving the fence a facelift. The latest market trends reveal that solar-powered post caps are gaining popularity among many due to their aesthetic appeal as well as their function of eco-lighting the yard. Moreover, the gate's hardware including hinges and latches should be checked for proper alignment and secure fastening. The new galvanized or stainless-steel hardware not only provides corrosion resistance but also supports heavier gates ensuring smooth operation for years.
Lastly, it is very important to be very careful and check that all the panels are at the same height, and seal any gaps between the fence and ground that might let pets out or allow wild animals in. If you have some climbing plants or very small decorative gravel at the base of the fence, the fence will appear as if it is a natural part of the surrounding and thus the overall look of your property will be improved.
Common Mistakes to Avoid When Installing a Fence
1. Neglecting Property Line Verification
Homeowners make the mistake of not accurately determining the property lines before they put up a fence. Sometimes it’s just a couple of inches over the neighbor's property, but this might escalate into costly lawsuits or, even worse, having to tear down and rebuild the fence. According to legal experts, boundary disputes are one of the top causes of property conflicts in the USA. Always check your property’s survey map or invite a surveyor to be sure about the lines.
2. Skimping on Post Installation
Posts are the backbone of a fence, and if they are not properly installed, the whole structure will be unstable. One of the most common mistakes is to place the posts not deep enough into the ground or to pour too little concrete around them. Industry insiders reveal that the minimum depth below ground level for proper post longevity is one-third of their total length; this is especially true in places with strong winds or high soil movement.
3. Ignoring Local Regulations and Permits
Homeowners often do not realize how important it is to get the necessary permits or obey the local zoning laws. Most places require permits for fences above a certain height, like the six-foot height for privacy fences. Erecting a fence in violation of local rules could lead to penalties or having to take down the fence. That is why it is a good practice to talk with your local municipality before you make any plans.
4. Choosing the Wrong Materials for Your Climate
The perfect fence in one area might not even last in another. Take wood, for instance, it can easily warp or become rotten in a high-moisture place, while metal can be the cause of premature rust in the coastal zones. Lately, the reports say that vinyl fencing has become the most preferred option as it can withstand the toughest of climates with sales going up by more than 5% every year.
5. Failing to Consider the Fence’s Purpose
Another error is not to set the proper fence based on its purpose. A chain-link fence for a pet might work, but it wouldn't give the necessary privacy for a retreat in the garden. Demand for privacy fences in suburban areas has increased by nearly 20% due to the need for isolation, according to statistics.
6. Not Accounting for Slope and Drainage
Even ground is easy, but uneven ground slopes or part of a lot can cause troubles during installation of the fence. Not considering these factors could cause gaps at the bottom or the fence not being straight. Plus, not factoring in drainage might cause water to gather around the posts, hence, decay will set in faster. Such issues can be solved by proper grading and sealing techniques.
7. Overlooking Maintenance Needs
Homeowners, sometimes, select gorgeous wooden fences but do not recognize the constant maintenance that they will require. A wood fence always must be regularly stained or painted to prevent decaying and weathering. However, if a homeowner does not want high-maintenance solutions, then vinyl or aluminum might be the appropriate option. Maintenance studies reveal that wood is at least 40% more expensive to maintain than vinyl during a 10-year period.
All these errors can be prevented and with proper planning, your fence will not only serve its current purpose but also last a long time. It is time-and-money saving, and helps build a boundary that is both practical and beautiful for your property.
Neglecting Local Building Codes
Undoubtedly, the most common and costly mistake committed by people who put up fences is not checking local building codes and regulations and not adhering to them. Usually, every city or county has its own regulations for fence construction which stipulate limits on the height, setback distances, and the materials allowed. For example, a maximum fence height of 6 feet may be specified in certain places for residential areas or there may even be a minimum sidewalk distance and property line requirement for fences. Fines, forced alterations, or even complete removal of the fence can be the consequences of not complying with such regulations, thereby incurring costs and causing displeasure.
The survey that was conducted recently revealed that nearly 30% of the respondents claimed that their fence installation had been put on hold due to not adhering to local codes. In addition to this, permits are usually a prerequisite for starting the building process and failure to secure them can lead to penalties ranging from $100 to $5,000, depending on the location. In order to avoid such situations, it is recommended to always contact the local building office or visit its website for detailed guidance before commencing any project. Although it may take some time to ensure that everything is in place, it will prevent you from facing legal troubles and the installation will go on without hiccups.
Improper Measuring and Marking
Among the most frequent errors in the construction or installation process are improper measuring and marking, which can lead to costly mistakes. One of the main factors that contribute to avoiding this issue is proper sizing; that is, the material has to fit and comply with the design and be of the right size. A 2023 report by the Construction Specifications Institute indicated that almost 25% of all project delays and rework are attributed to measurement mistakes made at the very early stages of the construction process.
Typically, the main reasons for measuring errors are using the wrong tools, insufficient time for the job, and poor comprehension of the plans and specifications. For instance, in multi-layered installations, using a traditional tape measure instead of a laser measuring tool can result in mistakes ranging from one millimeter to several inches—enough to create a problem in terms of either structure or function. Moreover, neglecting to recheck measures or not marking materials appropriately can lead to installations that are off or the need for further material cutting, thus causing time and resource wastage.
One of the best practices to eliminate these problems is the "measure twice, cut once" principle. The use of technology is another way to reduce errors; the market for digital measuring tools and apps offers nothing but accurate figures today. And it is great to know that if you apply such methods for labeling and marking as chalk lines or UV-resistant ink markers, the measurements will be visible even after the project is completed. The same time that is consumed in accurate measuring and marking will not only lead to better results but will also save on materials costing up to 15%, as per industry data.
Forgetting to Account for Property Lines
At the start of our project planning, we overlooked the need to check the property lines thoroughly and this caused our neighbors to get involved because our work had slightly crossed over their land. It was a hard-earned lesson that one should always depend on property surveys or professional assessments before any project kicks off. It might take you a while to confirm the borders but the result will be that there will be no cross claims and everyone will have a nice project run.
Frequently Asked Questions (FAQ)
How to install a new fence: what is the best way to install posts and post holes?
The installation of a fence is a precise activity and getting the posts right is the first step. Take the post spacing measurement from the center of one post to the center of the next; use either a post hole digger or an auger to excavate the ground to the advised depth (the common depth for residential fences is usually 2 feet, while the depth for very high poles is 8 feet), then provide 4 inches of gravel at the bottom of the hole for drainage, and finally, place the wooden or plastic posts vertically by means of a level tool. After that, support them with braces and pour the mix of concrete or use dry concrete according to the manufacturer's guidelines. Pack down the backfill and let the concrete set before putting up the fence or attaching mounting hardware directly to the posts.
Picket fence: what spacing and picket placement should I use?
In the case of a picket fence, typical picket spacing is 2 to 4 inches between pickets, depending on the level of privacy that is intended. Measure the distance between the posts from the center to the center (post spacing) and cut the pickets to the required length. Use fence sections that fit between the posts and attach the pickets to the horizontal rails; make sure that the posts in the concrete are straight and that the posts are positioned correctly so the pickets are in line and the top is even at the ground level over sloped yards.
Type of fence: which fence type should I choose for privacy and rot resistance?
In case of privacy fence concerns, select high solid wood privacy fence, etc. as a general option cedar (naturally rot-resistant) or PVC forlow maintenance. Chain link fence is an economical choice but it does not provide privacy unless the addition of slats is done. Take rot into consideration by going for pressure-treated wooden posts or cedar and planting them in concrete with gravel at the bottom to ensure that the wood is not in contact with the soil and thereby reducing rotting.
Way to install a chain link fence: how do I set many fence posts and gate posts?
The process of fence installation for chain link involves: measuring from post to post according to the spacing plan, making holes through the earth with an auger or digging them manually down to the stipulated depth (usually 2 to 3 feet deep depending on the frost line), pouring concrete mix to set the posts, waiting for the concrete to harden, then fastening line posts to terminal posts with brackets and appropriate hardware. For the gate posts, use a wider post, sink it deeper, and support it while the concrete sets; afterward, fix the gate hinges and attach the gate using the right hardware.
Picket installation: how deep should I dig the hole and how do I brace posts?
When digging a hole for a post, you should dig it at least one-third the length of the post with a minimum of 2 feet depth. Deeper holes might be necessary for 8 feet high posts. Starting with a post hole digger or an auger, you would first place about 4 inches of gravel at the bottom of the hole, and then position the post while checking its plumb with a level, next, you are going to put in temporary supports that will hold it during pouring of concrete. It is better to wait until the concrete has cured completely before removing the braces and attaching the fence sections because this will ensure that the post has been set correctly and will not move.
Type of fence: can I install a fence around slopes and still keep fence sections level?
You can either step the fence sections or rack the rails as two different methods to install a fence around slopes. For stepped sections, all you have to do is measure and set each post at ground level and plumb while keeping the same spacing between the posts on-center. Where longer posts are needed, do not hesitate to use them and keep checking the height and plumb of each post so that the pickets or panels are in line; backfill, tamp, and let the concrete set so the posts are firmly anchored in the ground that is not even.
Way to install gate posts: how do I place a post for a gate and attach the gate?
When placing a post for a gate, dig a deeper hole, use a larger post or add concrete footings, and set it with braces while its plumb. The gate must be hinged with heavy-duty hinges and brackets made of hardware that is directly attached to the posts. You need to concrete both the posts on the hinge side and the latch side; also, let the concrete cure before hanging the gate so the gate won't get misaligned and the hinge won't wear out by developing sag over time.
Picket tips: when should I get a permit, and can I buy materials from Home Depot or Lowe's for a DIY install?
Building permit requirements vary from one place to another, that's why it is best to inquire from the local authority before you put up a new fence—most city council areas require a building permit for any changes in height or location of fences. Home Depot and Lowe's are among the home improvement stores that carry fencing supplies such as wood posts, concrete mix, post hole diggers, gravel, brackets, and hardware. You can also get a long-lasting rot and maintenance-free fence if you buy cedar or PVC materials; however, always ensure that you have correctly measured the length of the post, the distance between the posts, and followed local rules on setbacks and gate placement before you commence digging.
Recently Posted
-
Building a Security Fence: Your Guide to High-Security Solutions
February 5, 2026The security fence functions as the primary defense system of your commercial property, industrial site, and private estate becaus Read More
 -
How to Build a Security Fence: A Comprehensive Guide to Installing Chain Link Security Fences
February 4, 2026Constructing a security fence is an effective way to protect your property, define its boundaries, and enhance your privacy. The v Read More
 -
Iron Yard Fence: The Ultimate Guide to Wrought Iron Fencing for Your Garden
February 3, 2026The design of a garden fence goes beyond establishing property borders because it serves two main purposes by enhancing the visual Read More
 -
Cast Iron Garden Fence: The Ultimate Guide to Durable and Decorative Garden Edging
February 2, 2026The cast iron garden fence functions as a boundary that creates an everlasting combination of practical use and aesthetic beauty t Read More

Contact Us
Recommended Products
-
 Durable Imitation Bamboo Fence for High-Traffic Public SpacesNegotiableMOQ: 50 Square Meters
 -
Customizable Imitation Bamboo Fence With On-Site Measurement ServiceNegotiableMOQ: 50 Square Meters
-
Modular Imitation Bamboo Fence Panels for Quick InstallationNegotiableMOQ: 50 Square Meters
-
Imitation Bamboo Privacy Fence With Reinforced Aluminum BaseNegotiableMOQ: 50 Square Meters
-
Commercial Grade Villa Fence for Real Estate Developments and Hotel Perimeter ApplicationsNegotiableMOQ: 10 Sets

-
Industrial Steel Grating Solutions for Oil and Gas Platforms, Compatible With Harsh ConditionsNegotiableMOQ: 10 Pieces
-
Basketball Court Fence 4M Height, Galvanized Steel Chain Link Mesh for Outdoor Sports Field PerimeterNegotiableMOQ: 50 Square Meters
-
Chain Link Basketball Court Fence Offering Anti-Rust Protection and Long-Term PerformanceNegotiableMOQ: 50 Square Meters
-
European Style Villa Fence Concrete Base Installation Courtyard Boundary WallNegotiableMOQ: 100 Square Meters
-
Galvanized Steel Villa Fence With Powder Coating for Superior Corrosion ResistanceNegotiableMOQ: 100 Square Meters
-
Powder-Coated Basketball Court Fencing With Weatherproof Finish for Long-Term Outdoor ApplicationNegotiableMOQ: 100 Square Meters
-
Powder Coated Wrought Iron Main Gate and Garden Fence for HousesNegotiableMOQ: 100 Square Meters
-
Elevate Your Garden With an Artistic Wrought Iron Garden Fence | Uniting Security & EleganceNegotiableMOQ: 100 Square Meters
-
Low-Maintenance Wrought Iron Garden Fence | Durable Powder-Coated Steel PicketsNegotiableMOQ: 100 Square Meters
-
Heavy-Duty Villa Fence: 10 Gauge Steel Construction With Powder Coating for DurabilityNegotiableMOQ: 10 Sets

-
Anti-Slip Steel Grating Panels for Enhanced Safety in Wet and Slippery Work AreasNegotiableMOQ: 10 Pieces
-
Steel Grating for Stair Treads and Catwalks in Commercial and Factory BuildingsNegotiableMOQ: 10 Pieces
-
High-Security Villa Fence With Lockable Gates and Weather-Resistant Finish for Home ProtectionNegotiableMOQ: 10 Sets
-
Galvanized Steel Basketball Enclosure Netting / Ball Containment System With Frame for Outdoor CourtsNegotiableMOQ: 50 Square Meters
-
Vinyl Coated Chain Link Fencing for Basketball, Pickleball & Tennis CourtsNegotiableMOQ: 500 Square Meters