
Installing Fence: A Comprehensive Guide to Building a Fence in 8 Easy Steps
Building a fence can be seen as a tough task, however, if you use the proper approach and technique it will turn out to be a fun and a simple project. Your plans whether they are to add to the beauty of your house, create a hidden paradise in your yard or simply improve the security a fence is an answer that works and also gives a nice look at the same time. The guide will lead you through the entire process with clear instructions and helpful hints that will make your project a winner. Up until the last post is firmly set, this blog will impart to you the know-how to build a strong and long-lasting fence with confidence. Get ready to change your house's look and learn how to complete this DIY project in only 8 simple steps!
Introduction to Fence Installation
A fence installation can offer to your property the pluses of privacy, security, and nicer appearance. Besides, it is a procedure that involves the selection of the right materials, accurate measuring of the area, and a well defined stage-wise process. To achieve the best outcome, always pick the high quality materials that are most appropriate for your needs and at the same time keep in touch with the local laws regarding fence height and positioning. With the proper planning and guidance, a fence installation can be turned into an easy and gratifying DIY project.
The Importance of Installing a Fence
The fence installation is a classic that brings both beauty and functionality to the property. It is a multi-faceted investment and here are the five main points that will make you lean towards having a fence:
Increased Privacy
Privacy is a major reason many people install fences. When you have a fence around your house, you will not only have the chance to use your outdoor space without any interference, but also will have a complete privacy barrier in place. It totally blocks those peeping Toms and that is why it is a great solution for families or singletons who want to have some private space for themselves.
Greater Security
A strong fence can be physically impossible for the intruders to cross and, at the same time, it can be a clear indication of where your property line is. This security measure is proactive and, not only that, it also makes your home and possessions safer with discouragement of burglary or an attraction repellent for stray pets.
Safe Environments for Kids and Pets
If you have young children or pets, a fence will help keep the playground free of external hazards and unwanted visitors. It shuts off their escape routes and thus the chances of accidents are reduced, more so in areas where there are cars moving around.
Reduction of Noise
A fence can be very effective if it is done properly with the right kind of materials and can serve the purpose of being a sound barrier between your property and the noise. Besides, it gives you and others a quiet atmosphere away from that noise source, especially if the noise is coming from the street or the town close to people’s houses.
Decorative Function and Property Value
In some ways, fencing is a decorative feature and even if you construct it for practical purposes the outcome would be an area that has a property with value increasing depending on how good you are with it. Besides, it can boost your house’s value by attracting buyers through clearly defined boundaries and gardening done with care.
Thus, a fence, while being practical, greatly adds to the pleasure and thus to the value of the property.
Benefits of Different Fence Types
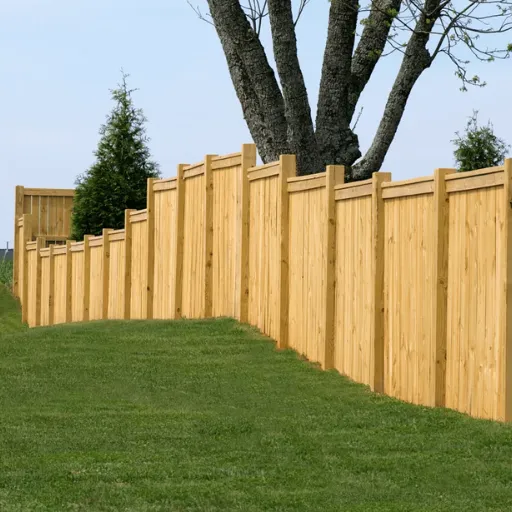
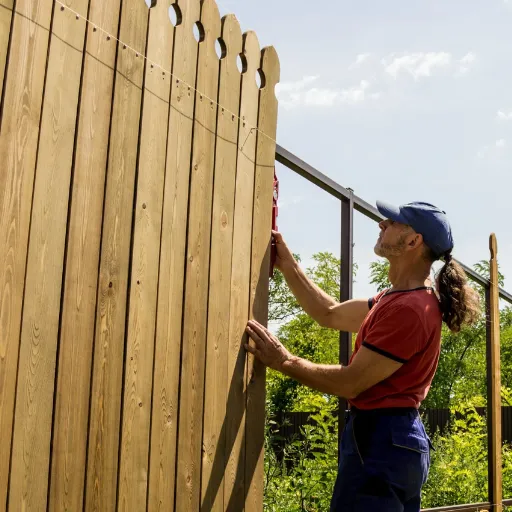
Wood Fences
Wooden fences have formed the most common and most favorite choice for the homeowners for natural beauty and functionality. These fences along with good privacy can easily be stained or painted thus matching with the color scheme of your house, and hence making them more beautiful. Moreover, wood is a green material as it can be harvested through eco-friendly methods.
Vinyl Fences
Vinyl fences have a few drawbacks and at the same time they are cost-effective and very durable thus making them a good investment for the long term. They are highly resistant to decay, bugs and even the most severe weather conditions. These fences come in a wide variety of colors and styles that can be tailored to your property and the neighborhood.
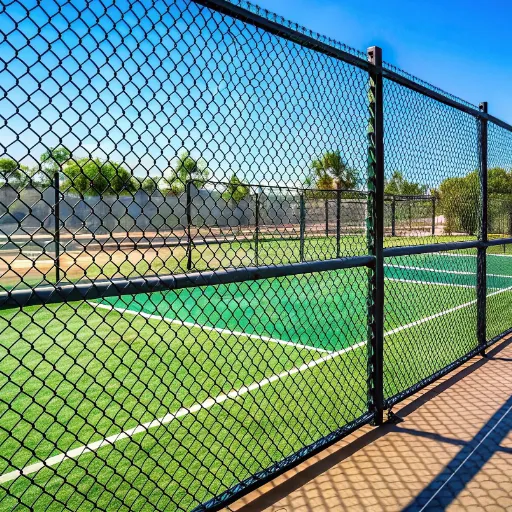
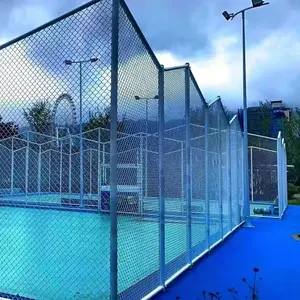
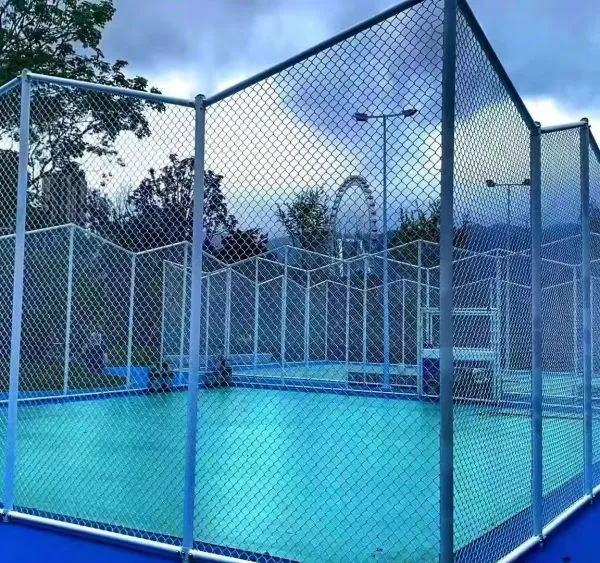
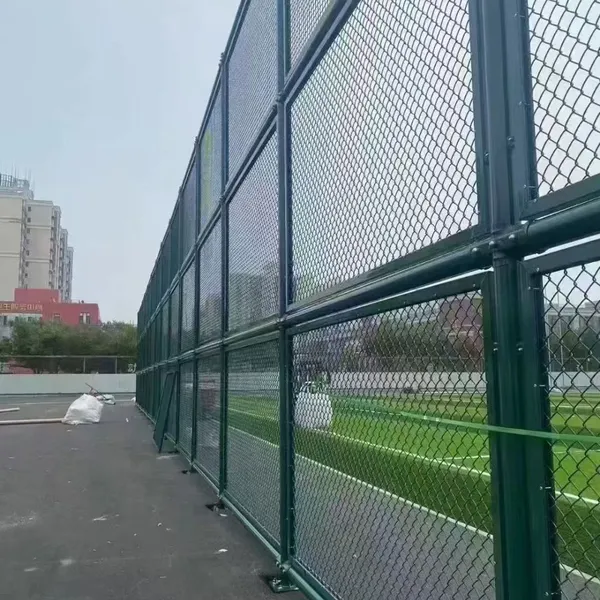
Chain-Link Fences
Chain-link fences are very budget-friendly alternatives which are ideal for enclosing large areas such as a house garden or commercial properties. Although chain-link does not provide visibility through the fence, it remains a strong barrier, requires minimal maintenance, and can be enhanced by adding slats or plants to create a privacy screen.
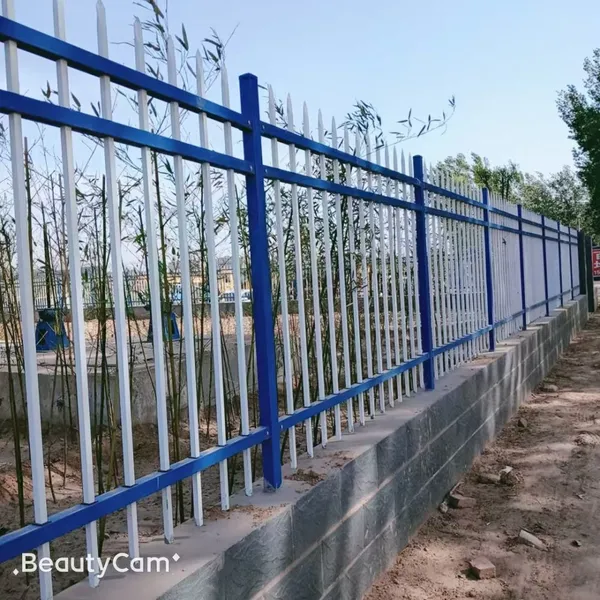
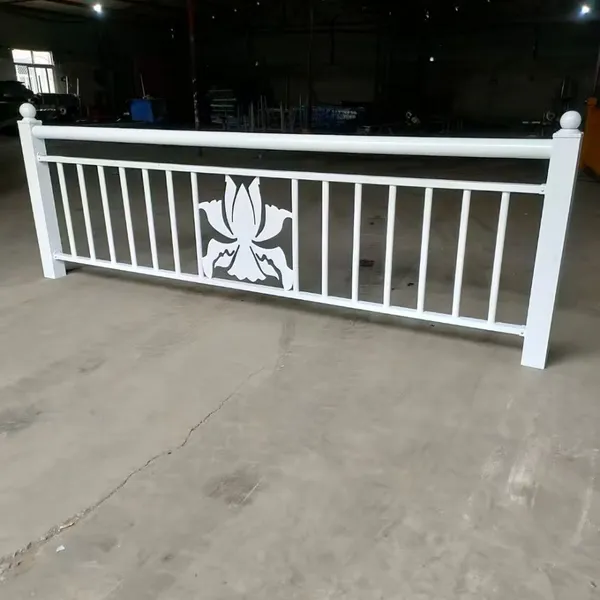
Metal Fences (Aluminum or Wrought Iron)
Metal fences provide not only a refinement and a chic look but also the property’s curb appeal. The wrought iron material gives a touch of beautiful old-world charm while the aluminum fence is the total opposite being lightweight and rust-resistant. However, both types are strong and can be beautified with decorative elements.
Composite Fences
Composite fences consist of the unattractive part of wood and plastic along with the beautiful and nature-friendly feature of both. They are a material that no insect can eat, nor can weather or rot degrade them. The initial price of these fences may frighten you but they will take revenge with a long lifespan and low maintenance, thus, costing you less over time.
Choosing the right type of fence for your needs, you can get a combination of the functionality, durability, and style that will match your property perfectly.
Overview of the Installation Process
The steps involved in constructing a fence are numerous and will give the fence a professional finish, enhancing durability and stability. Below is a precise and thorough guide to the whole process:
Planning and Permits:
To start with, first you must determine the purpose of the fence, like security, privacy or beauty. Online tools and apps can pinpoint the exact property line and ensure compliance with local codes and regulations. According to Google, a number of municipalities require the issuance of a permit before the construction of the fence, hence it is wise to consult with the local zoning office first to escape paying fines or having the fence removed.
Measuring and Marking:
Measure your yard and create a layout based on those dimensions. Corner posts and gate locations are to be indicated with stakes and string. A common approach is to have the fence posts between 6 and 8 feet apart, this depends on the material and style. Utilize modern technology like laser distance finders, which are now commonly available, and confirm that the borders are what your property is supposed to be.
Digging Post Holes:
The fence's stability will depend on the depth of the post holes. Generally, post holes should be one-third of the fence height deep (e.g., a 6-foot fence requires 2-foot-deep holes). Power augers are recommended for precision and ease, particularly for large projects.
Setting Fence Posts:
Concrete will be used to anchor each post for maximum durability. Carefully follow the manufacturer's guidelines to mix quick-setting concrete, then pour it into the hole while ensuring the post is level. To reduce time, it has become common to use pre-mixed concrete bags. Allow it to set for 24 to 48 hours.
Attaching Rails and Panels:
Use screws or galvanized nails to attach horizontal rails to the already stable and correctly aligned posts. After that, the fence panels or pickets will be attached to the rails. To ensure proper spacing, experts often recommend using templates or spacers to maintain even picket gaps, which is especially critical for wooden or composite fences.
Installing Gates:
Gates installation will be done with a service consisting of attaching hinges to the right post and fastening them with heavy-duty screws. A properly aligned gate will be able to operate smoothly and will have a longer lifespan. The anti-sagging characteristic is associated with widely used gate hinges and brackets, its operation improving with time.
Finishing Touches:
Treatment, staining or painting should be done on wooden fences especially for adding protection. Experts claim that regular sealing maintenance can extend the life of the fence by up to 50%.
Cost and Efficiency Insights:
Recent studies indicate that the average cost of fence installation ranges from $1,500 to $4,500. The price range varies with materials, labor, and project size; vinyl and composite are initially more expensive but have lower maintenance costs over the years. A professional installer would be able to finish a standard project in 1 to 3 days and a DIY job may take longer depending on the skill level and the tools available.
The above installation process is an excellent way to provide a successful, durable fence tailored to your specifications and preferences.
Choosing the Right Type of Fence
When selecting the right fence for your land, there are multiple factors to consider, amongst which is its intended use, its style, longevity, and your budget. Here is a comprehensive overview of the various fencing materials according to their most vital features based on the latest research:
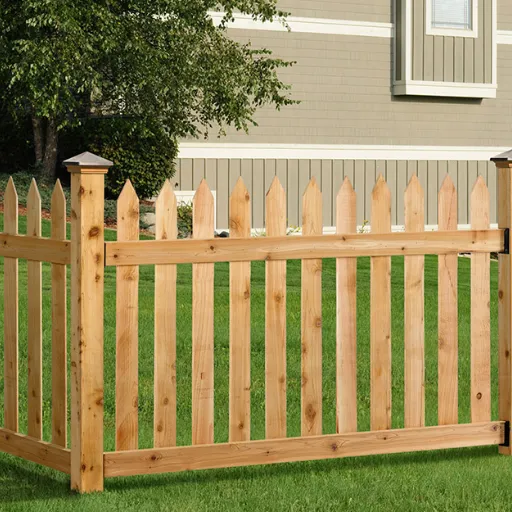
Wood Fences
Wood remains the top choice among consumers for its aesthetic appeal and versatility. It can be prepared in multiple designs such as picket, lattice, or solid privacy. However, wood requires high maintenance, and this includes staining or painting to prevent rotting or hopping by insects. The average pricing for wood fencing is around $17 to $45 per foot, where the cost is influenced by the type of wood among which are pine, cedar, and redwood.
Vinyl Fences
The toughest and least-maintenance-required material turned out to be the summer hit among the fencing options vinyl. The weather does not affect vinyl at all, consequently, the fence does not need painting and cleaning is also easy. The initial cost of a vinyl fence is not cheap, approximately $25-$70 per linear foot; however, it is viewed as a cost-efficient option in the long run, thanks to the little upkeep it requires.
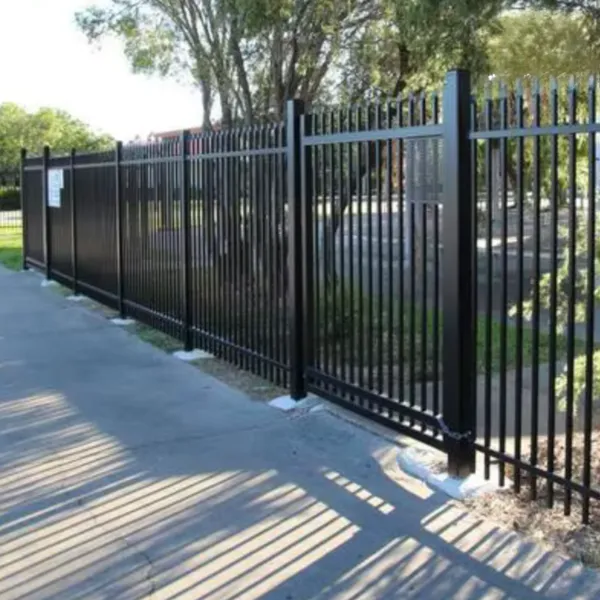
Aluminum Fences
Aluminum is a fence material that has a sleek and contemporary look besides being incredibly rust-resistant, which is perfect for very wet areas or those by the ocean. Although it is not as durable as steel or wrought iron, it costs $20-$50 per linear foot and is a low-maintenance solution suitable for most homeowners.
Chain Link Fences
Chain link is an option that combines economy and utility, with the primary goal of securing the property lines. Chain links cost about $10 to $20 per foot and the installation is not difficult. Although the fences appear functional, their visual appeal may not appeal to everyone.
Composite Fences
Composite fencing combines the beauty of wood with the durability of synthetic materials. The fusion of wood and plastic results in composites that are very tough and almost no maintenance is needed. Their price is quite high (ranging from $30 to $50 per foot), but the advantage of recycling the material used makes them a preferred choice for the environmentally conscious consumers.
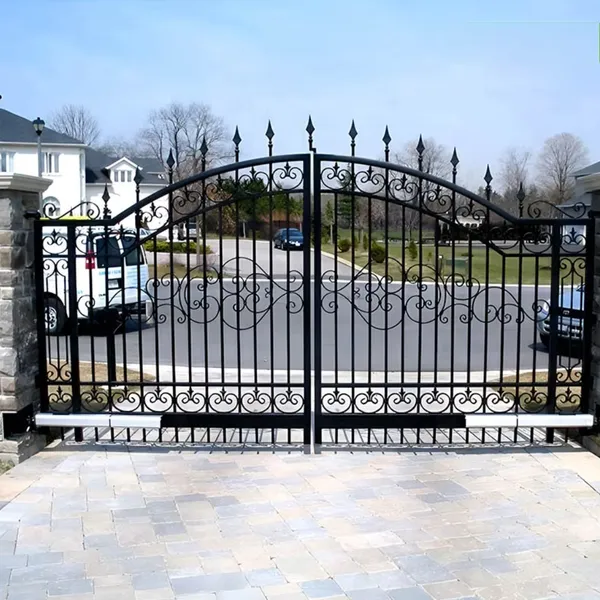
Wrought Iron Fences
Wrought iron fences are well-known for their intricate designs and long-lasting aesthetic appeal, which, on the one hand, provide a very strong fence while, on the other, require continuous maintenance such as rustproofing. Depending on the function and location on the property, prices typically range from $30 to $100 per linear foot and typically cover decor or security installation.
While you decide which fence type will work best for your property, consider the weather conditions, how you plan to use it, maintenance levels you can cope with, and your aesthetics preferences. Also, take a look at the local regulations or the homeowner's association (HOA) restrictions on the height, style and material of the fence. Properly chosen property boundaries beautify the house but, even more importantly, constitute security and functional barriers tailored to your needs.
Exploring Different Fence Materials
When selecting the best fence material for your property, it is very important to weigh the pros and cons of all the alternatives. Depending on your priority concern among aesthetics, durability, cost, or maintenance, each material will have its own distinguishing characteristics that can make it one of the best choices. Below are the most often used materials for fencing along with their attributes and current trends:
1. Wood Fencing
Popularity: The traditional wood fencing is still a favorite because of its beauty, practicality, and near universal adaptability to different properties and gardens.
Wood Types:
Cedar: Naturally resistant to rotting and bugs.
Pine: The most commonly used because it’s inexpensive.
Redwood: The ultimate choice for luxury with a long lifespan.
Lifespan: 15-20 years is the range if appropriately maintained.
Cost: The price per linear foot ranges from $12 to $20.
Maintenance: It requires staining/painting every few years to protect against natural damage.
2. Vinyl Fencing
Popularity: Unlike wood, vinyl fencing is gaining traction for its long lifespan and minimal maintenance.
Features:
Strong, weatherproof and will not change in shape or break easily.
Available in many different designs and colors.
Lifespan: 20-30 years with hardly any maintenance.
Cost: Around $25 to $50 per linear foot.
Maintenance: Cleaning with soap and water occasionally is all that is needed to keep it looking good—no need for staining or painting.
3. Metal Fencing (Aluminum, Steel and Wrought Iron)
Popularity: The appeal lies not only in their longevity but also in the modern, stylish look these materials offer.
Types and Features:
Aluminum: Easily worked, rust-resistant, and mainly used for decorative fences.
Steel: Tough and strong hence very suitable for security.
Wrought Iron: Beautiful and classical but more demanding in terms of maintenance for rust prevention.
Lifespan:
Aluminum and steel fences: 30 to 50 years.
Wrought iron fences can be even longer-lasting than the materials mentioned above, provided proper care is given.
Cost:
Aluminum: $20 to $40 per linear foot.
Steel and wrought iron: $30 to $80 per linear foot.
Maintenance:
Aluminum requires no maintenance at all.
Steel and wrought iron may need to have rust-proof treatments applied from time to time.
4. Composite Fencing
Popularity: A green solution that consists of recycled wood and plastic.
Features:
Displays the natural beauty of wood while being as solid as vinyl.
No warping, decay or insect attacks.
Lifespan: 25-30 years or longer.
Cost: The standard price is around $25 to $50 per linear foot.
Maintenance: Very low, only occasional washing is necessary.
5. Chain-Link Fencing
Popularity:
One of the most typical fencing types that is mainly used for practical reasons, such as securing private gardens, business areas or children in playgrounds.
These are not very attractive but they are very effective barriers.
Features:
Very cheap product that can last for a long time with minimum care.
Vinyl coating is available for aesthetic and rust prevention purposes.
Lifespan: 15-20 years depending on the coating quality.
Cost: around $10 to $20 per linear foot.
Maintenance: minimal but rust may happen without coating after some time.
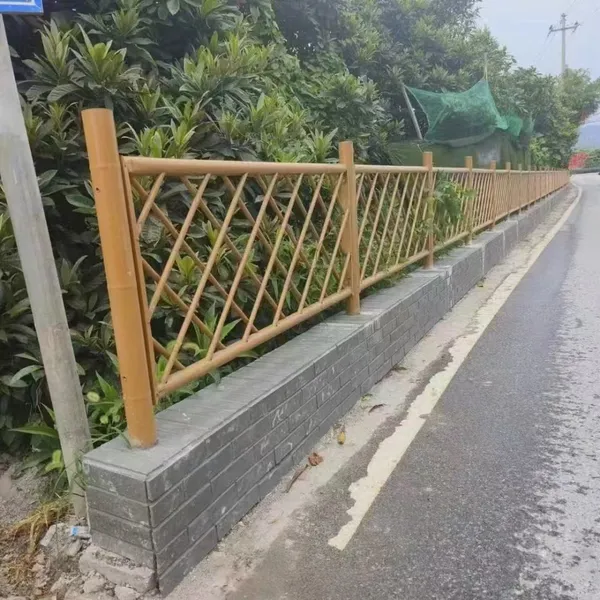
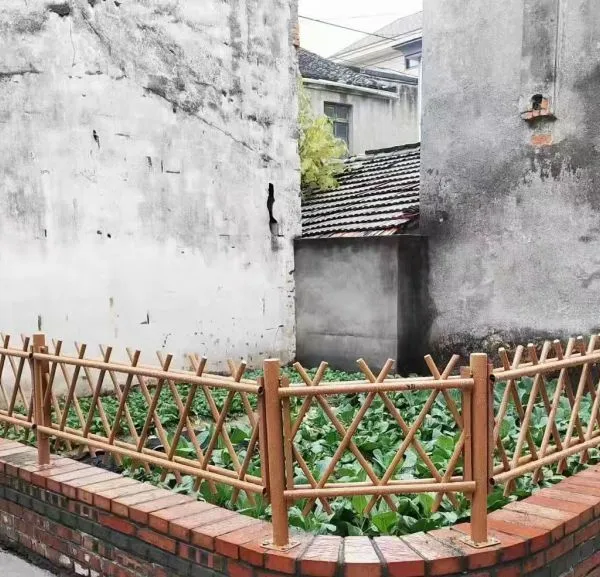
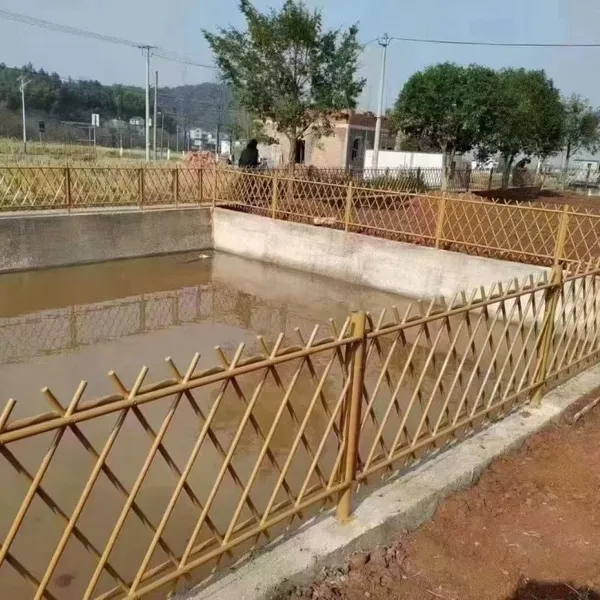
6. Bamboo Fencing
Popularity:
Increasingly popular among those looking for an eco-friendly and natural-finished product.
Features:
A sustainable and light-weight material.
Can be used for privacy or ornamental fences.
Lifespan: 10-15 years with exposure to regular treatments against termites and decay.
Cost: $10 to $30 per linear foot is usual.
Maintenance:
Regular sealing or treatment is required for the longest life.
Comparison by Longevity and Cost:
Material | Average Lifespan | Cost (Per Linear Foot) |
|---|---|---|
Wood | 15-20 years | $12 - $20 |
Vinyl | 20-30 years | $25 - $50 |
Aluminum | 30-50 years | $20 - $40 |
Steel/Wrought Iron | 30-50 years | $30 - $80 |
Composite | 25-30+ years | $25 - $50 |
Chain-Link | 15-20 years | $10 - $20 |
Bamboo | 10-15 years | $10 - $30 |
Knowing the key properties of each material will help you make an informed, cost-effective selection that aligns with your budget, design, and practical needs. The 2023 fence trends emphasize the characteristics of long-lasting, eco-friendly, and easy-care materials that are encouraging vinyl, composite, and bamboo to be the most preferred option for consumers. It is advisable to consult experts and then ask local merchants which materials are best suited to your specific weather and project requirements.
Wood Fence vs. Chain Link: Pros and Cons
Parameter | Wood Fence | Chain Link Fence |
|---|---|---|
Cost | $6,500–$10,000 (higher upfront cost) | $3,000–$5,200 (budget-friendly) |
Installation | Time-consuming, labor-intensive | Quick and easier installation |
Maintenance | Regular staining, sealing, repairs needed | Minimal maintenance, occasional cleaning |
Durability | 15–20 years with maintenance | 20–30 years, highly durable |
Privacy | High privacy with solid panels | Low privacy, slats can be added |
Aesthetics | Natural, customizable, classic look | Utilitarian, limited design options |
Security | Solid barrier, harder to climb | Durable, can add barbed wire for security |
Light | Blocks light completely | Allows light through |
Environmental Impact | Renewable but treated wood may harm environment | Recyclable but energy-intensive production |
Common Uses | Residential privacy, aesthetic appeal | Large areas, pet containment, security |
How to Choose Based on Property Line and Slope
Fencing the right area of your property and taking care of a slope at the same time involve a succession of factors that must be attended to in detail to ensure the fence is practical, aesthetically pleasing and in compliance with local permissions. In case you make a wrong decision, you will have lost your money and time, thus, the following is a guide to help in making the right decision:
Determining Property Lines
It is essential to accurately determine your property boundaries before building a fence. Erecting a fence over the property lines could lead to neighborly disputes, therefore, you should either refer to your property survey or have a surveyor mark the lines correctly. A recent estimation suggests that hiring a surveyor costs around $400 to $700, however, it is a worthwhile investment to be on the safe side and not to engage in legal disputes later on. Additionally, ensure your planned fence complies with local zoning laws and setback requirements.
Handling the Sloping Land
If the property has minor differences in elevation or is quite steep, it will be necessary to have a special fence designed that will be efficient and also good looking. The two fencing methods that are commonly applied are:
Racking
Racking involves arranging the panels to follow the slope of the hill. This method is suitable for gentle slopes as it provides no gaps at the bottom. Racked fences can be of vinyl or aluminum as both of these materials can be easily molded for the desired design.
Stepped Fencing
For steep slopes, it is recommended to go with stepped fencing. The configuration consists of a staircase-like placing of the panels which gives a uniform height. Timber and chain-link fencing are the most popular options for stepped designs due to their adaptability and cost-effectiveness.
Material Considerations
The terrain type and the financial plan determine the selection of fencing materials. For example:
Chain Link: Costs less and even the installation on a slope is not complicated.
Vinyl or Composite: Provides the longest-lasting option with the least maintenance.
Bamboo: The low carbon foot print and nice-looking wood make it a choice others are not going for, but it is not a slope climber.
Wood: A beautiful and versatile material that can be used for step-style installation on steep inclines but needs more maintenance than other materials.
Drainage and Erosion Control
Flooding control is the primary concern when installing fences on slopes. Mistakes in the drainage process can cause soil erosion and make the fence unreliable over time. Provide drainage options like gravel or French drains at the fence line to prolong the fence’s lifetime.
By thoroughly checking your property line and resolving the slope-related problems you can get a fence that is long-lasting, attractive, and legally compliant as well, all tailored to your land's needs. It is always wise to consult a local fence expert who can assess your specific situation and provide the best recommendation to achieve your desired results.
Tools and Materials Needed for Fence Installation
To guarantee fence installation the right way, first of all the proper tools and materials will be required to make it strong, functional and aesthetically pleasing. Below is the detailed list, along with the latest best practices and suggestions:
Tools:
Post Hole Digger or Auger – This machine digs deep, uniform holes for fence posts. Most often digging of 2-3 feet deep holes is required depending on frost lines and soil class for residential fences.
Measuring Tape – It is for the very precise measuring of post spacings which is generally 6 to 8 feet apart.
Level – This instrument ensures the posts and panels are perfectly vertical. This is important for both the structure and the artistic aspect of the fence.
Hammer and Nails or Nail Gun – These are the tools used to attach fencing panels or pickets.
Power Drill – This tool makes the process of fastening screws or hardware faster.
Circular Saw or Hand Saw – They are employed to cut down wood or composite fencing materials to the desired length.
String Line and Stakes – This tool helps visualize fence location and keeps it straight during construction.
Shovel – This tool is utilized to clean up the site, modify earthworks and backfill around the posts.
Concrete Mixer (Optional) – This is for large jobs where post stabilization entails a lot of mixing.
Protective Gear – Gloves, safety glasses, and heavy-duty boots are among the safety equipment that belongs to this category that provides the most basic safety at a job site.
Materials:
Fence Posts – These posts, usually made from wood, steel, or composite materials, support the structure of the fence. The usual size of posts is 4x4 inches (wood) to 2-inch diameter (metal).
Fence Panels or Pickets – These can vary by fence type (e.g., wood, vinyl, chain link). For wooden fences, cedar and pressure-treated pine are the varieties most commonly used.
Concrete Mix – It is used to set fence posts in the ground, making them sturdier. A 50-pound bag of fast-setting concrete will generally be enough for one post.
Gravel – It acts as a base layer in the post hole, supporting the drainage system and making sure there's no water at the bottom of the hole, thus extending the life of the fence.
Screws, Nails, or Fasteners – It is recommended to use corrosion-resistant fasteners such as galvanized or stainless steel for long-lasting attachment.
Post Caps – They prevent the tops of wooden posts from decaying due to rain and they come in either ornamentation or functionality.
Gates and Hinges – They provide entrances through the fence, ensuring ease of access.
Weatherproof Coating or Stain – Applying a protective coating or stain significantly extends the service life and weather resistance of wooden fences.
Chain-Link Ties or Tension Bands (For Chain-Link Fencing) – They help to maintain the strong connection between the chain-link material, the posts, and the rails.
Additional Insights:
Sources of home improvement say that if the posts are correctly secured in concrete, the fence life can be extended by 20-30%.
Use of vinyl fencing materials is increasing because they require very little maintenance and are estimated to have a 30-year lifespan.
The total cost of fence installation tools and materials typically ranges between $15 - $60 per linear foot depending on the chosen material.
With the right tools and materials, and careful planning and execution, the fence installation can be so professional that it meets your needs and lasts for decades to come.
Essential Tools for Building a Fence
The process of constructing a fence requires the utilization of basic hand tools plus professional tools and the right materials with the final result being a fence that is both durable and professional-looking. To provide you with the necessary tools and their functions, a complete list of necessary tools is provided below to make the process easier:
Post Hole Digger or Auger
The tool is meant to dig the holes for securely placing the posts in the ground. A manual post hole digger costs about $30 to $60, while a powered auger may cost from $150 to $600 depending on the size and the brand.
A hole that is dug to a depth of 2-3 feet is recommended to ensure stability.
Measuring Tape
Post spacing and evenness rely on precise measurements. If the project is large, a measuring tape of at least 100 feet long would be most suitable. The cost is generally between $10 and $30.
Level
A level is a helpful tool to make sure that not only the posts but also the horizontal boards are completely straight and lined up. They can consist of different kinds like bubble and laser levels with prices varying from $15 to $200.
String Line and Stakes
These tools are used for creating straight lines and consistent spacing along the fence line. String lines are inexpensive, costing around $10; however, they play a key role in achieving correct alignment.
Saw (Hand Saw or Circular Saw)
The cutting of the fence panels, posts, and boards to the right dimensions is done easily through this tool. The price for a standard hand saw is $15-$45 or circular saws can be purchased from $75-$300 of premium brands.
Hammer or Nail Gun
A hammer is required for manual nailing, though a nail gun speeds up the process and ensures consistent results. The price range for nail guns is $100-$400 depending on their size and features.
Power Drill and Drill Bits
Drilling is needed for both pilot holes and securing screws into the posts and boards. The price of a good cordless drill is approximately $75-$150, while drill bits that are compatible with drills start at $10.
Wheelbarrow
The apparatus will come in handy for transporting the heavy materials like dirt, cement, or wooden posts. There are various kinds of wheelbarrows and the cost of the usual type is around $70 to $150.
Protective Gear
Safety goggles, gloves, and ear protection are essential to prevent injuries during cutting, drilling, or hammering. It may be a good idea to allocate $20 to $50 for quality personal protective equipment (PPE).
Concrete Mixer (Optional)
Not only will a concrete mixer save time, but it will also help ensure consistent mixing when setting posts in concrete. Daily rentals for concrete mixers are approximately $50 to $100, or you may also purchase one for $300 to $1,000 depending on the size and capacity.
Having the required tools not only makes the job of fence building more efficient but also the result will be a strong and well-finished fence that will not only meet your needs but also your property's value.
Recommended Materials for Different Fence Types
Fence construction requires selecting the most appropriate materials; if the wrong ones are used, the fence's durability, functionality, and aesthetics will be affected. The correct materials generally depend on the type of fence you are building, the climatic conditions in your area, and of course, your budget. To facilitate your choice, here is a list of the recommended materials for some of the most popular fence types:
1. Wooden Fences
Wooden fencing is the most commonly used type and one of the most beautiful and adaptable materials at the same time. The most popular species for this purpose are cedar, redwood, and pressure-treated pine.
Cedar & Redwood: Both these kinds of wood are considered to be very high in quality because of their natural ability to resist rot and bugs and, thus, the fences made out of them can last very long. Cedar prices range from $15-30 per panel, while redwood is slightly more expensive at $20-40 per panel.
Pressure-Treated Pine: The least expensive option, priced at around $10-25 per panel, but it requires ongoing care, such as periodic sealing to prevent warping and decay.
2. Vinyl Fences
Vinyl fencing is the most recommended option among homeowners seeking a fence that withstands all weather conditions and seasons with minimal maintenance.
Durability: They withstand a range of harsh weather conditions and retain their appearance, as they do not rot, peel, or warp; therefore, they are well-suited for long-term use.
Cost: The average price of vinyl fencing is between $20 and $40 per linear foot, which is a bit high, but it compensates in the long run as the maintenance costs are quite small.
3. Chain Link Fences
Chain-link fences are not only secure but also cost-effective, offering security at a lower price.
Galvanized Steel: is the most widely used and preferred material for chain link fencing, as it is rust-resistant. Coated steel options also provide a thicker layer of protection.
Cost: Chain-link fencing materials range from $8 to $20 per linear foot, while high-end, painted options cost about $15 to $30 per linear foot.
4. Wrought Iron Fences
Wrought iron fences are famous for both their strength and beauty, thus, they can not only be used to hold the line but also as an ornamental feature.
Durability: They can last for many decades if properly maintained by regular application of rust-proofing coating.
Cost: Wrought iron is usually priced between $30 and $50 per linear foot, thus, it is considered a luxury fencing option.
5. Composite Fences
Composite fences are a modern choice that offer a wood-like board with the durability of plastic.
Eco-Friendly: The process of making composite fences involves using recycled materials, hence, they are not harmful to the environment.
Cost: The range of composite fence prices is $25-$45 per linear foot and they will require very little maintenance.
6. Aluminum Fences
Aluminum fences are the lightest and most rust-resistant among residential fencing options.
Versatility: The material is available in multiple styles and colors, making it easy to create either a decorative or a functional fence.
Cost: The typical range for aluminum fencing is $20 to $35 per linear foot. However, to keep its good look, aluminum needs to be repainted from time to time.
7. Farm or Ranch Fences
If a farm or ranch opts for wood, wire mesh, or vinyl, it typically does so for fencing large areas.
Wood with Wire Mesh: This combination extends the life of the fence and its functionality, the wire price is typically around $1-$7 per linear foot, while wood posts cost $2-$10 per linear foot.
Vinyl or PVC: Long-lasting and weather-resistant; the average price is $20-$40 per linear foot.
Factors to Consider
Climate: If you live in a damp or cold area, pick materials that can withstand humidity and severe weather.
Maintenance: Some materials, such as wood, require a lot of attention while others, like vinyl and aluminum, only need minimal care.
Budget: When selecting an alternative, compare the upfront cost with the total cost, including durability and maintenance expenses over time.
The right materials for the fence type you are building not only meet the project's functional requirements but also its aesthetic preferences.
Safety Precautions to Consider
It is always essential to observe safety measures at a fencing site not only for your protection but also for others. The following five safety measures are the most important ones to be pointed out:
Appropriate Safety Gear Usage: Protective gear, including gloves, safety goggles, hard hats, and sturdy shoes, should be worn at all times to prevent injuries from sharp tools and falling debris.
Tools and Equipment Check: Before work commences, ensure all tools and equipment are in proper working condition. Using broken power tools or worn-out equipment can lead to unexpected accidents.
Underground Utilities Location and Marking: Either independently or through a third party, determine the locations of underground utilities such as gas, water, and power lines, and visibly mark them for safety. Cutting through these lines can endanger lives and cause extensive damage.
Creating Safe Work Area: Give the work area the proper care so that it is organized, clean, and free of hazards. Also, set up barricades or warning signs to effectively communicate with the public, and guide them to an area of safety that is beyond a certain limit.
Manufacturer Instructions Compliance: Follow the manufacturer’s guidelines for setting up fencing and make use of the tools for their intended purpose. Disregarding directions or attempting to be inventive can result in safety risks and also lead to failure of the project.
Step-by-Step Installation Guide
Planning and Measuring the Area:
Before starting the installation, the entire area must be precisely delineated and the perimeter measured. The measuring tape or laser distance measurers can be used for the most precise measurements. The position of the fence can be shown with either string or chalk. Modern planning based on the latest data can reduce material waste by up to 15%.
Gathering Materials and Tools:
Acquire all required materials first: fence posts, panels, nails, screws, and concrete (if applicable). Don't overlook getting the essential tools like post-hole digger, saw, level, and power drill. It is recommended to purchase the calculated requirement plus a small margin—about 10% is the professional recommendation for errors or alterations that may occur during the process.
Preparing the Ground:
Remove any trash, plants, or other obstacles that might interfere with the fence line from the area where the work is to be done. If the ground is not level, it is advisable to either level it up or make a slope plan as this will not only make the fence stable but also improve its appearance. Studies prove that crooked fencing reduces the lifespan of fencing structures by 25%.
Installing Fence Posts:
One-third the height of the post should be drilled out for a secure foundation, with about 2 feet deep for a regular 6-foot fence. Post spacing should be standard and consistently maintained, typically 6 to 8 feet apart, depending on the type of fencing material. First, place the posts and then pour concrete into each hole ensuring that they are straight and aligned. Wait for 24-48 hours for the concrete to cure before proceeding to the next phase.
Attaching Fence Panels or Rails:
Fence panels or horizontal rails can be attached right after the posts have been solidified. In a wood fencing application, it is better to use coated screws, as they do not rust as quickly. Make it a practice to ensure all panels are at the same height and evenly spaced, maintaining uniform aesthetics and durability. Overlapping the panels is a good practice for privacy fencing, as it not only increases durability but also reduces the risk of wind damage.
Adding Finishing Touches:
Before the fence receives its final protective treatment, sealants, paints, or stains should be applied to enhance the wall's resistance to weather and foot traffic. Recent findings suggest that treated fences last up to 40% longer than their untreated counterparts. Finally, conduct a full inspection of the fence to confirm that all connectors are secure.
Since these meticulous steps were precisely executed along with planning, the installation was not only efficient but also durable and thus a robust and attractive fence was created for many years.
Measuring and Marking the Area
Initially, I determine the exact boundaries of the site to be fenced in for the purpose of measuring and marking the site. The entire perimeter is measured with a tape measure, and I am meticulous about accuracy to avoid misalignment. Afterwards, I put down stakes and string along the borders and mark significant spots such as corners and the gate. This process provides a clear view of the fence's location.
Setting Posts in Concrete
One might say that the placement of posts in concrete is the most crucial step because it is the only way to ensure your fence is not only stable but also has a long life. After that, the holes for each post will be dug; ensure they are deep enough to create a solid base. The common rule for post excavation is to dig one-third to one-half of the post's height above ground. A 6-foot fence will require a soil hole 2-3 feet deep, depending on local weather and soil conditions. The depth contributes to resistance to wind and soil movement.
You may either mix concrete yourself or buy premixed bags which are readily available in home improvement stores, so mixing the concrete will not end up being a hassle for you. Most manufacturers recommend 1 gallon of water per 80-pound bag of concrete, however, this is just a rough guideline and small variations may occur, thus it is wise to check with your specific brand for any exact instructions. Once you have confirmed that the post is in the correct position, pour the concrete mix into the hole, filling it up to the ground level. A few contractors suggest using a less-wet mix to improve post stability and reduce setting time.
At a minimum, the procedure should be expedited by the 24-48-hour waiting period for the concrete to set before connecting the fence panels or applying additional force to the posts. This curing time not only provides maximum strength but also reduces the risk of post-movement. Moreover, it is common among experts to recommend a slight incline on top of the concrete, away from the post, to divert rainwater and prevent pooling, which in turn will extend the lifespan of both the wood and the concrete base.
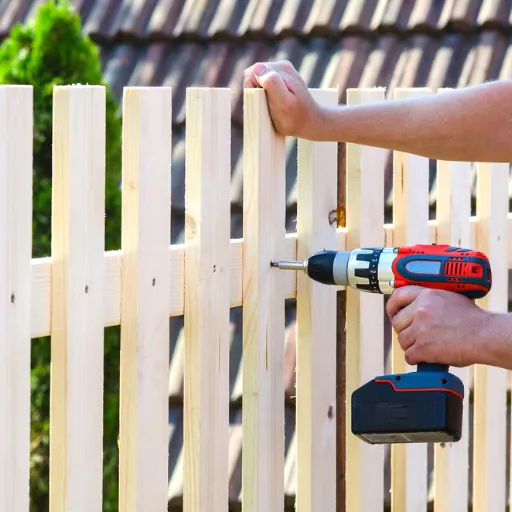
Installing Panels and Attaching Rails
The next step after the posts are secured is to install fence panels and rails. The first step is to measure and place each panel adjacent to the others in the desired order. Most of the time, fence panels are of a standard size of six feet in width, however, just check with the specifications of the panels you have bought. Drive screws or nails through the panels into the posts to attach each panel to the posts, at least two fasteners per side for stability. It is highly recommended that you choose either galvanized or stainless steel fasteners which will not only prevent rust but also increase the durability of your fence.
Space is the primary factor in installing the rails. The best structural integrity can be achieved if the upper and lower rails are attached 6–12 inches from the top and bottom of the fence, respectively. If a middle rail is used, it should be aligned according to the other rails. Moreover, using brackets or pocket screws for fastening the rails is more secure than nails or even the common screws, and thus the strength of your structure is increased as well.
To ensure each panel and rail is correctly positioned and at the same height, use a level during installation for precision. Additionally, this level of care not only improves the overall appearance of the fence but also helps it last longer by ensuring proper operation.
The pre-stained or pre-treated wood panels are considered the first choice by industry specialists for many homeowners because they are low-maintenance and durable. If privacy is a priority, choose options that are either fully solid or have minimal gaps. Composite fencing is a modern innovation that, although initially expensive, provides a weatherproofing solution with the material's strong resistance and longevity.
Finally, once the panels and rails are set, conduct a thorough examination of the structure to identify any loose fasteners or misaligned parts. Doing the adjustments on time can thus save you time and effort in the long run and make your fence strong and good-looking for many years.
Adjusting for Elevation Changes and Slope
Construction of a fence on an inclined land requires not only a new fence design but also careful planning of the different heights and angles of the slopes. The quantity and positions of the slopes dictate the choice of one of the two methods for setting the fence on the slope; the stepping and the racking methods.
Stepping Method
The stepping method involves first levelling each fence panel horizontally, then gradually raising the posts to match the ground slope. This technique is especially well-suited to steep, highly irregular slopes, as it maintains consistent panel width and provides an overall stable fence. Gaps created by this technique under the fence need to be filled with masonry materials if privacy or security concerns arise.
Racking Method
The racking method allows the fence panels to be sloped and shifted to the slope without a break, thus creating a seamless and smooth looking fence running all along the hill. This method is great for aesthetics and is also very common for gently to moderately sloped areas. Nevertheless, materials that can bend like aluminum or specially crafted wood panels that can be pitched at the slope will be needed.
Key Data to Consider:
Slope Gradient
The racking method is a preferred solution for slopes about 15 degrees. For more than 15 degrees slopes, the stepping method remains the best choice since it guarantees a more durable and sturdy fence.
Material Selection
Modern materials such as vinyl and adjustable composite panels are well-suited to sloping grounds, as they are durable and flexible. For instance, a vinyl fence would often have preassembled racked panels for faster installation.
Cost Implications
Recent research suggests that the stepping method would increase total project costs by approximately 10-15% because the overall number of posts used for height adjustments would increase. The racking method will not significantly affect the reduction of labor costs but it will call for special panels that could nonetheless raise the expenses by about 5-10%.
Pro Tips:
During planning, the slope gradient should be determined with utmost precision using a laser level or a string line.
Regardless of the slope, exact measurements and proper post spacing should be used to ensure the fence is securely supported.
Landscaping or retaining walls could be applied as support if the fence is built on very uneven ground.
With creative planning and methodical application, a solid yet attractive fence can be built on any uneven surface or slope.
Frequently Asked Questions (FAQ)
What are the steps for a picket fence installation project?
Preparation for a picket fence installation primarily involves determining the fence style and height, checking property lines and local zoning laws, and determining whether a building permit or HOA approval is required. It is also essential to measure the exact boundary for the fence, calculate the number of posts and panels needed, and time required for gathering hardware, concrete mix, and tools. Additionally, if you plan to hire a contractor or fence installers, include labor costs and consider how the new fence will affect the area's appearance, value, and privacy.
What is the most effective way of digging post hole and setting them properly?
Post holes are usually dug with a post-hole digger or auger to the recommended depth (typically one-third of the fence height plus 6 inches for gravel). For holes and setting, place a post on the gravel base, check its verticality, then pour dry concrete or concrete mix around the post and tamp. Make sure your posts are centered in the fence panels, and allow the concrete to harden before attaching pickets to the rails or panels. It is essential to check for underground utility lines before any digging.
What is the maximum distance that two posts can be apart and what is the number of pickets to the rails for different styles?
As a rough guide, posts can be placed 6 to 8 feet apart, depending on the fence style and panel width; most prefabricated panels are 6 feet wide. When connecting pickets to rails, maintain consistent spacing to achieve the desired look. On—center measurements and deck screws or galvanized nails are recommended. If the gates are heavy or sections of the privacy fence are quite tall, closer post spacing will be necessary for structural integrity.
Is it feasible for me to construct my own yard privacy fence or would that entail the hiring of fence installers?
A fence project around your yard can be a DIY project in case you have the right tools (post hole digger, auger, level, saw) and enough time to collect materials. On the other hand, professional fence installation can save time and ensure compliance with local regulations, proper footing with dry concrete or a concrete mix, and a plumb finish. It is wise to call a fence contractor if the location is complex, the fence lines are long, or building permits are required from local authorities.
What measures ensure the safety of utility lines and reduce damage during post hole taking?
Utility companies or 811 must be called in advance to locate and spray-paint the underground utility lines. Moreover, don’t dig in easement areas and check for sprinkler or irrigation systems. Always use extreme caution when using a post-hole digger or an auger. If unexpected lines are discovered, stop and call the utility. Good planning can prevent service interruptions and costly repairs.
What can I do with my fence panels and pickets to ensure they are not only vertical but also more lasting?
The strongest possible method of setting up the posts is to use a solid gravel base, level them, and hold them in place until the concrete mixture sets. To be sure, the posts are at the correct height for ground level, aligned with the fence height and the local frost lines. Fasteners or fittings that are resistant to rust should be used to directly attach the rails and the fence panels to the posts, while pickets must be sealed or painted for weather protection and to increase the life span of your fence.
What permits, local regulations, and building permit requirements are there in place that affect a fence installation project?
Usually, local zoning laws, homeowners’ association rules, and municipal codes set the maximum height of your fence, allow only certain types of materials (like chain-link, PVC, wood) and decide the minimum distance to property lines and easements where the wall can be built. A building permit is often required in many areas for fences taller than a set height (usually 6 to 8 feet) to ensure compliance with local building codes.
From post-hole digging to the installation of pickets and rails, what is the estimated time for finishing a typical fence project?
The time it takes to complete fences and finish a project varies based on factors such as fence length, terrain, weather, and whether you will engage installers. A small DIY fence can be completed in a weekend, while a longer one requiring a permit could take several days or longer. You need to account for time for digging postholes, setting concrete, and finishing (e.g., staining), all of which affect the overall schedule.
What are the materials and tools required for building a fence that not only keeps pets safe but also enhances the property's appearance?
Aside from the basic post-hole digging tools (or an auger), a level, a tape measure, a saw, and a drill with deck screws, the materials depend on the style- wooden pickets and rails, prefabricated fence panels, concrete mix for footings, or chain-link hardware for fencing with wire. First, select a fence style and height that will block pets from getting out, second, think of security against intruders by choosing the best gate latches, and last, pick the appearance and finishes that will not only make the property look good but also increase its value.
Recently Posted
-
Building a Security Fence: Your Guide to High-Security Solutions
February 5, 2026The security fence functions as the primary defense system of your commercial property, industrial site, and private estate becaus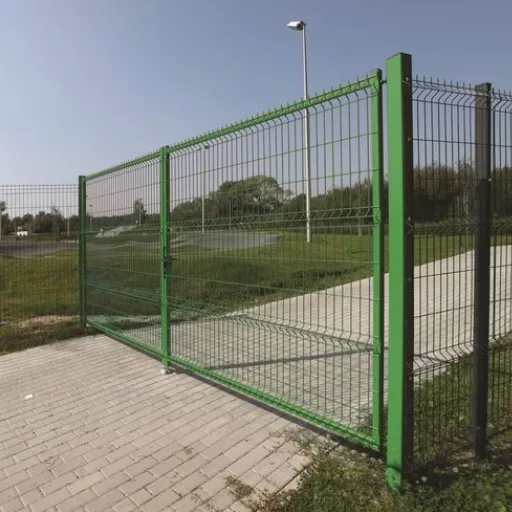 Read More
 -
How to Build a Security Fence: A Comprehensive Guide to Installing Chain Link Security Fences
February 4, 2026Constructing a security fence is an effective way to protect your property, define its boundaries, and enhance your privacy. The v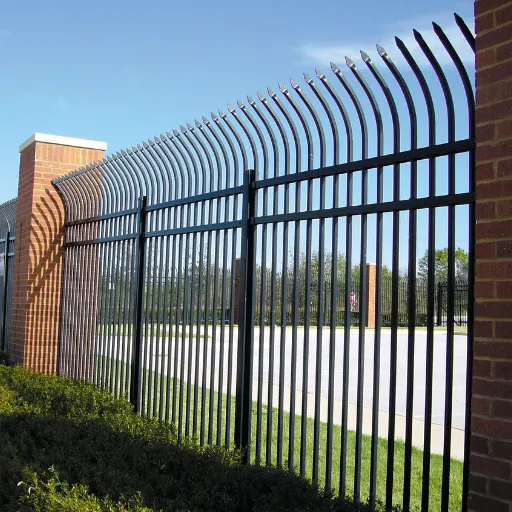 Read More
 -
Iron Yard Fence: The Ultimate Guide to Wrought Iron Fencing for Your Garden
February 3, 2026The design of a garden fence goes beyond establishing property borders because it serves two main purposes by enhancing the visual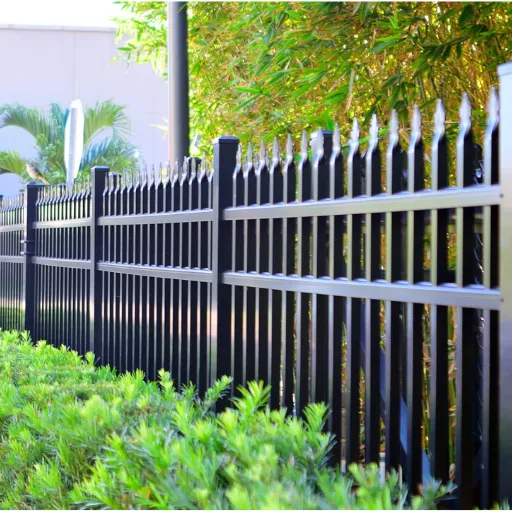 Read More
 -
Cast Iron Garden Fence: The Ultimate Guide to Durable and Decorative Garden Edging
February 2, 2026The cast iron garden fence functions as a boundary that creates an everlasting combination of practical use and aesthetic beauty t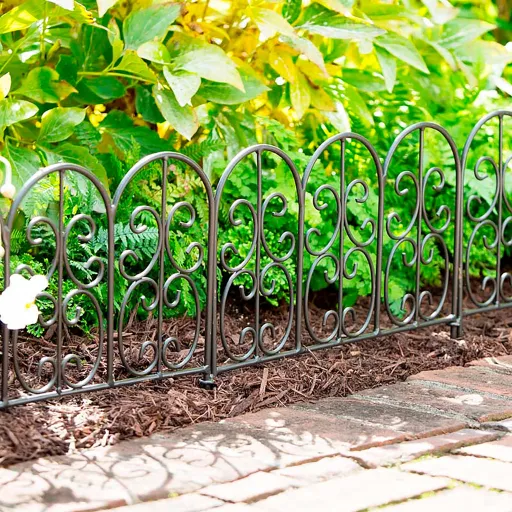 Read More

Contact Us
Recommended Products
-
 Durable Imitation Bamboo Fence for High-Traffic Public SpacesNegotiableMOQ: 50 Square Meters
 -
Customizable Imitation Bamboo Fence With On-Site Measurement ServiceNegotiableMOQ: 50 Square Meters
-
Modular Imitation Bamboo Fence Panels for Quick InstallationNegotiableMOQ: 50 Square Meters
-
Imitation Bamboo Privacy Fence With Reinforced Aluminum BaseNegotiableMOQ: 50 Square Meters
-
Commercial Grade Villa Fence for Real Estate Developments and Hotel Perimeter ApplicationsNegotiableMOQ: 10 Sets

-
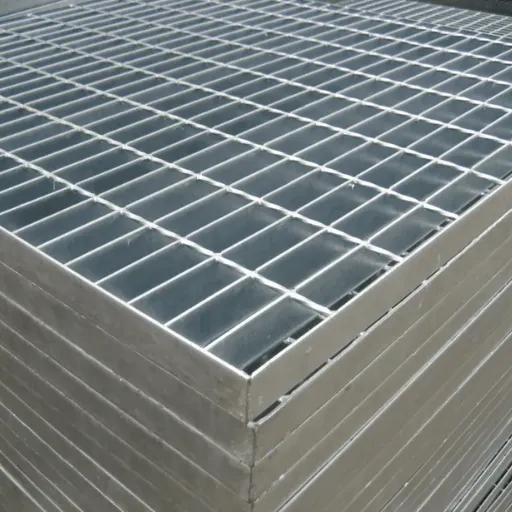
Industrial Steel Grating Solutions for Oil and Gas Platforms, Compatible With Harsh ConditionsNegotiableMOQ: 10 Pieces
-
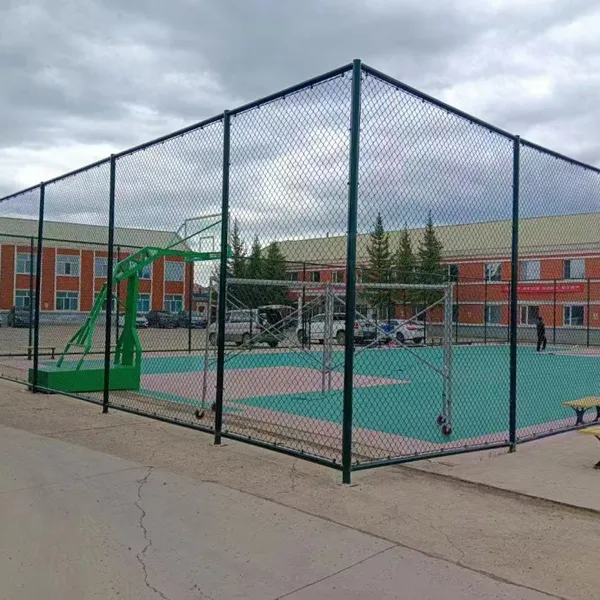
Basketball Court Fence 4M Height, Galvanized Steel Chain Link Mesh for Outdoor Sports Field PerimeterNegotiableMOQ: 50 Square Meters
-
Chain Link Basketball Court Fence Offering Anti-Rust Protection and Long-Term PerformanceNegotiableMOQ: 50 Square Meters
-
European Style Villa Fence Concrete Base Installation Courtyard Boundary WallNegotiableMOQ: 100 Square Meters
-
Galvanized Steel Villa Fence With Powder Coating for Superior Corrosion ResistanceNegotiableMOQ: 100 Square Meters
-
Powder-Coated Basketball Court Fencing With Weatherproof Finish for Long-Term Outdoor ApplicationNegotiableMOQ: 100 Square Meters
-
Powder Coated Wrought Iron Main Gate and Garden Fence for HousesNegotiableMOQ: 100 Square Meters
-
Elevate Your Garden With an Artistic Wrought Iron Garden Fence | Uniting Security & EleganceNegotiableMOQ: 100 Square Meters
-
Low-Maintenance Wrought Iron Garden Fence | Durable Powder-Coated Steel PicketsNegotiableMOQ: 100 Square Meters
-
Heavy-Duty Villa Fence: 10 Gauge Steel Construction With Powder Coating for DurabilityNegotiableMOQ: 10 Sets

-
Anti-Slip Steel Grating Panels for Enhanced Safety in Wet and Slippery Work AreasNegotiableMOQ: 10 Pieces
-
Steel Grating for Stair Treads and Catwalks in Commercial and Factory BuildingsNegotiableMOQ: 10 Pieces
-
High-Security Villa Fence With Lockable Gates and Weather-Resistant Finish for Home ProtectionNegotiableMOQ: 10 Sets
-
Galvanized Steel Basketball Enclosure Netting / Ball Containment System With Frame for Outdoor CourtsNegotiableMOQ: 50 Square Meters
-
Vinyl Coated Chain Link Fencing for Basketball, Pickleball & Tennis CourtsNegotiableMOQ: 500 Square Meters