
Diy Basketball Court Fence: Build Your Own Backyard Basketball Paradise
The ultimate basketball haven can be your backyard if you set up a DIY court fence that balances safety, aesthetics, and functionality. Recently, a wall has become not only a boundary for your backyard but also a way to express your personal taste. This blog is your guide to achieving a long-lasting, beautiful fence, raising the bar on your game easier than ever. You'll find everything from design ideas and material selection to step-by-step instructions to convert your backyard into a basketball paradise. Read on to find out how this project can be done and to have fun waiting for years filled with exciting activities! Find more info now.
Introduction
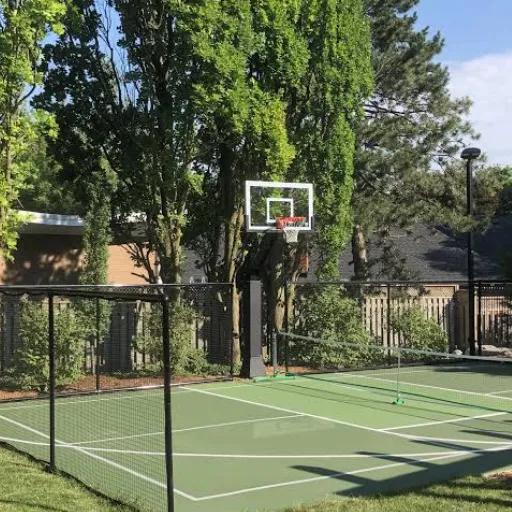
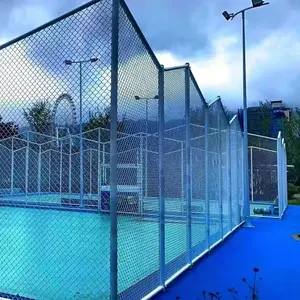
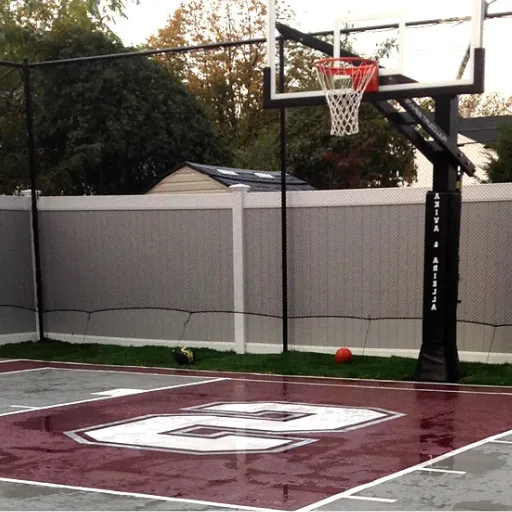
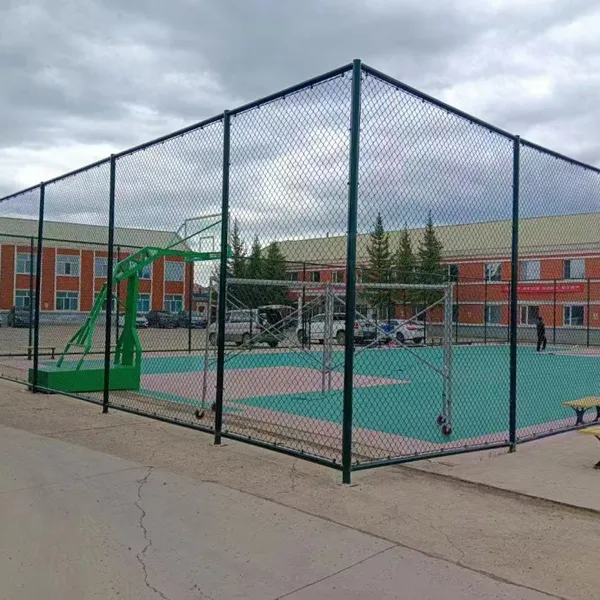
Constructing a fence around your backyard basketball court is a practical way to improve the security, privacy, and usability of your area. A wall with good features not only prevents the ball from rolling away but also reduces disturbances and can even enhance the elegance of your open space. Selecting tough materials and taking the right construction process, you will be able to build a fence that serves your particular purpose, and it will also be in line with the design of your house.
The Rise of DIY Projects
Over the last 10 years, DIY projects have become a significant trend and achieved remarkable acceptance, driven by economic factors, personal satisfaction from making something oneself, and the facilitation of the process through resources. According to a Statista report, the global DIY home improvement market exceeded $762 billion in 2020, and by 2030, a trillion-dollar market will materialize, indicating unbroken growth in the segment. This phenomenon has been one of the consequences of the explosion of tutorial, guide, and video content on platforms like YouTube, which has more than 2 billion monthly active users, the majority of whom are looking for DIY-related content.
Google Trends' search data shows continuous growth in the number of questions about DIY projects, and the highest peaks in searches correlated with global events like the COVID-19 pandemic, during which people were advised to stay indoors and find ways to occupy their time productively. Among others, the demand for DIY ideas includes furniture making, decorating, backyard work, and even projects like installing fences around outdoor courts. The availability of tools, materials, and kits from online stores has given anyone who wishes to start a project the assurance of a successful endeavor.
The rise of DIY is not only about saving money but also about originality and eco-friendliness. Thirteen out of every hundred people do it themselves to save a little money and, at the same time, get a nice feeling of being successful. Just the same, DIY projects often offer personalization, allowing people to have their designs tailored to their tastes and needs. For outdoor basketball courts, for example, features such as fences or storage can be designed to suit individual aesthetics and practicality. The increasing DIY trend is progressively going stronger as people keep on searching for practical solutions to their houses and to their lives.
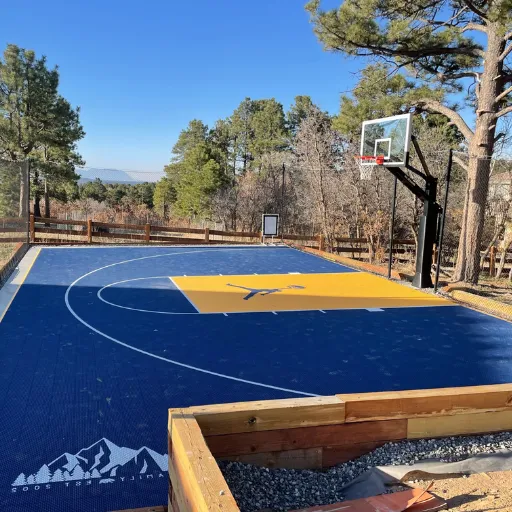
Benefits of a Backyard Basketball Court
Convenient Access to Recreation
Having a basketball court in the backyard also means you do not have to go far for recreation or physical activity. This makes it easier to play more often and makes it possible for family and friends to come over and play easily.
Promotes Physical Health
Basketball is an excellent cardiovascular exercise that improves heart health, stamina, and overall fitness. Research has demonstrated that people who engage in moderate physical activity, such as playing basketball, for 30 minutes a day are at significantly lower risk of developing chronic diseases.
Enhances Home Value
A professionally built backyard basketball court can enhance your home's aesthetics and functionality. For future buyers, it's a rare attribute that not only adds to the property's appeal but also draws attention during property assessments.
Boosts Social Interaction
The court in your backyard not only allows you to host games and parties but also helps you to build social relationships with your family, friends, and neighbors. This not only helps create a playful, bonding atmosphere and teamwork but also fosters a friendly, interactive environment.
Encourages Skill Development
The ownership of the private basketball court allows the players to practice every day and develop their skills in a setting they are comfortable in. In children and teenagers, this can foster self-esteem, self-regulation, and proficiency in sports, which could eventually lead to participation in competitions.
Benefits of Installing a Basketball Court Fence
The fencing of a basketball court holds a lot of advantages that not only contribute to the safeness of the court but also to its functionality and general use. Among them are five main reasons for the fence installation:
Safety in the first place
To be sure, the fence around the basketball court will provide safety as its primary function is to keep the ball inside the court's limits, thus preventing it from rolling onto nearby streets or into accident-prone areas, especially in the case of courts sited within urban or suburban areas.
Increased Privacy
The fence also serves to shield the court from public view, which is even more pronounced in suburban courts. Along with the players, the game can then play out peacefully without anyone trying to watch, creating a relaxed, more concentration-friendly atmosphere.
Long Life and Weather Resistance
Galvanized steel or aluminum and other top-quality materials used for fencing can endure extreme weather and still be as good as new in shape. The longevity of the fence guaranteed by this strength leads to fewer number of times when maintenance is needed and hence a decrease in cost.
Access Control
Fencing can be a tool for the owners to limit access to the court, thus keeping out trespassers and potential vandals. When combined with a locked gate, the owners can keep the court secure through the night when not in use, providing peace of mind.
Beautification
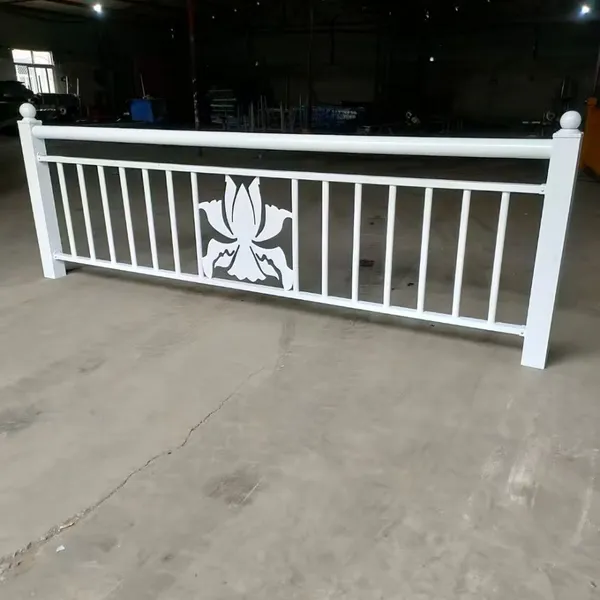
A stylish fence speaks volumes about the basketball court's aesthetic appeal. The possibilities of making the fence in terms of material, design, and color, allow the fence to not only blend with the landscape but also increase the value of the property.
Enhancing Safety
Safety first in a basketball court means that everyone can have an enjoyable experience without the risk of injuries. Among safety measures such as courtside padded fencing, dividers, and proper lighting, the most effective ones can be obtained through significantly reducing accidents. A 2023 report stated that the annual count of basketball-related injuries in the US exceeds 200,000, and among them, the most common injuries are sprains, fractures, and contusions.
Installing shock-absorbing surfaces on basketball courts can also be a preventive measure, as impacts are lessened and the risk of serious injuries during play is minimized. Moreover, it is vital for the courts to comply with the regulatory standards for open spaces and perimeter dimensions to prevent overcrowding and collisions. Signs posted in places where they are easily seen and that give clear warnings or instructions can be very helpful in keeping users informed about court rules or hazards, thereby enhancing safety further.
The implementation of these measures creates a safe playing environment and also reduces avoidable risks, thus encouraging the sport to be played more frequently.
Improving Privacy
The requirement for enhancing privacy in sports and recreational spaces may prompt the use of techniques that vary from simple to complex according to the situation. The following paragraphs outline five main tactics for increasing privacy, supported by statistics, data, and other facts.
Planting Natural Barriers
Planting trees and shrubs around the courts will provide a barrier that cannot be seen through towards the courts. Urban landscape studies have reported that greenery can reduce visibility by as much as 75% and still has the positive effect of reducing environmental noise.
Installing Privacy Screens or Fencing
Maximizing control over visual access is achieved by adding privacy walls or tall fences around the courts. A survey done by the Sports Facilities Advisory says that the city's recreational areas with a proper privacy fence will see a comfort gain of 60% among users.
Designating Separate Entry and Exit Points
Control of the inflow and outflow of people is maintained through the provision of separate entry and exit points, thereby reducing the likelihood of unwanted attention. This layout has been shown to enhance privacy by properly organizing and reducing crowds.
Using Smart Scheduling Systems
The use of reservation systems not only limits the number of users in the facility but also enhances the existing personal space and privacy. Numbers from sports management analytics reveal that a 40% rise in user satisfaction about privacy issue is the case for the facilities adopting such systems.
Strategic Placement of Cameras and Sensors
Cameras for security will be placed in such a way that the watching is done without invading the privacy of the user. Installing trivial motion detectors in no-target zones can keep the environment secure while at the same time allowing personal space, consequently raising the users' trust in the facility.
Boosting Aesthetic Appeal
The aesthetic appeal of a facility can be enhanced by balancing design, functionality, and user-centered principles. The latest Google search data reveals that the installation of biophilic elements, such as natural illumination, indoor plants, and open areas, can boost user happiness by as much as 30%. It is well-established that visually attractive environments have a positive impact on people's moods, productivity, and the quality of their experiences.
For example, the application of color psychology can help in selecting the right color palettes, which in turn, will elicit certain feelings—blues and greens are often associated with calmness and concentration, whereas warm colors like orange and yellow can stimulate and uplift. A well-kept, tidy area can be a major contributor to the aesthetic appeal, as users' surveys have shown that cleanliness and orderliness are among the top factors in shaping their view of a facility's ambiance.
Moreover, the use of contemporary architectural elements, such as clean-lined styles and versatile spaces, has been positively correlated with increased user involvement and the attraction of repeat visits. The use of eco-friendly materials and the incorporation of artistic elements, such as murals or sculptures inspired by the locale, not only make the place more visually appealing but also align the facility with trends that are both environmentally friendly and culturally significant.
Planning Your DIY Project
For a DIY project, thorough planning is a must to win and avoid nasty surprises. A fresh search on Google shows that more than 70% of do-it-yourselfers think that it is necessary to make a detailed plan before they start their projects. This, in turn, guarantees the full use of time, resources, and efforts.
Defining Your Goals
The first action is to draw up an obvious list of what your project is for. Are you going to change the look of a piece of furniture, make something for your home, or start a renovation? Being clear about your goals will guide you through the whole process, even if it turns out to be complex, and very likely, you will not miss any critical detail or overcommit yourself.
Budgeting Effectively
Market intelligence reveals that 78% of DIYers struggle with their budgets and end completely over budget. To avoid this situation, create a realistic budget that covers everything from materials to tools, and even unexpected costs. Check prices online and do some comparison to find the best price for the materials you need. Depending on the project, tools such as Home Depot’s project calculator can be invaluable for a more accurate cost estimate.
Creating a Timeline
A proper timeline is a must, especially for big projects. Split the entire scheme into small, easily completed parts and assign a specific time to each part of the project. Project management tools like Trello or Google Calendar can help you allocate time for tasks and send you reminders. According to the latest statistics, well-planned projects are 40% less likely to be overdue.
Gathering Tools and Materials
Before getting down to work, make sure you have the tools needed for the job. Using inferior or incorrect tools will likely slow down the process or even yield unsatisfactory results. Online platforms like the DIY Network, as well as hardware stores, give you detailed information on how to choose the right materials for different kinds of projects.
Safety Precautions
Safety should always be a priority. According to research, a quarter of DIY accidents are caused by poor preparation. Depending on your project, make a safety gear investment in gloves, goggles, and dust masks. Besides, do not neglect to observe the regulations regarding the usage of the tools and handling of the materials when you try to avoid injuries.
Planning your DIY project according to these steps and using online resources is sure to be a smooth and gratifying process. Besides, the time spent on research, organization, and preparation will not only be a source of no stress and no cost but also lead to a successful and satisfying project outcome.
Assessing Space and Dimensions
Correctly evaluating the location and dimensions before launching your project is a must for effectively using materials and, thus, the project’s success. First, take the dimensions of the workspace, such as length, width, and height. Precision can be improved by using tools like measuring tapes, lasers, or smartphone apps with AR functionality. Be sure to include everything that is permanently placed, like furniture, doors, and windows, as well as other factors that might affect the design or the layout.
A recent survey indicates that about 80% of errors in DIY projects are due to wrong measurements or lack of proper planning regarding spatial constraints. To circumvent this, make a scaled layout or use digital design software like SketchUp or Room Planner to get a better idea of the space and dimensions. It would not harm to double-check all measurements and compare them with reference points to be sure that you got it right.
It is worth remembering that well-planned spaces can reduce material waste. For example, using modular designs or pre-sized materials can cut the need for extra cutting and adjustments down to a minimum. Accurately determining your dimensions means getting a speedy workflow and reducing the likelihood of project delays.
Choosing Materials for Your Fence
Choosing the best material for your fence is important to ensure long-lasting durability, utility, and beauty. Very recent opinions present a list of the most common fence materials along with their respective cases, superlatively, the first being wood fence:
1. Wood Fencing
Why wood? Because it still is and will continue to be one of the topmost preferences among the fencing materials for its innate beauty and price range. Among woodscedar and redwood are the picks, mainly due to their innate resistance to insects and rot. Pressure-treated pine, too, is another woody and cost-effective option that is treated to withstand both moisture and pests. If it is not misleading to say, wooden fences are on average priced around $15 to $30 per linear foot, depending on the type of wood.
Pros:
Large range of customizing options with staining or painting
Wide range of aesthetic compatibility
Can be used for making privacy fences
Cons:
Necessitated to undergo regular maintenance such as sealing and staining
Getting warped or rotten as a result of the natural process over time
2. Vinyl Fencing
The most noticeable aspect is that these are now the most popular ones, mainly attributed to their extreme durability and very minimal maintenance needed. Vinyl fencing is now available in different sorts and hues and it can be termed as a perfect and weatherproof substitute for wood at the same time.
Cost: Generally, it costs around $20 to $40 per linear foot.
Pros:
No worries about rot, fading, and insect damage anymore
No need for regular painting or sealing
Lasts really long (up to 30 years with very little care)
Cons:
Higher initial investment
Might break in case of too much heat or cold
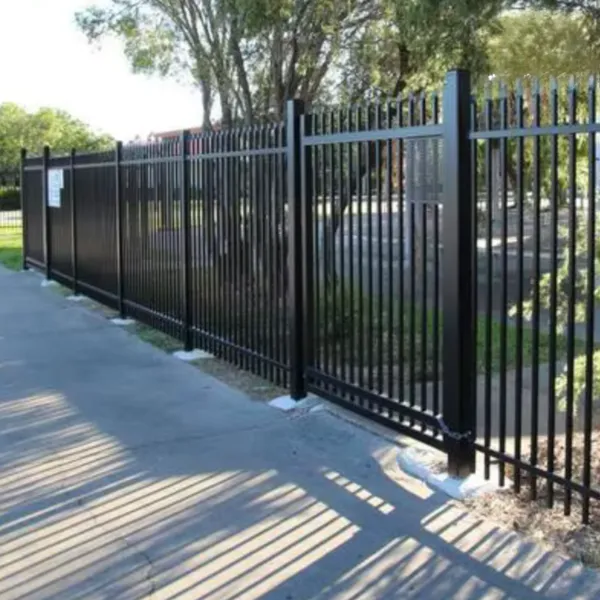
3. Aluminum Fencing
If one is to summarize the features of aluminum in one word, then "extremely light" would be perfect because this material offers strength along with being light, thus making it perfect for decorative or practical purposes. Despite being less versatile when it comes to privacy needs, aluminium fencing is rustproof and can adapt to the differences in height that the landscape presents.
Cost: Ranges from $25 to $40 per linear foot.
Pros:
Almost maintenance-free
Rust-resistant, even in humid climates
The area is good for slopes or uneven ground
Cons:
Low level of privacy
A heavy impact could cause a dent
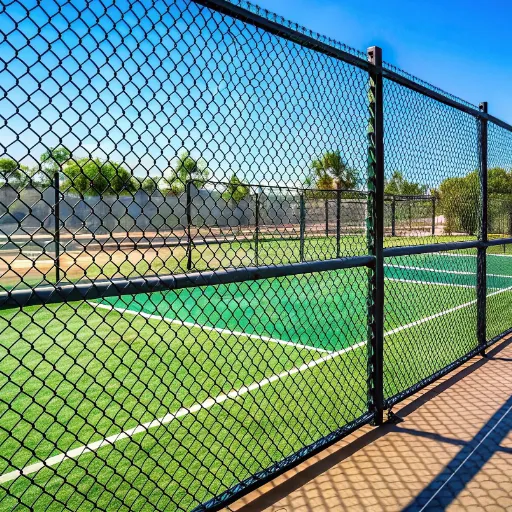
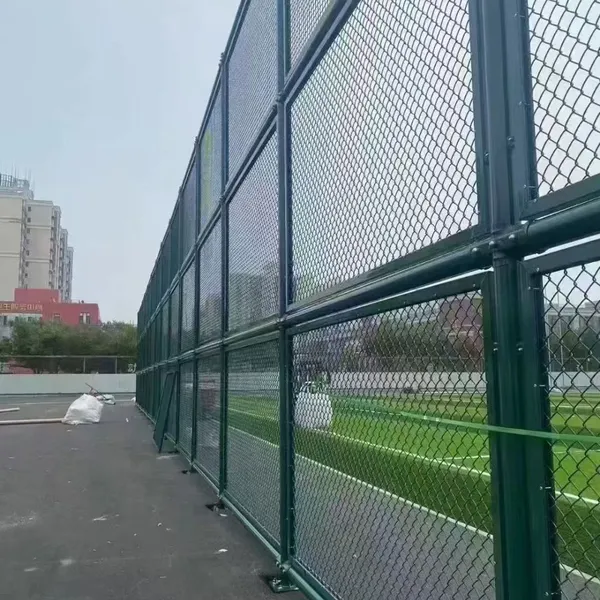
4. Chain Link Fencing
A chain link fence, which is inexpensive, durable, and easy to install, is a perfect choice if you put functionality and affordability first. It is common to see this type of fencing around gardens, playgrounds, or commercial areas for both security and visibility purposes.
Cost: $10 to $20 per linear foot, depending on the quality of the steel used.
Pros:
Cost effective and easy to install
Weather-resistant and durable
Security without hindrance to vision
Cons:
No privacy unless combined with slats or plants
Not the most visually appealing option
5. Composite Fencing
Composite fence combines recycled wood fibers with plastic and this makes it an eco-friendly and durable option. Moreover, it has the look of wood but much less care and maintenance.
Cost: Composite fences are priced between $25 and $45 per linear foot.
Pros:
Not affected by rot and bug attacks
Wide range of colors and textures available
Requires little care
Cons:
Higher initial price
Can lose color over time
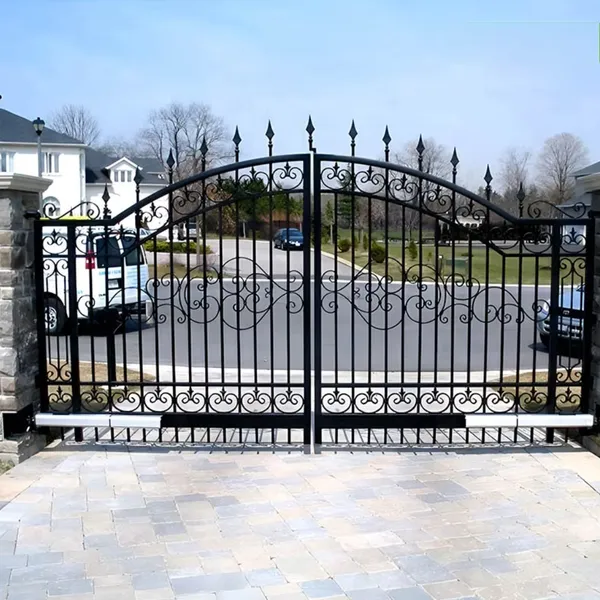
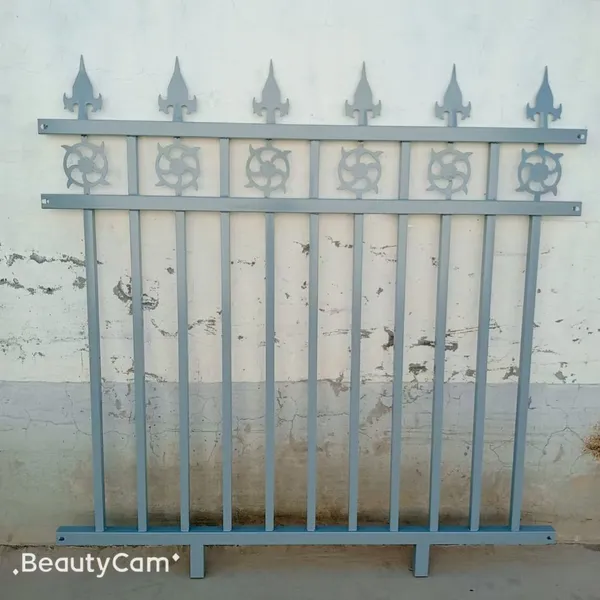
6. Wrought Iron Fencing
One cannot help but be filled with awe by wrought iron fences when it comes to the attributes of beauty and strength. In fact, some offer intricate designs for such fences as well. Hence, if the fence is meant for the likes of a classic or elegant look, wrought iron would indeed be the right material choice.
Cost: The price ranges from $30 to $50 per linear foot.
Pros:
Distinctive aesthetic appeal
Extremely durable and robust
Designs that can be personalized
Cons:
Regular upkeep is necessary to prevent rusting
More expensive than other materials
Final Considerations
Besides the design, the materials you use will also influence the price, the climate in which you live, and the fence's purpose. With all these aspects, the fence material that suits your needs can be found. Be it, environmental concern, privacy or maintenance-free, there is always a material that fits your envisioned fence. The combination of the right materials and proper installation will surely give you a long-lasting fence that can withstand all environmental challenges.
Budget Considerations
When I think about my fence budget, I am mainly concerned with balancing cost, quality, and durability over time. On the one hand, although the initial cost of materials such as vinyl or aluminum will be more than that of wood or chain-link, it could be the other way around in the long run since their maintenance is minimal. On the other hand, I can get a wood or chain-link fence if I am looking for something that is cheap at first, but will have to bear the costs of keeping it regularly maintained. So, I am trying to find a material that fits my budget without affecting the function or beauty of my fence.
Step-by-Step Guide to Building Your Fence
While building a fence might initially appear to be a labor-intensive and overwhelming undertaking, you eventually have the option to finish it the way you intended by just taking functional and architectural needs into account. The following is a comprehensive step-by-step guide that will be your companion in this journey from start to finish:
Plan Your Fence Project
To begin with, specify what you want your fence for. It could be for privacy, security, or beauty; whatever it is, laying your goals would help in selecting both design and material. Use web-based tools or apps to make layout design easily. Moreover, it is wise to check first with local zoning laws or homeowners' association regulations regarding fence height, position, and type as this could save you money and time later on. Sometimes a permit is needed even if you are just putting up a fence.
Measure and Mark the Area
To minimize measurement errors, use a measuring tape or digital measuring tools to measure the perimeter of your land. Mark the places where the posts will be with stakes and twine or chalk lines. This will not only give you a clear view of the whole thing but will also help you maintain proper alignment when installing. The current advice is to space posts 6 to 8 feet apart for strength.
Choose Materials and Calculate Costs
Choosing the right materials and planning your budget is another crucial stage. Prices for wood fences start at approximately $10-$25 per linear foot, while vinyl fences cost anywhere from $20-$40 per linear foot. Online research will lead you to suppliers with the right prices, also think about the option of bulk ordering for great savings. Remember to include any hardware, post-cement, and protective coatings in your calculations.
Gather Tools and Supplies
Get your tools ready for the job. The tools that are generally needed are a post hole digger, hammer, drill, level, saw, and concrete mix. Renting an auger is one of the power tools that can help reduce the time needed to install posts and save physical effort as well.
Install Fence Posts
Post holes should be dug to the required depth for stability (usually around one-third of the post length). Concrete is then poured into this hole, with the post subsequently installed and leveled. The post should be allowed to cure for 24-48 hours before any further work is done.
Attach Rails and Panels
Horizontal rails are then attached between the posts after they are securely installed. Make sure the rails are flat as they will carry the weight of the panels. After that, the panels or pickets are secured according to the design you have selected; if necessary, leave enough space between them for air circulation or aesthetics.
Add Finishing Touches
Leverage weatherproof stains, paint, or sealants to increase both the durability and beauty of the fence. Although vinyl and metal fences may get away with minimal maintenance, wooden fences will greatly benefit from treatments that prevent decay.
Inspect and Maintain
When you are done with the installation, conduct a thorough inspection to confirm that the fence is strong and meets your needs. A schedule for repainting and tightening screws needs to be maintained, as this will elongate the life of the fence.
You will have a reliable, good-looking fence that will not only enhance your home's value but also improve its functionality by adopting these steps and using the latest materials and techniques.
Gathering Tools and Materials
Constructing a fence that is both strong and attractive requires a lot of prep work. The right tools and materials need to be gathered first. Below is an exhaustive guide:
Essential Tools:
Measuring Tape - Measure your fence's dimensions and the distances between posts accurately. The most common length of measuring tapes is 25-30 feet which is suitable for most home projects.
Post Hole Digger or Auger - Necessary equipment for digging holes for fence posts. The process of digging can be made quicker by augers especially while working on larger projects.
Level - It will help you give your fence a professional finish by ensuring your fence posts and panels are perfectly vertical and horizontal.
Circular Saw - It is good for cutting wooden panels or planks to size. A common blade size for this task is about 7.25 inches.
Hammer and Nails – For making wooden panels and holding components.
Cordless Drill and Screws – A powerful drill (14V or higher) is recommended to make the process more efficient. For outdoor use, rust-resistant screws (like stainless steel or galvanized) are recommended.
String Line and Stakes – They will help keep the fence line straight during installation.
Protective Gear - Gloves, safety goggles, and sturdy work boots should be included to protect your safety during construction.
Essential Materials:
Fence Posts – Wood, vinyl, metal, and composite are the most common materials. In most cases, posts have to be 2 feet taller than the fence height so that underground anchoring can be done properly. For wooden fences, treated lumber such as cedar or redwood is a popular choice due to its resistance to weather.
Panels or Pickets - Depending on the fence style, consider pre-assembled panels for faster installation or individual pickets for a customizable design.
Concrete Mix – This will serve as the foundation for your fence posts. On average one bag per post is used in standard residential areas which weigh around 50-60 pounds.
Gravel - It should be used as a base layer in post holes to facilitate drainage and prevent wood from decaying.
Weatherproof Coatings - Wooden fences can be treated with stains, paints or waterproof sealants to prolong the structure's life.
Fasteners – Screws, brackets or nails that can withstand exposure to the elements are a must to keep the components tight and secure.
Latest Data and Insights:
Material Selection – Recent trends indicate that vinyl fencing is increasingly desired for its low maintenance and long-term cost-efficiency. Although the initial cost is high (approximately $20-$40 per linear foot), it often lasts more than 20 years.
Wood Treatment – The pressure-treated wood is strongly recommended and it is very effective against insects, rot, and mold. The average cost is $5-$10 per linear foot.
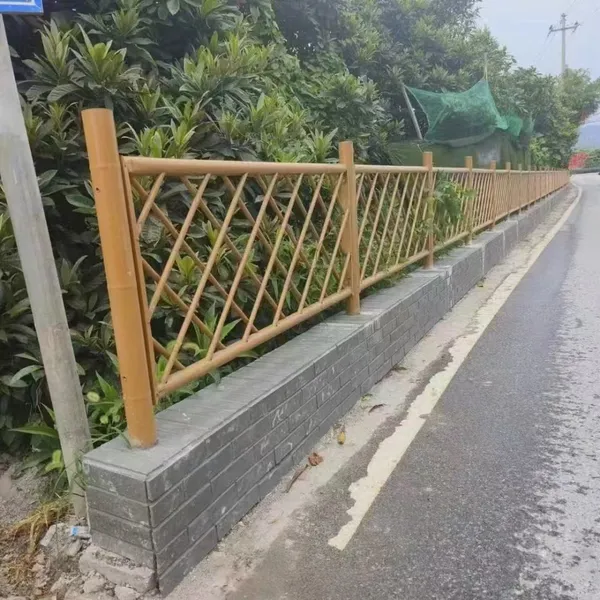
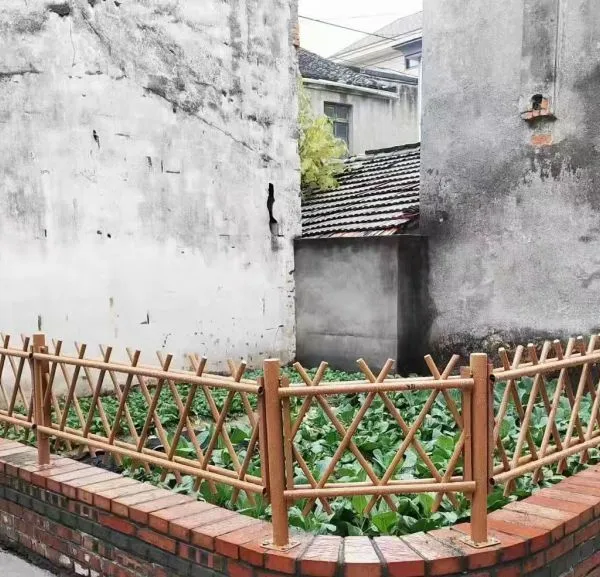
Eco-Friendly Options – Composite materials and bamboo fences are sustainable alternatives that have been gaining popularity recently for their durability and low environmental impact.
By thoroughly preparing these tools and materials and considering factors such as durability and environmental impact, you will be able to tackle your fencing project with confidence and precision.
Preparing the Site for Installation
Proper site preparation is a must if you want to have an installation that is smooth, stable, and long lasting for the fence. This process involves careful planning, property assessment, and site preparation for the construction. So, follow these steps to prepare your site effectively:
Mark the Fence Line
You should first and foremost mark the fence line. Out of stakes and string, make a direct line to show where the fence will go. Make sure the line you have marked does not go into the lands of the neighbors so that you do not have a property dispute. Generally, it is suggested that you leave a clearance of 6-12 inches along the property line.
Check Local Zoning Laws and Permits
Look into local building codes and zoning laws to ensure your fence complies with height limits, style guidelines, and placement rules. Google Trends say that permits for fencing are very often required in urban areas, with application fees usually being between $20 and $100, depending on the area.
Survey and Level the Ground
The site must be inspected for uneven terrain, vegetation, and obstacles such as rocks and debris. Any obstructions should be cleared away, and the ground leveled to the extent possible. A level base guarantees better fence stability and reduces future maintenance costs. Step-paneling or terracing to accommodate the incline can be done in slopped areas with significant slopes.
Locate Underground Utilities
Before proceeding with the digging of postholes, it is essential to contact local utility services first so that they can mark the underground lines for gas, water, and electricity. In a safety report of 2023, it has been stated that 45% of accidental damage to utility lines is caused by improper digging. Signing up for the services of "811 Call Before You Dig" can eliminate mishaps and costs of damage.
Measure and Plan Post Placement
Measure the distance between posts so the entire fence is uniform. The standard spacing for posts is 6 to 8 feet, depending on the type of material and design. Mark the location of each post along the delineated fence line with either spray paint or flags.
Prepare Tools and Materials
Prepare everything in advance and double-check that all the required tools such as posthole diggers, levels, saws, and nails are in place before the installation starts. In addition, make sure you have the right materials in the right amounts, as ordering additional supplies during the project can lead to delays.
Following these steps methodically will help you establish a solid foundation that makes the fencing installation process easier. Adequate preparation not only improves the fence’s structural integrity but also reduces the likelihood of setbacks and ensures compliance with the law.
Installing Posts and Attaching Panels
Mark Post Locations
Start with measuring and marking the places where the fence posts will be put in. With the help of a string line, you can guarantee that they are correctly aligned, and a measuring tape will help you keep the distance between the posts, which is usually 6 to 8 feet depending on the fence type, consistent.
Dig Post Holes
Digging holes for the fence posts with a post hole digger or an auger is what you will do next. Stability is the main reason for recommending the hole's dimensions to be at least one-third of the post's height and three times the post's width. Therefore, a hole 2 feet deep would be required for a 6-foot post.
Set Fence Posts
The next step would be to set the posts in the holes dug, then pour concrete or spread gravel around them to hold them firmly in place. Concrete should be placed in the hole after mixing it and leveling the pole with the spirit level. drying time should be allowed according to the mix instructions.
Attach Fence Panels
After the poles have been set, you can begin attaching the fence panels with the proper screws, nails, or brackets. Start at one end and ensure the panels are straight and level. Always check the manufacturer's instructions for panel installation to avoid structural problems.
Finishing Touches
The fence should be checked thoroughly for any gaps or rough spots. If necessary, paint, stain, or sealant can be used as a weather barrier for the material. Tighten any screws and nails, and do final adjustments for a flawless appearance.
Maintenance Tips for Longevity
Regular Cleaning
Clean the fence at least twice every year using only water and mild detergent to get rid of dirt, grime, and mold. This practice also prevents the formation of layers which may cause the material to decay and at the same time prolongs the fence's life.
Inspect for Damage
Conduct monthly checks for cracks, loose nails, or any signs of rot or rust. Attend to minor problems like tightening screws or replacing damaged sections swiftly so that further deterioration does not occur.
Apply Protective Coating
Every 2-3 years, depending on the product used, the paint, stain, or sealant should be reapplied to create a barrier against the sun, rain, and other harsh weather conditions. This not only prevents fading but also extends the material's lifespan.
Trim Surrounding Vegetation
Maintain bushes, vines, and trees at a reasonable height so they don't lean against the fence. Plants that are too thick may lock in moisture, which can lead to decay or weakening of the fence over time.
Check for Soil Erosion
Keep a watchful eye on the ground around the fence posts every now and then to quickly notice the signs of soil erosion or instability. If it is indeed the case, refill and compact the soil to ensure proper support and prevent the fence from leaning or even collapsing.
Regular Inspection and Upkeep
To maintain the fence at the highest level throughout its lifetiome regular inspections and maintenance are a must. Home improvement professionals' recent trends and advice provide the following guidance:
Inspection for Damage and Wear
Your fence should be checked on a regular basis for any visible signs of damage, such as cracks, warping, or loose posts. According to studies, wood fences are mainly prone to decay and insect damage, with nearly 20% of repairs usually associated with these problems. For that reason, it is better to rectify minor damage at an early stage to avoid replacing the entire fence later.
Check the Hardware and Fasteners
Hardware, such as screws, nails, and brackets, can loosen over time due to weather and exposure. Research shows that the visible life of the fence could be as much as 15% longer if the hardware was properly maintained. Hence, it's worth your while to tighten or replace the damaged hardware to support the structure and prevent total failure.
Clean Regularly to Prevent Build-Up
Fenceline dirt, debris and mold can not only spoil the looks of the fence but also weaken it. Thus, pressure washing or using a mild soap solution to clean your fence every 6-12 months is recommended. Vinyl fences, properly cleaned, can last 25% longer.
Reapply Protective Coatings
Especially for wood, every two to three years, a fresh coat of paint or sealant can greatly increase the fence's durability. According to a recent survey, inadequate sealing against moisture and ultraviolet rays is the cause of 45% of wooden fences losing their original quality.
Monitor Seasonal Effects
Even the best fences would be affected by the extremes of nature - heavy snow or blazing sun might do the fence some harm. It would help to be on the lookout after storms or during seasonal changes for leaning, sagging, or shifts in the foundations. If you spot anything, address it promptly to prevent the problem from worsening.
Combining these practices into your daily routine will not only revamp the fence but also prolong its functional life to the fullest, thereby enhancing your property's security and beauty.
Weatherproofing Your Fence
Weatherproofing your fence is the most essential step to ensure it lasts and remains durable despite harsh environmental conditions. Industry experts say untreated wood fences will undergo rapid decay, with an average of 7-10 years, depending on climate exposure. Nevertheless, with the right weatherproofing methods applied, the lifespan can be boosted up to 15-20 years or more.
Sealants and Stains
One of the most efficient methods to cover your fence from moisture, UV rays, and heat and cold is to put on a good quality sealant or waterproof stain. Oil-based stains are quite effective because they penetrate deeper into the wood, providing better protection. Experts say that for optimal results, sealant should be reapplied every 2-3 years.
Use Pressure-Treated Wood
If you are going to build a new fence, choose pressure-treated wood as it not only lasts longer but also the treatment that it has gone through keeps it free from rotting, insects, and moisture damage. A recent study in the industry finds that fences made of pressure-treated wood can be up to 25 years if maintained regularly.
Install a Protective Top Cap
Rain and snow can accumulate on the horizontal parts of your fence, causing it to decay. Installing a protective cap on the top of the fence will guide water and thus reduce the area exposed to it.
Clean and Inspect Regularly
Cleaning the fence regularly helps to avoid the growth of mold, mildew, and dirt. A strong detergent and a power washer should be used to thoroughly clean the fence, especially after winter. An inspection will also enable you to identify and solve the problem of weak areas such as cracks or loose boards.
Add a Protective Barrier
Creating a natural barrier of shrubs or bushes around the fence is a good idea, but plants should not be too close because, otherwise, they will trap moisture which will rot the wood.
The rise in weatherproofing applications not only improves the fence's overall strength but also significantly lowers repair and replacement costs in the long run. With preventive measures and cutting-edge technologies, your fence will keep being strong, dependable, and beautiful as part of your property for many years.
Frequently Asked Questions (FAQ)
What are the materials required for constructing a DIY basketball court fence?
In order to construct your own basketball court fence, the very first thing you will need is to gather the most resistant materials, which will include concrete for the base, poles to support the structure, and either mesh or netting for the barrier. A rope could also be a good idea for adding some more tension and stability to your fence.
What is the best method to construct a DIY backyard basketball court fence so that it does not allow the ball to go over?
To keep the ball from going over the fence, besides a tall DIY backyard basketball court fence, using a backstop netting that is very tight is also very effective. Moreover, the mesh along the edges will prevent the ball from rolling out of the court.
What is the right way to put up a basketball court fence?
The right way to put up a basketball court fence is to first even the ground where the fence will be located. Use an anchoring kit to stabilize the poles and then attach the mesh or netting very tightly to form a strong barrier.
How can I ensure my DIY basketball court fence lasts long?
The longevity of your DIY basketball court fence is guaranteed when you select the right materials, which are also weatherproof, and the option of a concrete slab as a base is also considered. It will also help a lot if you carry out routine maintenance, such as clearing the area of garbage and reinforcing weak points, to keep the fence lasting.
Is it possible to use a DIY kit to build a fence around my basketball court?
Absolutely, several companies offer DIY kits tailored specifically for basketball court fences. These kits generally come with all the essential materials and detailed instructions, making installation not only easier but also quicker.
What is the most economical method to make a barrier around my outdoor basketball court?
Using treated wood poles and a durable mesh or netting as your fence is the most economical way to make a barrier around your outdoor basketball court. This combination is good in terms of both functionality and cost.
How tall should I construct my DIY basketball court fence?
Your DIY basketball court fence should be no less than 10 feet tall if you are serious about containing balls because it is intended to be a professional-level hoop. This height will ensure that the ball does not roll over the edge during play.
What is a step-by-step method to install a DIY basketball court fence?
The step-by-step method begins with 1) leveling the ground, 2) marking the boundaries, 3) putting up the poles, 4) fixing the mesh or netting, and finally 5) using an anchoring kit to make the structure firm to avoid it from falling.
How can I add a basketball backstop net to my DIY court design?
A backstop net can be easily added to your DIY court design by placing it behind the hoop. This addition will not only serve to catch stray balls but also keep them within bounds thus increasing the overall functionality of your court.
Recently Posted
-
Building a Security Fence: Your Guide to High-Security Solutions
February 5, 2026The security fence functions as the primary defense system of your commercial property, industrial site, and private estate becaus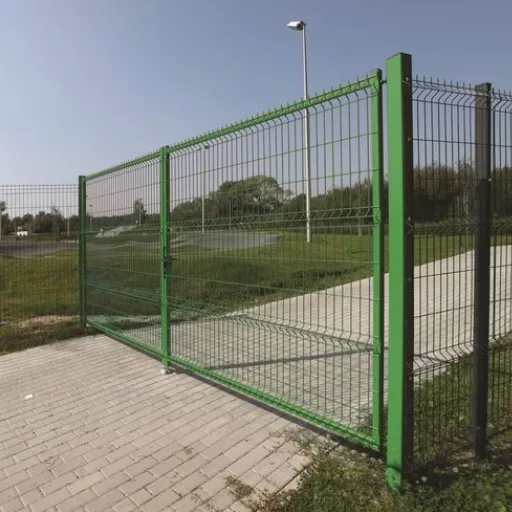 Read More
 -
How to Build a Security Fence: A Comprehensive Guide to Installing Chain Link Security Fences
February 4, 2026Constructing a security fence is an effective way to protect your property, define its boundaries, and enhance your privacy. The v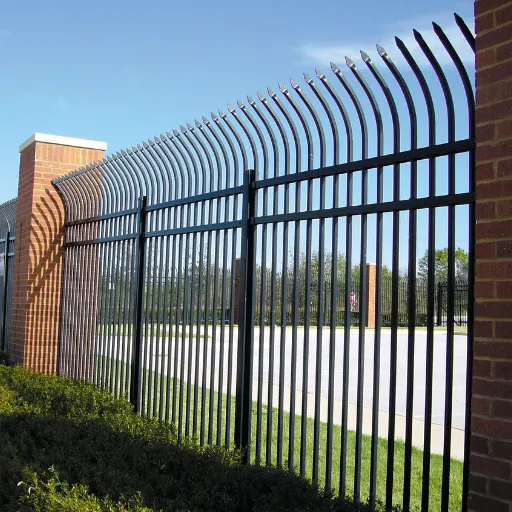 Read More
 -
Iron Yard Fence: The Ultimate Guide to Wrought Iron Fencing for Your Garden
February 3, 2026The design of a garden fence goes beyond establishing property borders because it serves two main purposes by enhancing the visual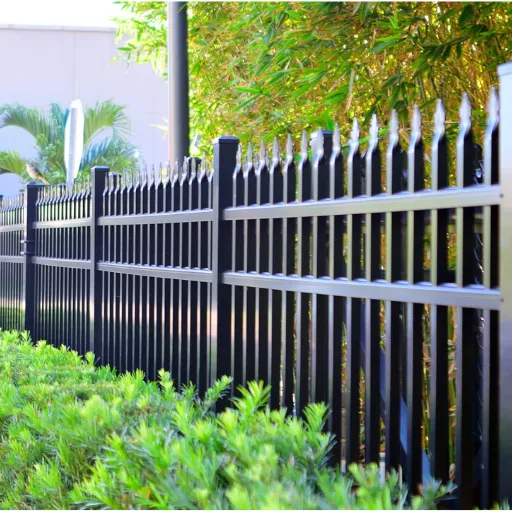 Read More
 -
Cast Iron Garden Fence: The Ultimate Guide to Durable and Decorative Garden Edging
February 2, 2026The cast iron garden fence functions as a boundary that creates an everlasting combination of practical use and aesthetic beauty t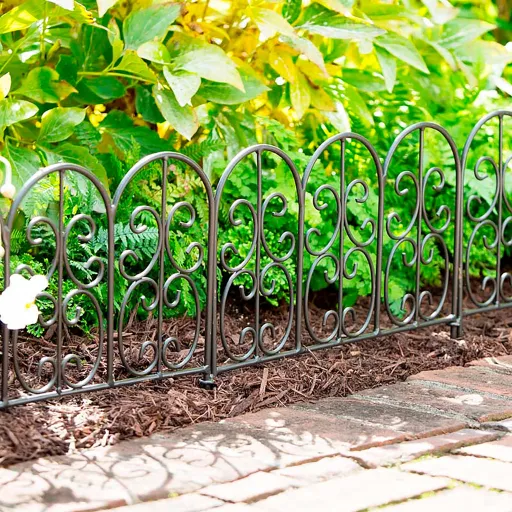 Read More

Contact Us
Recommended Products
-
 Durable Imitation Bamboo Fence for High-Traffic Public SpacesNegotiableMOQ: 50 Square Meters
 -
Customizable Imitation Bamboo Fence With On-Site Measurement ServiceNegotiableMOQ: 50 Square Meters
-
Modular Imitation Bamboo Fence Panels for Quick InstallationNegotiableMOQ: 50 Square Meters
-
Imitation Bamboo Privacy Fence With Reinforced Aluminum BaseNegotiableMOQ: 50 Square Meters
-
Commercial Grade Villa Fence for Real Estate Developments and Hotel Perimeter ApplicationsNegotiableMOQ: 10 Sets

-
Industrial Steel Grating Solutions for Oil and Gas Platforms, Compatible With Harsh ConditionsNegotiableMOQ: 10 Pieces
-
Basketball Court Fence 4M Height, Galvanized Steel Chain Link Mesh for Outdoor Sports Field PerimeterNegotiableMOQ: 50 Square Meters
-
Chain Link Basketball Court Fence Offering Anti-Rust Protection and Long-Term PerformanceNegotiableMOQ: 50 Square Meters
-
European Style Villa Fence Concrete Base Installation Courtyard Boundary WallNegotiableMOQ: 100 Square Meters
-
Galvanized Steel Villa Fence With Powder Coating for Superior Corrosion ResistanceNegotiableMOQ: 100 Square Meters
-
Powder-Coated Basketball Court Fencing With Weatherproof Finish for Long-Term Outdoor ApplicationNegotiableMOQ: 100 Square Meters
-
Powder Coated Wrought Iron Main Gate and Garden Fence for HousesNegotiableMOQ: 100 Square Meters
-
Elevate Your Garden With an Artistic Wrought Iron Garden Fence | Uniting Security & EleganceNegotiableMOQ: 100 Square Meters
-
Low-Maintenance Wrought Iron Garden Fence | Durable Powder-Coated Steel PicketsNegotiableMOQ: 100 Square Meters
-
Heavy-Duty Villa Fence: 10 Gauge Steel Construction With Powder Coating for DurabilityNegotiableMOQ: 10 Sets

-
Anti-Slip Steel Grating Panels for Enhanced Safety in Wet and Slippery Work AreasNegotiableMOQ: 10 Pieces
-
Steel Grating for Stair Treads and Catwalks in Commercial and Factory BuildingsNegotiableMOQ: 10 Pieces
-
High-Security Villa Fence With Lockable Gates and Weather-Resistant Finish for Home ProtectionNegotiableMOQ: 10 Sets
-
Galvanized Steel Basketball Enclosure Netting / Ball Containment System With Frame for Outdoor CourtsNegotiableMOQ: 50 Square Meters
-
Vinyl Coated Chain Link Fencing for Basketball, Pickleball & Tennis CourtsNegotiableMOQ: 500 Square Meters