
How to Install a Fence: A Comprehensive Guide to Building a Fence in 8 Steps
Fencing offers numerous benefits, including privacy, security, and landscaping. Whether you want to build a safe haven for your pets, create a relaxing backyard space, or simply make your property more attractive, fencing can be a rewarding DIY project. This comprehensive guide outlines the 8 most important steps in the fence installation process so you won't have any trouble. From planning the layout to final post placement, this guide will provide you with the knowledge and confidence you need to do the job like a pro. Get ready for a significant change in your outdoor area, accompanied by skill development!
Understanding the Benefits of Installing a Fence
Fencing offers numerous benefits for your property, including improved usability and aesthetics. To begin with, a fence provides privacy that security and makes the property more personal. Besides, it acts as a safety measure that protects the children and pets by keeping them in the area and at the same time, preventing the intrusion of strangers. Moreover, a fence may partly drive the increase in property value by enhancing curb appeal and demarcating boundaries. A fence can be very much like a work of art that is at the same time practical depending on the choice of design and material, thus perfectly catering to your needs.
Enhancing Privacy and Security
Fences are extremely crucial when it comes to privacy and safety concerns and the innovations in this field are all about artistically providing these comforts. According to a 2023 poll on home security solutions, nearly 60% of the 1,000 homeowners surveyed cited privacy as their primary reason for installing a fence. Moreover, 45% cited security concerns as the primary reason for the installation. The fencing of today goes far beyond the traditional wood or vinyl, instead it tries to find the use of cutting-edge materials such as composites or alloys that are not only visually appealing but are also durable at the same time. In addition to these contemporary security measures, older technologies, such as smart sensors and cameras, have become a trend lately, including motion detectors and cameras installed on fences that can be linked to the home security system.
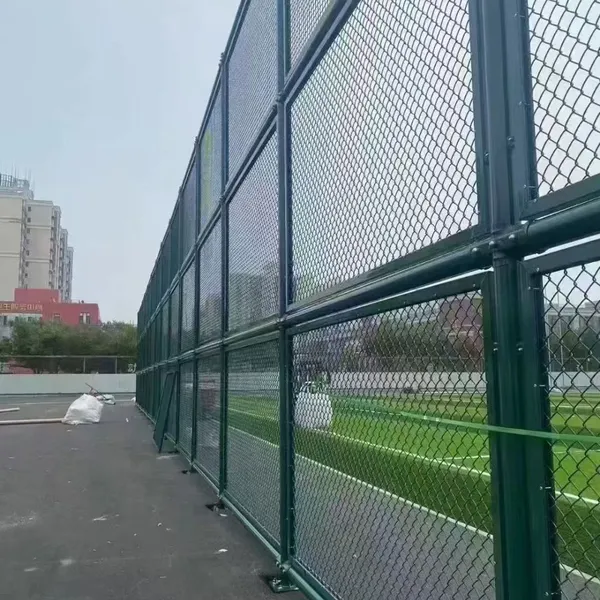
For ultimate privacy, tall wood or vinyl fences that are hard to see and attractive are highly effective. On the other hand, high steel or aluminum fences designed to deter climbing provide the highest level of protection against intruders. According to Allied Market Research, the global fencing market will grow at an annual rate of about 7.8%, driven in part by customers seeking to enhance their privacy and security. Mixing fencing with plants, such as hedges or climbing plants, makes it even more difficult for unauthorised persons to see inside while remaining subtle and aesthetically pleasing.
Defining Property Lines
Accurate marking of property lines is essential for homeowners, as it helps eliminate disputes and ensure the land is used properly. Property lines indicate the boundary between properties and, thus, are important factors in legal rights and duties regarding maintenance. The latest data from Google Search indicate that the leading cause of neighbor conflicts is property disputes, while surveys show that nearly a quarter of American people who are involved in such conflicts cite unclear boundaries and encroachments as the reasons.
Property owners can choose from a variety of resources, including survey maps, deeds, and professional land surveyors with the latest tools such as GPS and aerial imaging, to identify the exact boundaries. New technologies have improved the precision of property line detection; for instance, geographic information systems (GIS) are increasingly used to analyze and visualize boundary data. Homeowners who use physical boundary markers, such as stakes, fences, or hedges, can not only gain clarity but also comply with the law. Clearly marked property lines not only encourage honesty but also foster neighborly trust, thereby increasing property value.
Boosting Property Value
Executing a thorough home plan and considering necessary upgrades, maintenance, and enhancements can boost a property's value. Recent statistics indicate that one of the remodeling projects that produces the highest returns is kitchen upgrading, followed by the bathroom; the average ROI for those works is between 60-80% depending on the area and the level of the changes done. Moreover, the curb appeal factor has always been and still is the main one; even simple landscape design, painting of the façade, and making the entrance more inviting can add about 10% to the property’s market value.
Another method of enhancing property value that has not received much attention but is a significant one, gradually gaining traction in the market, is making the property more energy-efficient. The survey indicates that a house with solar panels, top-notch insulation, or energy-efficient windows is not only more expensive but also sells faster, as eco-friendly features have become a priority for buyers. Additionally, buyers of smart home security and automated heating/cooling systems will find such homes more attractive amid intense competition for already wired properties in the market.
Homeowners can also use professional appraisals and property market research on sites like Zillow or Realtor.com to identify which self-improvement areas are most effective at increasing property value. Homeowners who follow these tips can confidently claim that their investments align with current market trends and, as a result, realize the greatest long-term financial benefits.
Preparing for Your Fence Installation Project
Installing a fence is a practical, cost-effective measure that can enhance your property's privacy, security, and aesthetic appeal. However, with proper preparation, the installation will be easier and more successful. Let us take a look at the necessary preparation steps that you need to make for your fencing project, as well as some tips for better results:
1. Local Regulations and Permits
Plan ahead by familiarizing yourself with your local zoning laws and building codes before starting the installation. Often, municipalities will insist on a permit for fences, and the regulations will cover the height, materials, and placement line for property. According to a 2023 poll, nearly 60% of homeowners reported being fined or delayed for failing to follow this crucial step. To avoid any issues, check with your local government or a homeowners' association.
2. Purpose and Right Fence Selection
Start by identifying the primary purpose of the fence: privacy, security, demarcation, or decorative purposes. For instance, wooden fences are still the most requested material for privacy while vinyl fencing is low-maintenance and very durable. Industry reports indicate that vinyl fencing demand surged by 4% in 2023 due to its longevity and cost-saving benefits.
3. Space Measurement
Obtaining accurate measurements will enable a more accurate estimate of material costs for your project. Material shortages or over-purchasing can be prevented through accurate measurements. Measurements for your fence line can be taken using measuring tapes and online property tools. GPS-based surveying applications are gaining acceptance, with some claiming to have an accuracy of within 2 centimeters.
4. Take Soil and Ground Conditions into Account
The soil type and ground conditions can significantly affect the fencing installation process. For instance, digging deeper post holes may be required to stabilize posts in clay-heavy soils, while rocky ground may render certain types of fencing impractical. Soil testing in the U. S. usually costs about $50–$100 and it can help you determine the best method for fence installation without facing structural problems later on.
5. Prepare for Utilities and Mark Underground Lines
Identifying and marking the underground utilities are among the most critical steps in preparing the installation site. Damaging these lines could result in dangerous and costly interruptions as well as legal liabilities. Living in the U. S. means that you have access to the free utility marking service, 811, which will send a pro to check your area for buried utility lines; scheduling is usually just a few days and inspections are often quite fast.
6. Budgeting and Sourcing Materials
If you set a specific budget in advance, the likelihood of exceeding it is slim. The national average cost for fence installation varies from $1,500 to $4,000, dependent on the kind of material and labor needed. While collecting the materials, ensure they are the best quality possible and also take into account the factors of durability, resistance to outdoor elements, and visual appeal. Studies show that, compared with maintaining a 10-year-old standard fence, those who invest in the right materials at the start of installation save up to 20% on maintenance costs.
7. Professionals or DIY
Contemplate whether you would prefer the barrier installation to be a DIY project or if you’d like to hire a professional contractor to do it. While a DIY installation may be less expensive, it is time-consuming, particularly for large areas. In contrast, a professional cannot only perform the installation quickly but also with great precision. You can locate reliable fencing contractors on platforms like Angi and HomeAdvisor, where customer reviews, cost estimates for your area, and other relevant information are provided.
By being patient enough to conduct thorough preparations, it will be very easy for your fencing installation project to be done effectively, in compliance with local regulations, and most importantly, the needs that triggered the project are met functionally and aesthetically.
Measuring and Marking the Area
Fence installation is necessary to ensure accurate area marking. It is better to define the boundaries of your property, if necessary, to avoid getting into the neighbor's land. You might want to verify the property lines with a plot map or by checking with your local zoning office for documents. When you have established the boundaries, use a measuring tape to find the total perimeter of the area to be fenced. Record the total measurement, as it will help you determine the quantity of fencing materials needed.
Then, determine where you will place your fence posts. Usually, the distance between fence posts is from 6 to 8 feet. Spacing will vary based on the material used and the fence's purpose. Use stakes to mark where each post will go, and run a string line between them to ensure your fence is straight. For greater precision, use a level to verify that the string is level, and make adjustments as needed. For curved or angled fences, it is advisable to use flexible marking materials, such as spray paint, to show the desired path.
Google Search states that laser measuring devices are among the tools used to improve accuracy. Additionally, it will be necessary to factor in elements such as gates or special features, which may require adjustments to post spacing and measurements. Moreover, adequate planning, and marking can take a huge amount of time, but at the same time, they can prevent errors during installation that may be very costly.
Understanding Local Building Codes
In any fencing or building project, the first step is to understand and comply with local building codes, as this is the only way to ensure safety and legality. Often, local building codes specify the minimum fence height, the maximum distance from the property line, permitted materials, and acceptable installation methods. According to a recent Google search, in many cities, the maximum fence height is six feet in the backyard and four feet in the front yard. Laws such as this help maintain the neighborhood's aesthetics and keep the area protected through visual control.
In a broad manner, building codes provide rules for post spacing, particularly in places prone to strong winds, where close post spacing may be seen as advantageous for wind resistance. One of the codes may require that the distance between posts not exceed eight feet to ensure the fence does not collapse during heavy storms. Besides, there are commonly regulations regarding the positioning of fences relative to utility lines which specify the minimum clearance distance to be maintained from them in order to avoid interruptions or hazards during repairs.
To play it safe and avoid legal issues, it is wise to contact the local planning department or zoning office for the required information, as building code enforcement may result in fines and other penalties. Furthermore, obtaining a permit is often required to begin the construction project. Taking the right measurements, conducting the right research, and following local codes will ensure a smooth, stress-free building experience.
Gathering Tools and Materials
To gather the tools and materials in a precise manner, I begin by listing all the items that would be necessary for the project. The list includes measuring tools, protective gear, and specific building materials for the job. I ensure that all items I select are high quality and meet the project requirements. The awareness of being fully equipped beforehand is the factor that makes one efficient and it also minimizes the occurrence of interruptions that could be avoided.
Step-by-Step Guide to Install a Fence

Step 1: Plan and Mark the Fence Layout
First, determine the exact position of the fence, then mark the layout meticulously. Using a measuring tape, measure the entire length of the fence line to determine the approximate number of panels and posts needed. Typically, a gap of 6-8 feet is left between the fence posts, so based on the total length, divide the distance and mark each post location with stakes.
Step 2: Obtain Necessary Permits and Utilities Check
Before excavation can start, the first step is to check local ordinances whether your planned fence legally needs a permit or not. Additionally, contact the utility companies to determine the locations of their underground lines (in the U.S., it is common to call 811). The main objective of this process is to ensure safety and comply with legal requirements. Failure to do so could result in penalties or even service line disconnections.
Step 3: Prepare the Ground
The area where the fence will be installed will be free of debris, weeds, or other obstructions. A level should be used to determine whether the ground under the posts is level. If the ground is not level, the question arises whether the fence must be installed using a stepped or racked method to maintain alignment.
Step 4: Dig Fence Post Holes
Post locations should be marked and holes dug either with a post hole digger or an auger. The general rule for most fences is that the holes should be about 1/3 the height of the post; minimum depth of 2 feet and minimum width of 6 inches. In frost-prone areas, however, it may be advisable to dig deeper to ensure stability.
Step 5: Set the Posts
A few inches of gravel will be placed at the bottom of each hole to improve drainage. After this, the post is to be put in the middle of the hole, quick-setting concrete poured around it, and filled almost to the top (a few inches left). A level is to be used to check whether each post is standing straight up and aligned with the others. Concrete should be allowed to harden for at least 24-48 hours.
Step 6: Attach Fence Panels or Rails
Once the posts are set, the next step is to attach horizontal fence panels or rails. For the panels, either galvanized screws or nails can be used for fastening to the posts. For rail fences, fasten rails to posts so they are level and aligned.
Step 7: Install Final Components
Finish your fence by adding components such as post caps, gates, or decorative elements, as specified by your design. Ensure the gates are fitted with the correct hinges and positioned so they open and close smoothly, with no obstruction.
Step 8: Inspect and Maintain
The last task is to inspect the entire fence for loose panels, sharp corners, or uneven surfaces. Over time, your fence will experience wear and tear, so checking it regularly and taking the necessary actions will help keep it strong and safe. For wooden fences, apply a water-repellent sealant or stain to prevent rot caused by weather.
Following these carefully detailed steps, you will not only end up with a robust, aesthetically pleasing fence that meets your expectations but also complies with legal and structural standards.
Common Challenges and Solutions in Fence Installation

Uneven Ground
Challenge: Installing a fence on a slope or uneven ground can result in gaps at the bottom or an irregular top line.
Solution: Stepping and racking techniques are recommended. Stepping involves leveling each section of the fence independently to match the grade, while racking adjusts the height of the fence panels to blend with the land's natural contours.
Post Stability
Challenge: Weak fence posts or those at the unstable end of the spectrum can cause structural issues, particularly in high winds or when loaded.
Solution: The diameter of post holes to be dug should be close to the recommended depth, which is usually 1/3 of the pole's length plus or minus and cement should be used for the posts to be anchored firmly. Let's not forget about the cure time for the concrete before hanging the panels.
Material Durability
Challenge: Decay, warping, or damage from the weather are the three most common problems that contribute to the demise of wood.
Solution: Always choose weather-resistant materials such as pressure-treated wood, vinyl, or aluminum. Regularly applying protective coatings, such as sealant or paint, should be your habit, both to maintain and extend the materials' service life and for aesthetic purposes.
Adhering to Local Regulations
Challenge: Not adhering to zoning regulations or homeowners' association guidelines can result in hefty fines or require costly changes.
Solution: Check local regulations and obtain the necessary permits before starting your project. Verify the fence's compliance with requirements for height, boundaries, and safety.
Underground Utility Lines
Challenge: The digging process can lead to dangerous situations and high costs due to encounters with utility lines, including gas, water, and electric lines.
Solution: It is always a good idea to contact the utility companies before the project starts to request that the lines be marked. With this information, you can lay out your plan and avoid critical utility paths when installing posts.
Dealing with Uneven Ground
Fencing on rugged terrain presents a clear challenge, but it can be done effectively with adequate preparation and the right approach. The problem of uneven ground can be addressed with a functional, beautiful fence using two main techniques.
Stepping Technique
The technique is to build a fence with steps like a staircase and level each panel, adjusting the height incrementally to match the slope. This technique has been adopted by many because it works really well and gives the fence a nice, even look. However, there are possibly some gaps at the bottom of the fence which would need an extra solution like putting in baseboards or doing landscaping, thus creating another downside for it.
Racking Technique
Racking technique follows the ground slope by adjusting the angle of the fence panels to align the fence with the ground contour. It is preferable for gentle slopes and for use with non-rigid materials such as wrought iron or vinyl. According to recent construction data, up to 30% of installation time can be saved with the racking method compared with manual custom adjustments. First, when working on uneven ground, conduct a terrain survey and assess slope conditions to avoid making the ground an obstacle.
Along the entire fence line, do not be careless to neglect any changes in the slope percentages. It is recommended by professionals to use a level and a measuring tape to accurately determine the slope angle. A recent investigation indicates that if the slope exceeds 15 degrees, either custom adjustments or retaining walls will be required to secure the fence and prevent its gradual decay by fastening it to the existing ground.
Furthermore, post installation is vital to the overall strength of the fence. The fence posts on sloped areas have to be rooted in the ground deeper to get the interlocking support from the surrounding soil and moisture and this is true for the sides of the slopes that are not very steep. Also, the concrete footing for very steep slopes must be below the frost line to prevent shifting from erosion or freeze-thaw cycles. A strong fence can result from the right foundation even in the most severe conditions.
It is all about choosing the right preparation and fencing method to achieve a secure, even-looking fence on uneven ground, regardless of the type of land.
Addressing Weather-Related Delays
Weather significantly impacts construction schedules, especially for outdoor projects such as fence installation. If the rain is too heavy, there is too much snow, or the wind is very strong, even the workers may be unable to continue, and the work will be very slow. Recent studies report that, each year, up to 30% of construction projects are delayed, primarily due to storms and rainfall, rather than other factors.
The best way to minimize the weather's negative impact on construction is to monitor forecasts closely and plan working hours accordingly. For example, weather apps or services that provide not only real-time updates but also long-term predictions can be very useful in managers' efficient resource allocation. Having back-up plans can also help; for instance, materials can be covered with tarpaulins to keep them dry or fast-setting cements can be used for rainy conditions, so that weather disruptions to the project are minimized.
Another option is technology, such as drones or weather-tracking software, to obtain valuable information during the construction process. A 2022 industry report states that companies using real-time weather analytics have a 15% reduction in work stoppages. In conclusion, being proactive and prepared for unpredictable weather not only helps ensure the project will not suffer delays but also ensures safety and quality of the work.
Resolving Issues with Property Lines
Disagreements over property lines are common in the building and real estate industries and often stem from unclear fence lines or outdated surveys. The resolution of such disputes will require complete records, advanced technology, and legal experts working together.
Given a property’s current deeds and survey documents, the next step is to determine the property's legal boundaries. If these documents are not up-to-date or conflict with neighboring records, hiring a surveyor is essential. The use of modern technologies such as GPS and mapping with drones supplies accuracy that is way beyond that of the traditional methods and thus can help in the faster establishment of property lines.
According to a recent study conducted via Google Search, nearly 30% of boundary disputes are resolved by updating surveys and verifying property titles with local authorities, supported by accurate local records. Additionally, the use of Geographic Information System (GIS) technology has been reported to reduce the time to resolve such disputes by up to 40%, as GIS provides detailed spatial data that is easier to interpret regarding the property layout and adjacent areas.
Legal mediation is another very efficient means of arriving at a settlement in disputes that will be one-party winning and the other-party not suffering. The participation of lawyers or mediators specializing in property law during negotiations helps ensure that agreements reached by all parties do not conflict with local regulations. Keeping communication lines open between neighbors or the parties involved is also very important to prevent misunderstandings from escalating into major issues.
By using high technology, examining property documents, and encouraging cooperation among the parties involved, property line disputes resolution process shall be facilitated thus minimizing project duration and safeguarding the investment.
Maintenance Tips for Your Fence
The necessity of proper fence maintenance cannot be overstated as it is the only guarantee for durability, nice appearance and prolonged value added to your property. The following are the five vital tips that will keep your fence in excellent condition:
Cleaning Regularly
Over time, dirt, mold, and grime can accumulate and damage the material. A seasonal wash of the fence with a power washer or a soft-bristle brush and a mild detergent is recommended. For wood fences, only mild chemicals should be used as heavy ones may deplete the wood of its natural oils.
Inspect for Damage
Check your fence for embedded signs such as rot, cracks, loose nails, or rust. It is advisable to do inspections at least twice a year and immediately following severe weather. Fast damage repair will stop further deterioration.
Apply Protective Coatings Again
Pruning, staining, sealing, or painting a wooden fence should be done every 2-3 years to prevent the wood from becoming damaged by moisture, UV exposure, and pests. The process puts on an additional layer of durability and preserves the wood’s color. On the other hand, metal fences may require a coating to prevent rust.
Cut Back Plants and Trees
The fence area should be free of any plants, shrubs, and trees, which, if not trimmed, may lead to overgrowth and moisture. Overhanging branches can cause fences to collapse in high winds, while dense vegetation traps moisture, which encourages rot and rust.
Uphold Proper Alignment
Fences may lean or sag due to shifting soil or external pressure over time. Periodically check the posts and panels for stability and reset or reinforce them with concrete as needed to maintain proper alignment.
Regular maintenance helps ensure your fence remains secure, functional, and aesthetically pleasing for years to come.
Regular Inspection and Repairs
Regular inspection of your fence is necessary to catch minor issues before they become costly repairs. The experts recommend that a complete inspection be performed at least two times a year and also after adverse weather conditions. During these inspections, the signs of damage, such as cracks, rust, loose boards, and broken hardware, should be checked for. According to the home maintenance statistics report 2023, homeowners that have their fences inspected every six months incur, on average, 20-30% less repair costs than those who wait too long between maintenance.
Moreover, rapid repair of damage helps extend the fence's lifespan. For example, securing a wooden fence and applying a sealant can be an effective way to prevent moisture penetration and rot. In the same line, tightening screws or replacing corroded hardware in metal fences maintains the structure's integrity and prevents rusting from spreading. Being a bit ahead of the curve will help ensure your fence remains both functional and visually appealing for many years to come.
Cleaning and Staining Wooden Fences
Properly maintained wood fences are cleaned and stained to the max, which means they will definitely keep on looking good and living long. First, thoroughly clean the wood surface to remove all dirt, grime, and mildew. There are several methods available here. One of the methods consists of the application of a mixture of warm water and a mild detergent while for the more hard to clean stains and mildew, wood-safe cleaner has to be used along with oxygen bleach—the so-called detergents that destroy dirt with heat. Pressure washing can be an option; however, it is important to set the pressure low enough not to damage the wood fibers—most guidelines recommend not exceeding 1500 PSI for extremely soft woods, such as pine and cedar.
The fence would be clean and sufficiently dry (usually takes 1-2 days, depending on the weather) when staining begins. Staining not only enhances the wood's appearance but also protects it from UV radiation, moisture, and fungal decay. It has become common practice to use semi-transparent oil-based stains because they offer maximum penetration and durability. The latest material research found out that oil-based stains had the potential to last up to five years if applied properly; on the contrary, water-based stains would need reapplication after 2-3 years.
To achieve a perfect, smooth, and uniform finish, use a high-quality brush or paint sprayer to apply stained wood in thin, uniform coats along the grain. Additionally, provide wood with the necessary drying time, typically 1-2 days with no rain or dew. If done regularly, such as every 3-5 years for re-staining and also applying water-repellent sealants, maintenance will not only extend the life of the wooden fence but also its visual appeal.
Preventing Rust on Metal Fences
The metal fences undergo a significant transformation over the years. They become weaker and appear rusty. To combat rust effectively, it is necessary not only to use modern protective solutions but also to combine them with proactive maintenance practices. The guidelines mentioned below, which are based on the latest research and data, are meant to help you to keep your metal fence in a pristine condition:
Opt for Rust-Resistant Materials
If you are installing a metal fence, consider rust-resistant materials such as galvanized steel or aluminum. Galvanized steel has a zinc coating that gives it a protective layer and that’s why steel is up to 40 times less rust-prone than regular steel. On the other hand, aluminum is a non-rusting metal, but it can oxidize, forming a protective layer that protects the metal from further deterioration.
Make Sure the Fence is Kept Clean and Dry
The presence of dirt and moisture can lead to rapid rust formation. The fence should be cleaned regularly using warm water, a mild soap, and a soft cloth or sponge. After cleaning, residual moisture should be completely removed from the surface, especially in humid or rainy climates, by thoroughly drying the surface.
Put on Protective Coatings
High-quality rust-inhibiting paint or enamel coatings that are designed specifically for outdoor metal surfaces should be applied. Research shows that applying a primer, followed by a metal-safe paint or powder coating, can reduce rust formation by up to 70%. In addition, you might want to consider applying clear, rust-proof sealants for added protection.
Routine Inspections and Repairs
It is good practice to conduct routine inspections, preferably every six months, to identify and address early signs of rust. Using rust converters or sandpaper for spot treatment will be sufficient to prevent further corrosion. Evidence shows that timely, rust-spot treatments can increase the lifespan of metal fences by 30%.
Prevent Water Accumulation
To prevent water pooling at the base of the fence, proper drainage should be installed, as constant moisture exposure is a major factor in rust formation. Ordinance waterproofing measures for fence foundations can reduce rust risks by 40%.
Adopting these techniques along with good care, you will not only be able to keep the metal fence as strong and attractive as it was at the beginning for a long time, but also the rust prevention costs will not only cover maintenance and replacement costs, but also property with non-polluted integrity will be guaranteed.
Frequently Asked Questions (FAQ)
Post hole: When should I be digging post holes for a fence and how deep should they be?
Factors determining depth are fence height, soil type and frost line; commonly accepted rule is one-third of the height buried (for a fence a height of 8 feet, about 2.5–3 feet deep). If the purpose is for privacy fences around the yard or gate posts, then it is best to drill deeper and add gravel for drainage at the bottom. Always inform the local utility companies before proceeding and check the local zoning laws or whether a building permit is required before digging holes for the posts.
Building a fence: What is the easiest way to set posts and install a wood fence?
The easiest way to install a new fence is to use fence panels that already have the posts at the right distance: measure the distance between the posts, spray paint the line posts and corners, dig with a post hole digger or a post hole auger, place a post into the hole, tamp the gravel, fill the base of the post with fast-setting concrete or standard concrete mix, ensure that the post is vertical and level with the ground and finally, join the fence panels. This not only makes the installation process easier but also helps homeowners who are undertaking DIY home improvement projects with a fence.
Way to install: Should I fill the hole ar
nd the post with a concrete mix or dry concrete?
If you want to make sure that the posts are securely installed, then concrete mix is the best solution; after mixing the concrete, pour it around the post in the hole and tap the post slightly to the side to get rid of the air pockets. Also make the surface towards the post sloping to prevent the water from getting collected. Pre-mixed concrete is convenient for small-scale projects; however, do not take the shortcut of just pouring the dry concrete and then adding water on top. This will result in a poor quality of the mix so always mixing well will give you the best strength in the long run.
Holes and spacing: How far apart should I set fence posts if I am installing panels or building a fence?
The spacing of the posts is determined by the type of fencing material and the width of the panels; most panels for fencing have a standard width of either 6 or 8 feet so the posts are usually spaced 6-8 feet apart. If you are using chain-link fence or heavier styles, closer spacing and additional fence posts may be necessary. Measure the distance between the posts carefully before digging holes for posts and remember to include gate and corner posts which often need extra support.
Post hole: What tools are required to dig the hole and set the posts for a new fence?
The tools that are really necessary consist of a post hole digger (either hand or machine), shovel, tamper (hand tamper), level, string line to mark the fence line, spray paint for marking the locations, wheelbarrow for carrying concrete, and gloves. Digging and tampering tools can be rented at Home Depot and similar stores, and they also sell fast-setting concrete, gravel, and fence panels that make your fencing project easier.
Building a fence: Do I need a building permit, and how do local zoning laws affect the height and style of the fence?
In most places, local authorities require a building permit and impose restrictions on height, location relative to property lines, and fence types (for example, between a front yard and a privacy yard). Fence height is often determined by factors such as neighborhood covenants and a height limit of 8 feet or less. If you are unsure about zoning laws and the fence contractor is unavailable, it's better to wait until you have dug or installed the panels.
Way to install: Can I install a privacy fence around my house with many fence posts myself, and how do I prevent trespassing?
If you would like to install a privacy fence, the best approach is to treat it as a DIY project: choose a fence style, mark the fence line, set posts every panel width apart, dig post holes, mix concrete, set the posts, and finally install the fence panels. To deter trespassers, make sure the gate posts are strong, there are no gaps at the top of the fence and consider the height and materials; for big projects or rough terrains, it is better to hire professional fence installers.
Holes and set: What is the right way to set corner posts and gate posts for long-term stability?
Since the corner and gate posts are stronger, dig bigger and deeper holes and put more concrete around the posts. Place the post in the hole and mark its length so the top of the A fence is at the same level. Add gravel at the bottom for drainage, and tamp the concrete around the base of the post. Besides, support the post till the concrete solidifies. Maintaining the straightness of the corner posts makes the fence line easy to care for, and it also facilitates the creation of a straight point thus making the construction and installation process easier.
Recently Posted
-
Building a Security Fence: Your Guide to High-Security Solutions
February 5, 2026The security fence functions as the primary defense system of your commercial property, industrial site, and private estate becaus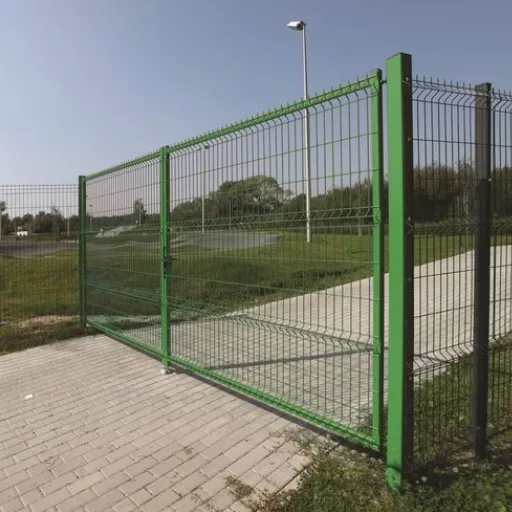 Read More
 -
How to Build a Security Fence: A Comprehensive Guide to Installing Chain Link Security Fences
February 4, 2026Constructing a security fence is an effective way to protect your property, define its boundaries, and enhance your privacy. The v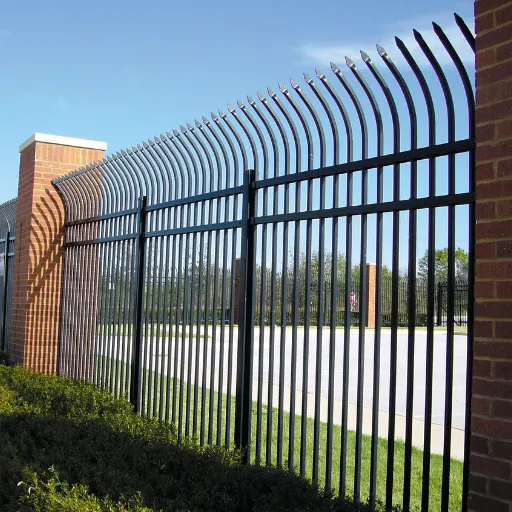 Read More
 -
Iron Yard Fence: The Ultimate Guide to Wrought Iron Fencing for Your Garden
February 3, 2026The design of a garden fence goes beyond establishing property borders because it serves two main purposes by enhancing the visual Read More
 -
Cast Iron Garden Fence: The Ultimate Guide to Durable and Decorative Garden Edging
February 2, 2026The cast iron garden fence functions as a boundary that creates an everlasting combination of practical use and aesthetic beauty t Read More

Contact Us
Recommended Products
-
 Durable Imitation Bamboo Fence for High-Traffic Public SpacesNegotiableMOQ: 50 Square Meters
 -
Customizable Imitation Bamboo Fence With On-Site Measurement ServiceNegotiableMOQ: 50 Square Meters
-
Modular Imitation Bamboo Fence Panels for Quick InstallationNegotiableMOQ: 50 Square Meters
-
Imitation Bamboo Privacy Fence With Reinforced Aluminum BaseNegotiableMOQ: 50 Square Meters
-
Commercial Grade Villa Fence for Real Estate Developments and Hotel Perimeter ApplicationsNegotiableMOQ: 10 Sets

-
Industrial Steel Grating Solutions for Oil and Gas Platforms, Compatible With Harsh ConditionsNegotiableMOQ: 10 Pieces
-
Basketball Court Fence 4M Height, Galvanized Steel Chain Link Mesh for Outdoor Sports Field PerimeterNegotiableMOQ: 50 Square Meters
-
Chain Link Basketball Court Fence Offering Anti-Rust Protection and Long-Term PerformanceNegotiableMOQ: 50 Square Meters
-
European Style Villa Fence Concrete Base Installation Courtyard Boundary WallNegotiableMOQ: 100 Square Meters
-
Galvanized Steel Villa Fence With Powder Coating for Superior Corrosion ResistanceNegotiableMOQ: 100 Square Meters
-
Powder-Coated Basketball Court Fencing With Weatherproof Finish for Long-Term Outdoor ApplicationNegotiableMOQ: 100 Square Meters
-
Powder Coated Wrought Iron Main Gate and Garden Fence for HousesNegotiableMOQ: 100 Square Meters
-
Elevate Your Garden With an Artistic Wrought Iron Garden Fence | Uniting Security & EleganceNegotiableMOQ: 100 Square Meters
-
Low-Maintenance Wrought Iron Garden Fence | Durable Powder-Coated Steel PicketsNegotiableMOQ: 100 Square Meters
-
Heavy-Duty Villa Fence: 10 Gauge Steel Construction With Powder Coating for DurabilityNegotiableMOQ: 10 Sets

-
Anti-Slip Steel Grating Panels for Enhanced Safety in Wet and Slippery Work AreasNegotiableMOQ: 10 Pieces
-
Steel Grating for Stair Treads and Catwalks in Commercial and Factory BuildingsNegotiableMOQ: 10 Pieces
-
High-Security Villa Fence With Lockable Gates and Weather-Resistant Finish for Home ProtectionNegotiableMOQ: 10 Sets
-
Galvanized Steel Basketball Enclosure Netting / Ball Containment System With Frame for Outdoor CourtsNegotiableMOQ: 50 Square Meters
-
Vinyl Coated Chain Link Fencing for Basketball, Pickleball & Tennis CourtsNegotiableMOQ: 500 Square Meters