
How to Repair a Chain Link Fence: A Comprehensive Guide
If you want a fence made of chain links to last long, look good and work well, then it is crucial to maintain its integrity. A chain link fence is a solution that can be used for various purposes in the homeowner and business sectors, e.g., securing a property's perimeter, protecting pets, or providing an extra layer of privacy. However, over time, exposure to bad weather, accidental strikes, and constant use can lead to problems such as reticulation, dropping, or damaged sections. This all-inclusive manual will give you a step-by-step approach to identifying everyday issues, choosing the right tools and materials, and using the repair techniques that work best. At the conclusion of this article, you will have acquired the know-how and assurance necessary to bring your chain link fence back to its best condition, regardless of how serious the damage is. Find more info now.
Introduction to Chain Link Fence Maintenance
A chain link fence necessitates maintenance comprising of performing checks regularly, cleaning it and fixing the minor problems immediately to stop the bigger ones from happening. Start with the daily inspections for rust, loose fittings, or parts that need to be changed. The fence should be washed from time to time with plain water and a mild soap solution to get rid off the dirt and other particles which are the cause of the rusting. For repairs, use simple tools like pliers and wrenches to replace broken links and tighten loose hardware. The fence's quality can be improved by applying a rust-resistant coating. If these practices are followed, the fence will remain durable and serve its purpose for many years.
Importance of Maintaining Your Chain Link Fence
If you want a fence that functions well, is safe, and lasts a long time, you must maintain it properly. Of course, if you neglect the fence and do not perform regular maintenance, it will eventually cost you more in repairs and replacements. Below are five major advantages of maintaining your chain link fence:
Enhanced Durability
Regular maintenance, including inspections and quick repairs, prevents minor problems, such as rust or loose parts, from becoming major, expensive issues. When proper care is applied, chain link fences can last 20-30 years or even more, depending on the environmental conditions where they are and light care.
Improved Security
A well-maintained fence actually provides a safe boundary for the property, thereby discouraging unauthorized entry. Fixing holes, broken parts, and the like immediately strengthens the fence's protective function over your area.
Aesthetic Appeal
The fence's appearance is preserved through regular cleaning and the application of protective coatings, such as rust-resistant paint. A fence that is in good condition not only looks good in itself but also makes the whole property more attractive and hence, increases its worth.
Cost Efficiency
Regular preventive maintenance will reduce the need for extensive repairs or full fence replacement. Regular small maintenance investments will ultimately save you money, since the cost of repairs is much lower than the cost of reconstruction.
Compliance with Regulations
Keeping the fence in good condition is mandatory for commercial properties or areas with strict community standards to be in compliance with safety and aesthetics regulations. A neglected fence could lead to fines or the need for urgent, expensive repairs to comply with local laws.
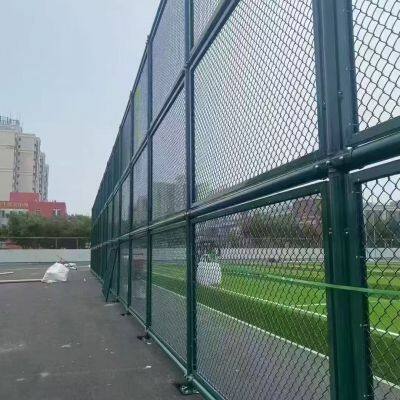
Identifying Common Issues with Chain Link Fences
Chain link fences are perfect and flexible, but they have to suffer several common problems, which in the end, will lead to their weakening and loss of functionality. Following industry standards and modern maintenance guidelines, it is essential to address the issues above immediately to ensure the fence lasts longer. Here are the most common problems that one has to encounter with chain link fences:
Rust and Corrosion
Rust will form on the fence due to moisture in the environment, especially in areas with extreme humidity or frequent rain. Zinc-coated or galvanized chain link fences are mainly designed to resist corrosion, but over time the protective layers can wear down, allowing rust to form. The studies show that if nothing is done, untreated rust can reduce the fence's strength by 30-50% within a few years. One of the most essential preventive methods is the regular application of rust-resistant sealants and carrying out of inspections for the early signs of corrosion.
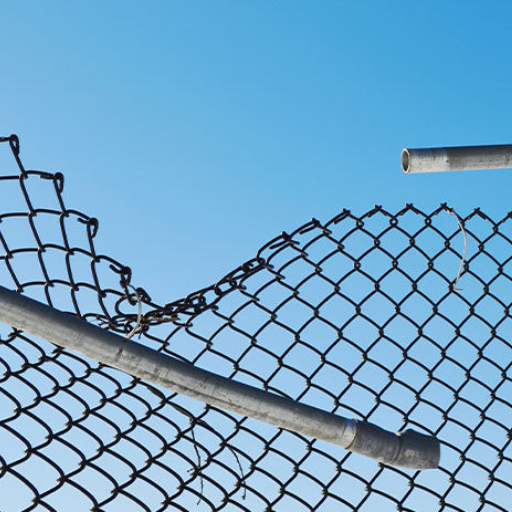
Damaged or Sagging Fabric
Impacts from physical activities, such as strong winds, falling debris, or even vandalism, can damage the mesh fabric of chain-link fences, causing sagging or torn areas. The data indicates that damaged fence fabric decreases security and stability by 20-40%. The remedies of tightening mechanisms and replacing affected panels are musts in order to keep the fence functioning properly.
Post Instability
Post instability is one of the main reasons for the fence losing its durability because the fence posts are the primary support system and their stability is significant for the overall durability of the wall. The causes of post-instability include soil erosion, improper installation, and long-term ground shifting. One of the engineering assessments states that weak or loose posts can reduce overall fence efficiency by 50%. The use of reinforced concrete footings and performing soil stability tests at the time of installation can help overcome this problem.
Overgrowth of Vegetation
Vegetation growth (e.g., vines, weeds, or tree branches) can exert pressure on the fence, leading to rapid wear and tear. Research done has shown that dense vegetation can be a reason for up to a 15% reduction in the longevity of chain link fences due to mechanical stress and moisture accumulation. Regular trimming and herbicide use are effective methods for controlling overgrowth and extending the fence's lifespan.
Bent or Misaligned Top Rails
The top rail is usually the one that receives the most physical stress, for instance, accidental impacts from vehicles or equipment. Bending or misalignment of the top rails will weaken the fence, creating openings for further damage or gaps. The professionals suggest heavy-gauge steel for high-traffic areas and periodic inspection of the rails to ensure proper alignment.
All these issues have a quantifiable impact on the performance of chain-link fencing. It is vital to address the mentioned concerns with methodical maintenance practices, current material advancements, and data, since this is the only way to preserve the functional and aesthetic qualities of chain-link fences.
Signs of Damage in Your Chain Link Fence
The process of finding damage in a chain link fence is fundamental to keep the wall strong and working properly. Common damage signs include rust or corrosion on the fence's metal parts, which reduces the fence's overall strength. Recent studies show that corrosion is usually more rapid in humid places or where there is a lot of salt, like coastal areas, so fences there can break down 30% faster than in dry spots.
The next thing is that bent or unaligned rails can be considered as another strong sign of damage. Misalignment causes most of these problems, and it is usually caused by heavy impacts, for example, coming into contact with heavy machines or vehicles. Misalignment can increase the structure's instability and may even reduce the fence's load-bearing capacity by 20% if rail misalignment is not adequately addressed; therefore, the risk of failure during extreme weather conditions is increased.
Apart from that, damaged or sagging mesh is also a common problem, usually caused by the material aging or being subjected to external stress. It has been reported that sagging may cause openings in the fence, resulting in a 15% or more reduction in effectiveness against intruders, especially in residential or commercial applications.
Last but not least, loose or missing tension bars and hardware are often forgotten but they contribute greatly to the performance of the fence. A fence without proper tension is flimsy and can break under substantial impacts.
The inspection of a fence for these issues should be done regularly, and fixing them with high-quality materials at the same time as replacing the materials is very important. Applying protective coatings, properly installing parts, and other measures can extend a fence's lifespan by 10-15 years, in line with industry standards and modern research.
Common Problems: Bent Rails and Damaged Sections
The very common problems of bent and broken fence parts frequently lead to a loss of both the structural strength and the visual attractiveness of the fence. Usually, these issues are the result of a combination of different factors like nature, human intervention, or improper installation. Below is a comprehensive enumeration of five main reasons and their contributing factors:
High Wind Pressure
Wind conditions can really affect the position of the fence rails over time, especially on unbraced ones. Research indicates that high winds of 30-40 mph put significant stress on fences, bending them and causing them to become misaligned.
Impact From Heavy Objects
Heavy machinery, vehicles, and falling tree branches are typical causes of fence section breakage or denting. Repair records indicate that such incidents account for up to 25% of all residential fence damage.
Corrosion and Material Degradation
If a barrier does not have the right kind of coating, then metal ones will surely rust while wooden ones will disintegrate from water. Rusting can greatly weaken the supporting parts of a fence, ultimately leading to sagging rails.
Improper Installation Techniques
Poorly spaced posts or poorly secured rails can cause fences to shift even under a small force. According to recent field studies, improperly tensioned fences fail 40% faster than properly tensioned ones.
Thermal Expansion and Contraction
Hot and cold weather causes metals and PVC to alter their sizes, thus, putting more strain on their joints and connections. Eventually, this might result in the warping or separation of the rails and sections.
By spotting these problems and taking action quickly, fence owners can avoid further damage and keep a secure, durable structure.
Assessing the Condition of the Fence Fabric
The condition of the fence fabric is a very important factor in maintaining the fencing's sturdiness and proper operation. Usually, the fence fabric is made up of chain link, welded wire, or ornamental steel, and they all face environmental stressors constantly, like getting wet from rain, physical impacts, and getting worn away naturally over the years. Repairing or replacing fabric can be facilitated by a systematic assessment that identifies areas of the fence fabric that need urgent attention. The following are factors that require primary focus:
Rust and Corrosion: The authority of rust to quicken the decay of metal fence fabrics is immense and this is more so in the case of metal fabrics in the coastal areas or places where there is high humidity. Recent research has reported that, ten years down the line, corrosion might have reduced a metal's tensile strength by about 30% if it is not treated. So, check for rust colors —reddish or brownish —and pitting. The performance of galvanized and powder-coated materials is comparatively better in resisting such bad effects.
Tensile Hardness Testing: The fabric's tensile strength may decrease over time due to repeated stress. The process of aerial strength testing can uncover parts that are weakened and likely to break under load. If a fence is designed to withstand tensile loads of 1,200 pounds, for example, it can still fail very quickly in high winds or under impact.
Warping or Deformation: The visible, warped or deformed fence fabric usually indicates physical stresses, such as impacts from fallen leaves, branches, etc. The overall security of the fence can be compromised if the chain links are bent.
Coating Deterioration: The first line of defense against environmental damage is provided by protective coatings, such as vinyl or galvanization. Peeling, cracking or damage to these coatings are signs that the inner material will be exposed and the degradation will be faster.
Attachments and Fasteners: The ties, fasteners or clips holding the fence fabric to the posts and rails need to be inspected very thoroughly for their condition. Weakening or absence of attachments can lead to loss of stability, which is then followed by the formation of sagging areas of the fence.
Periodic inspection is a must for fence owners to extend the life of their fence. A combination of visual assessments and measurable tests will be of help in this case. Furthermore, modern technologies such as epoxy-based coatings and weather-resistant alloys can significantly enhance durability and reduce maintenance requirements. To maintain a strong fencing system, repairs and replacements must be carried out in accordance with the prevailing local safety standards and building codes.
Necessary Tools and Materials for Repairing a Chain Link Fence

Having the proper tools and materials is a must for repairing a chain link fence properly and ensuring long-lasting performance. Below is a thorough description of the items necessary for the frequent chain link fence repairs:
Tools
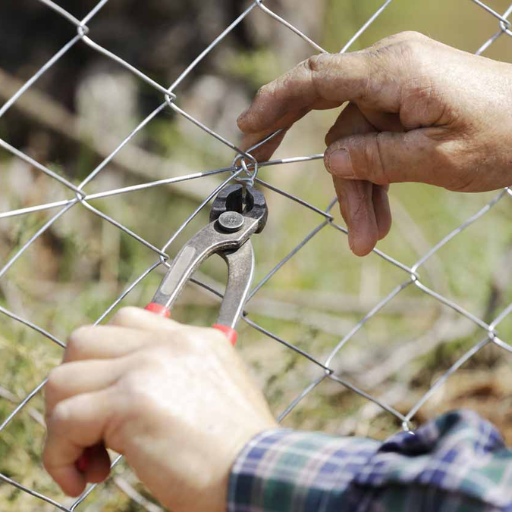
Pliers - These are the tools needed for twisting up and tightening wire ties or removing spoiled sections of the fence.
Wrench Set - This is a set of tools for tightening or loosening bolts connecting the fence components.
Wire Cutters - These are the tools you can't do without if you need to cut chain link fabric and metal wires to the desired length.
Fence Stretcher - This is the jigsaw in the toolbox when it comes to removing the sag or damage off the chain link fabric and making it nice and tight. It is a must-have tool if your chain link has a saggy part or a damaged section.
Post Hole Digger - This digging tool is a must-have for setting new posts in the ground when you repair or replace a damaged section.
Hammer/Mallet - This is the tool for tightening tension bands, caps, and post fittings.
Measuring Tape - It is the tool that provides accuracy when replacing sections, cutting materials, or installing new components.
Level Tool - This tool provides the vertical alignment of posts and other structural elements to keep them stable.
Materials
Replacement Chain Link Fabric - Available in different gauges and coatings (usually galvanized or vinyl-coated for corrosion resistance, which is the most common). Pick a material that complements your current fence.
Repair Brackets and Tension Bands - These tools help hold and support connections when the structure's strength is reduced.
Fence Posts - If the posts are damaged, replacement posts made from galvanized steel or very tough alloys should be considered.
Tie Wires - The wires used to tie back the chain link fabric to the fence frame.
Concrete Mix - The best for setting posts back into the ground; a quick-mix is the choice for a faster installation.
Protective Coatings or Spray - Epoxy- or polymer-based sprays are best, as they can protect the areas that have been repaired from rust and other environmental factors.
Bolts, Nuts, and Screws - Do not forget to have the exact specifications as your original fence so that they can be installed and repaired easily.
Rust-Resistant Paint (Optional) - After the repairs, a coat of paint will not only make the fence more durable but also very attractive.
Additional Details
Fence Fabric Gauges - Generally, chain link fences come in gauges ranging from 6 (thickest) to 11.5 (thinnest). If the area is subjected to extreme weather, thicker gauges are definitely recommended for high durability.
Tool Durability - Choose professional-grade tools for better precision and a longer service life. For instance, diamond-coated wire cutters are perfect for cutting heavier-gauge materials, as they are very sharp and precise.
Keeping all these tools and materials readily available is not only going to make the repair process easier but will also ensure the end product maintains the same high standards of safety and durability. For the best possible results, it is always a good idea to consult the manufacturer's guidelines or the specific installation manual for your chain link fence model.
Essential Tools for Chain Link Fence Repairs
The right tools are a must when dealing with chain link fence repairs, as they ensure efficient, precise, and long-lasting repairs. From the most recent practical knowledge, the following tools are listed as the most necessary:
Pliers (Standard and Locking)
Pliers are the most useful tools for the three primary wire-working operations: gripping, bending, and securing. In the case of chain link fences, it is suggested to use locking pliers with a jaw span of at least 2 inches, as it will provide the necessary grip on the tension bands and wire ties during changes or setting up.
Wire Cutters or Bolt Cutters
When cutting the damaged wire or taking down the old fencing, one is usually compelled to use heavy-duty wire cutters or even bolt cutters. Industry standards say that a 24-inch or greater cutting leverage allows you to apply the force required to handle thick-gauge chain-link materials effortlessly.
Tensioning Tools
If you want to stretch fencing sections back to their original tautness, a chain or fence stretcher is required. Modern-day tensioning tools, which feature a quick-release mechanism and high-grade alloy components, are engineered to withstand 1,500 pounds of tension without risk.
Socket Wrenches
Socket wrenches in standard 5/16-inch and 7/16-inch sizes are most commonly used to loosen and tighten hex bolts and screws on the frame and fittings of chain link fences. They ensure exact torque application, thus minimizing the risk of over-tightening or damage.
Post Hole Diggers
A post hole digger is required when damaged fence posts are to be replaced. The ground holes should be prepared promptly. The digging blade should be no less than 6 inches in diameter really, to fit the standard chain link post sizes.
Protective Equipment
Safety Gloves: Cut-resistant gloves with high dexterity serve as a barrier between your hands and the sharp wire edges. Gloves that have been tested and received an ANSI Cut Level A4 or higher rating are the most desirable.
Safety Glasses: To protect your eyes from the barrier created by blurred vision and flying debris while cutting or tensioning, OSHA-approved polycarbonate safety glasses with an anti-fog coating are highly recommended.
Replacement Material
Apart from the tools, do not forget to arrange the replacement materials such as galvanized steel wire (12.5 gauge or thicker for durability) and tension bands. Studies have found that galvanized materials can last up to 25 years due to their corrosion resistance.
Measuring Tape and Marking Equipment
A durable measuring tape with a minimum length of 25 feet is a must-have for measuring the fence sections that need repair. During cutting and alignment, use chalk or paint pens to mark.
Making sure you have all the tools and materials mentioned above will not only make the repair process quick but also safe. Recent surveys show that professional repairs with high-quality tools and proper methodology can extend the lifespan of chain link fences by more than 10 years, underscoring the importance of proper preparation. Always refer to specific product manuals for compatibility and maintenance instructions to guarantee optimal performance.
Materials Needed for Fixing a Chain Link Fence
During chain link fence repair, it is essential to have the proper materials and tools in place to achieve a durable, functioning fence. Below is a list detailing the materials that are usually required along their purposes:
Replacement Chain Link Fabric
Purpose: To substitute damaged or highly corroded sections of the fence.
Details: Just like the existing fence, make sure the fabric gauge is the same. Standardised gauges range from 6 to 11.5, with the heavier ones being more durable. Most fences seem to have either galvanized steel or vinyl-coated wire fabric which forms a layer of rust resistance.
Fence Ties/Wire Ties
Purpose: To attach the chain link fabric to the framework of the fence, which consists of top rails and line posts.
Details: They are generally made from either aluminum or galvanized steel so that they don’t corrode. Depending on the size of your fence section, you may need 20-30 ties per panel.
Tension Bars
Purpose: To share tension uniformly over the chain link fabric and fix it to end, corner, or gate posts.
Details: 3/16 inch thick, and the height of the fence is a standard size. Bars should be made of galvanized steel to prevent rust.
Tension Bands
Purpose: To securely fasten the fabric to the tension bar and connect it to the posts.
Details: Made to match the size of the end or corner posts, which usually have diameters from 1 ⅞ inches up to 3 inches. Depending on the height of the fence, you will need 3-10 bands per post.
Fence Posts
Purpose: To remove bent or ruined line, corner, or terminal posts that cause the fence to lose its strength.
Details: Opt for galvanized steel posts in the correct dimensions for your fence's height. For instance, poles under 6 feet tall usually have 1 ⅝-inch line posts.
Top Rail Pipes
Purpose: To take away bent or broken top rails that keep the chain link fabric straight and sturdy.
Details: 1 ⅜-inch diameter is the standard pipe size for residential fences, and their length is 10 feet or more.
Tools Required
Fence Pliers: To cut and shape wire.
Wire Cutters: For ties and fabric trimming.
Post Hole Digger: To dig for posts to be replaced.
Socket Wrench: To fasten tension as well as brace bands.
Level: To check the vertical positioning of posts.
The repair process has been simplified nad modernized in terms of techniques and materials in recent years. The lifetime of vinyl-coated chain link fabric, for example, may be as high as 15 years compared with the previously used galvanized fabric, which means that time and money spent on maintenance would be less. Always use materials that meet ASTM (American Society for Testing and Materials) standards to ensure the longevity and reliability of repairs. The right material selection and preparation beforehand will greatly improve performance, optimize repair efficiency, and prolong fence life.
Step-by-Step Instructions to Repair a Chain Link Fence
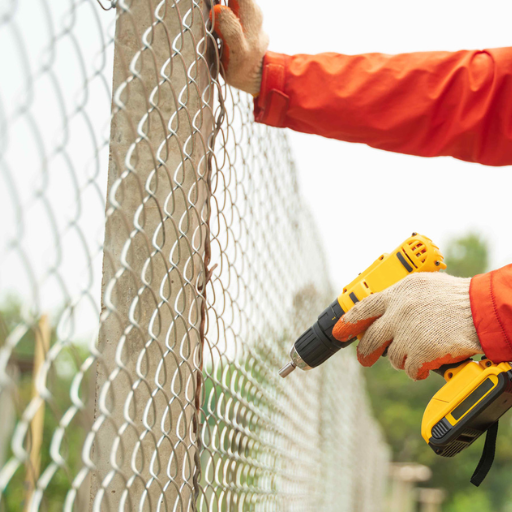
Repairing a chain link fence is an easy task if one does not rush and follows the steps. Just take your time, assess the situation, gather the right tools, and do it the right way so the fence stays stable and lasts a long time. Just follow this detailed guide, and you will be able to repair your chain link fence in no time:
1. Assess the Damage
The first thing to do is to take a good look at the fence and tell where it has broken, where the posts have been bent, where the gates are sagging, and where the chain link fabric has come off. Write down the degree of damage so you can determine the materials you will need for the replacement. For example, a damaged post might need to be removed and replaced entirely, whereas only tightening would be needed for chain link fabric that is hanging loosely.
2. Gather Necessary Tools and Materials
You need the following tools and materials at hand before you begin mending the fence.
Pliers, wrenches, and wire cutters
A tension bar and tension bands
Replacement chain link fabric or wire
Replacement posts, if necessary
Concrete mix (for post replacement)
Gloves and protective eyewear
Measuring tape and level
Having these tools ready will make the fence repair process easier.
3. Remove Damaged Sections
Get hold of wire cutters or pliers and cut off the damaged parts of the chain link. If a fence post is crooked or not steady, dig around it and take it out. If it is a concrete-set post, use a sledgehammer or similar heavy tool to break the old concrete and then the area is ready for the new post.
4. Replace Fence Posts (If Necessary)
Put a new post into the hole, and make sure that it is on the same horizontal level as the neighbouring posts. Pour fresh concrete into the hole and let it dry for a day or two to provide stability. A level should be used to ensure that the post stays vertical during the curing period.
5. Attach Replacement Chain Link Fabric
Take the new chain link fabric and lay it out; cut it into pieces if the size is not right. Using a tension bar, connect one end of the fabric to the terminal post with tension bands while placing the other end of the fabric on the fence line. The fabric should be stretched very tightly along the fence line by using either a come-along or a fence stretcher tool so that it does not droop. Use wire ties or clips to attach the fabric to the line posts.
6. Repair Loose or Broken Wire
If there are some parts of the fence fabric that are loosely hanging but the fabric is otherwise in good condition, then retighten the ties around the line posts and resecure with tie wires. Damaged wires should be replaced with wires of the same gauge, as this is not only for matching but also for durability. The spacing needs to be uniform throughout the fence.
7. Inspect and Reinforce the Gate
A sagging gate could render the chain-link fence useless. If the gate is sagging, it may need minor hinge adjustments or replacement with heavy-duty hinges. Also, bolts and screws should be tightened to stabilize the gate. If support for the gate frame is required, an anti-sag gate kit can be used.
8. Perform a Final Check
Go over the whole fence line once more and check for anything that might need fixing after the repairs are done. Double-check that no sharp wire ends are left and nothing is loose. Also, check that the fence fabric is tight, the posts are well-secured, and the gate moves freely. Minor adjustments that can further strengthen the fence should be made as well.
Additional Tips for Longevity
Material selection: Choose galvanized or vinyl-coated materials to ensure maximum longevity and prevent rusting. Galvanized steel generally lasts 15–20 years, with variation depending on surrounding conditions.
Routine maintenance: Regularly check the fence for issues like weak spots, rust, or shifting posts to nip minor issues in the bud.
Weather considerations: If possible, always do the repairs during dry weather as this will not only make it easier to work but will also speed up the curing of the concrete.
If you follow all these steps and use the right tools and materials, not only will the functionality and aesthetics of your chain link fence be restored, but it will also remain an effective boundary solution for many years.
How to Straighten a Bent Top Rail
Correcting a distorted top rail in a chain-link fence requires disciplined planning to ensure the repair is thorough and long-lasting. Impacts cause trees to fall and accidental hitting of vehicles to be the main inciting factors for the bending of the top rails relatively often. Reduce the rail step by step according to the following definitions:
Evaluate the Damage
Start by carefully inspecting the bend to determine its size and position. Bends that are closer to rail joints are more straightforward to get to, while those in the middle of the rail may require some extra effort. Inspect the rail area next to the bend for signs of stress or distortion to be certain that no hidden damage has been done that would affect the strength of the fence.
Preparation
Prepare all the tools and materials that you will need—pipe wrench, rubber mallet, level, and clamps. If your top rail is severely bent or kinked, you might also need to use a metal pipe bender or have replacement rail sections handy. Ensure safe working conditions by wearing gloves and goggles.
Removing the Damaged Section
If the bend is so bad that it cannot be repaired, then cut off that section of the top rail. Loosen the tension bands and unbolt the brackets that fasten the rail to the posts. Now you can remove the damaged portion of the rail for easier handling. According to the measurements, standard rails are typically 1-5/8 inches or 1-3/8 inches in diameter.
Aligning the Rail
If there is a slight bend, use a pipe wrench to apply a gentle grip, then straighten the rail back to its original position. Apply the pressure steadily so that you do not go too far with the correction or create new bends.
In the case of medium bends, put the rail in a vice or make use of two strong, flat surfaces to work the rail. A pipe bender can also be used to make the adjustments more accurate. Hit with a rubber mallet to even out any wrinkling without ruining the rail's finish.
Rail Change (if needed)
If the rail cannot be repaired in any practical way, the only alternative is to replace it. Cut the new rail to the correct length with a hacksaw or a pipe cutter.
Apply a rail sleeve (typically 6 to 8 inches long) to join the new section to the old one. Slip the sleeve halfway onto the existing rail, then join the replaced section for a perfect connection.
Reattachment and the Last Steps
The straightened or replaced rail piece is to be reinstalled into the original position on the fence posts. Make sure the brackets and tension bands are tight enough to hold the pieces in place, and that everything is correctly aligned.
Use a level to ensure the top rail is straight and properly aligned along the entire length of the fence.
Make sure to tighten any loose fittings and test the sturdiness of the complete fence structure.
Care and Avoidance
Regularly check and keep your fence in good condition to prevent damage to the top rail. Cutting back overhanging trees, not letting heavy objects lean against the fence, and making sure the chain link fabric has uniform tension are some of the preventive methods. Studies suggest that early intervention on weak points can extend the lifespan of a chain link fence by up to 20 years.
You can easily restore the structural soundness and elegant appearance of your fence by following these steps. Also, adding durable materials and having routine inspections will further ensure long-term performance and resilience against external forces.
Replacing a Damaged Fence Section
If you want to replace a compromised chain link fence section, amid all the fuss that you have to deal with, you can still ensure that both functionality and aesthetics are restored through a seamless repair only if accuracy and the use of proper tools are involved. First, closely examine the faulty area to determine how serious the problem is. A recent industry report claims that nearly 15-20% of fence repairs are due to poor tension or damage from external forces, e.g., falling branches or car accidents.
Step 1: Remove the Damaged Section
At first, unlock the fence ties that hold the chain link to the structure to remove the damaged part. With the pliers, pull apart the clips or ties, being very careful to not spoil the neighboring sections. In the event that a pole is also busted, you will have to dig around the pole, around 24-30 inches deep, based on the local frost line, to take out the part that is buried.
Step 2: Preparing the Replacement Materials
You have to look for a chain-link fabric and a fence post that are identical to the original ones in all respects. Chain link wire is usually gauged in wire and mesh size. Standard residential fencing wire is 11.5-gauge with a 2-inch mesh size, while commercial fences are often constructed with heavier 9-gauge wire. Posts that are galvanized or coated for rust resistance are recommended, as this can extend the lifespan by 50% or more, according to industry studies.
Step 3: Install the New Fence Post (If Required)
Place the replacement post in the concrete holding it vertical and checking the plumb with a level. A concrete curing time of 24 hours is the minimum requirement before the next step can proceed, per the material manufacturers’ recommendations for optimal stability. The new generation of quick-set concrete products can reduce wait time to as little as 4 hours under the right conditions.
Step 4: Attach the New Chain Link Fabric
The new chain link fabric can now be unrolled and placed next to the current fence. A tension bar and tension bands will be used to attach the new fabric to the new or existing end post. The fabric will not sag, as it will be stretched tight with a come-along or similar device. Now it is time to connect the fabric to the framework using fence ties spaced roughly 12-16 inches apart to provide ample support.
Step 5: Inspect the Work
To finish up, take a closer look at the section that has been fixed to check the tension and ensure it is aligned with the rest of the fence. Repairs done right can withstand wind loads of up to 90 mph, as long as the structure and materials comply with industry standards. Maintenance should be scheduled every six months so that any problems that may arise can be spotted and addressed early, before they get worse.
When you implement these thorough instructions and quality materials, then you can successfully change a section of a damaged fence, and its resistance to being torn down will last, along with the continued strength of the whole fence structure.
Recently Posted
-
Building a Security Fence: Your Guide to High-Security Solutions
February 5, 2026The security fence functions as the primary defense system of your commercial property, industrial site, and private estate becaus Read More
 -
How to Build a Security Fence: A Comprehensive Guide to Installing Chain Link Security Fences
February 4, 2026Constructing a security fence is an effective way to protect your property, define its boundaries, and enhance your privacy. The v Read More
 -
Iron Yard Fence: The Ultimate Guide to Wrought Iron Fencing for Your Garden
February 3, 2026The design of a garden fence goes beyond establishing property borders because it serves two main purposes by enhancing the visual Read More
 -
Cast Iron Garden Fence: The Ultimate Guide to Durable and Decorative Garden Edging
February 2, 2026The cast iron garden fence functions as a boundary that creates an everlasting combination of practical use and aesthetic beauty t Read More

Contact Us
Recommended Products
-
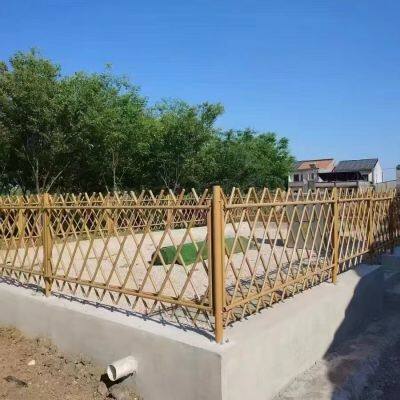
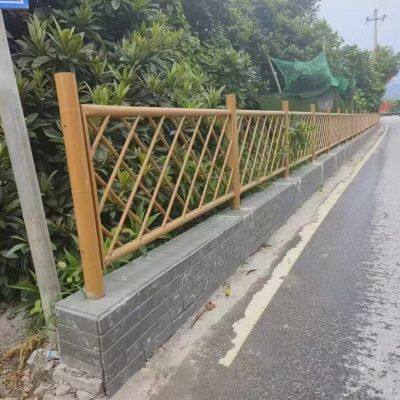
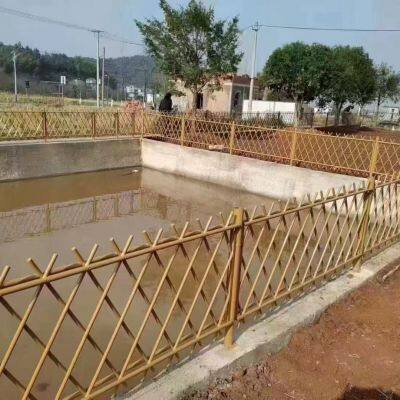
 Durable Imitation Bamboo Fence for High-Traffic Public SpacesNegotiableMOQ: 50 Square Meters
 -
Customizable Imitation Bamboo Fence With On-Site Measurement ServiceNegotiableMOQ: 50 Square Meters
-
Modular Imitation Bamboo Fence Panels for Quick InstallationNegotiableMOQ: 50 Square Meters
-
Imitation Bamboo Privacy Fence With Reinforced Aluminum BaseNegotiableMOQ: 50 Square Meters
-
Commercial Grade Villa Fence for Real Estate Developments and Hotel Perimeter ApplicationsNegotiableMOQ: 10 Sets

-
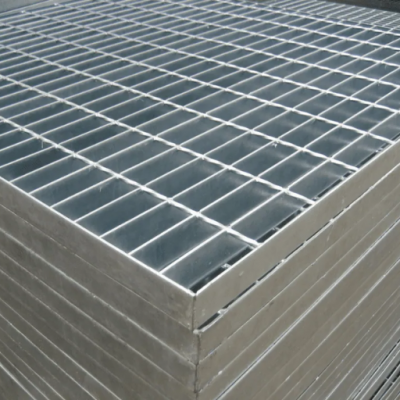
Industrial Steel Grating Solutions for Oil and Gas Platforms, Compatible With Harsh ConditionsNegotiableMOQ: 10 Pieces
-
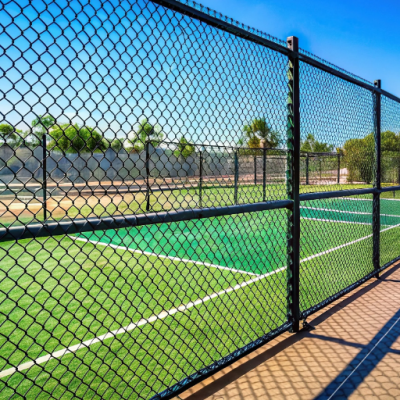
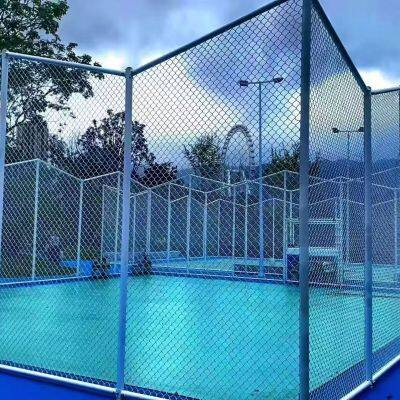
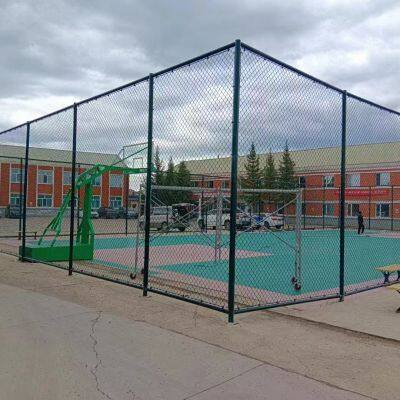
Basketball Court Fence 4M Height, Galvanized Steel Chain Link Mesh for Outdoor Sports Field PerimeterNegotiableMOQ: 50 Square Meters
-
Chain Link Basketball Court Fence Offering Anti-Rust Protection and Long-Term PerformanceNegotiableMOQ: 50 Square Meters
-
European Style Villa Fence Concrete Base Installation Courtyard Boundary WallNegotiableMOQ: 100 Square Meters
-
Galvanized Steel Villa Fence With Powder Coating for Superior Corrosion ResistanceNegotiableMOQ: 100 Square Meters
-
Powder-Coated Basketball Court Fencing With Weatherproof Finish for Long-Term Outdoor ApplicationNegotiableMOQ: 100 Square Meters
-
Powder Coated Wrought Iron Main Gate and Garden Fence for HousesNegotiableMOQ: 100 Square Meters
-
Elevate Your Garden With an Artistic Wrought Iron Garden Fence | Uniting Security & EleganceNegotiableMOQ: 100 Square Meters
-
Low-Maintenance Wrought Iron Garden Fence | Durable Powder-Coated Steel PicketsNegotiableMOQ: 100 Square Meters
-
Heavy-Duty Villa Fence: 10 Gauge Steel Construction With Powder Coating for DurabilityNegotiableMOQ: 10 Sets

-
Anti-Slip Steel Grating Panels for Enhanced Safety in Wet and Slippery Work AreasNegotiableMOQ: 10 Pieces
-
Steel Grating for Stair Treads and Catwalks in Commercial and Factory BuildingsNegotiableMOQ: 10 Pieces
-
High-Security Villa Fence With Lockable Gates and Weather-Resistant Finish for Home ProtectionNegotiableMOQ: 10 Sets
-
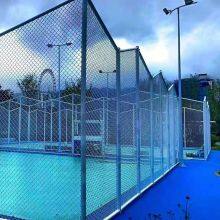
Galvanized Steel Basketball Enclosure Netting / Ball Containment System With Frame for Outdoor CourtsNegotiableMOQ: 50 Square Meters
-
Vinyl Coated Chain Link Fencing for Basketball, Pickleball & Tennis CourtsNegotiableMOQ: 500 Square Meters