
How to Install a Wrought Iron Fence: A DIY Guide
A wrought iron fence enhances the security and privacy of your property while adding elegance and durability. In other words, you might want to use a wrought iron fence to delineate your space, shield your garden, or simply improve your home curb appeal. This DIY guide will take you step by step through the entire installation process so that you will feel confident undertaking the project. You will learn everything there is to know about installing a wrought iron fence by yourself, right from the types of tools and materials needed to exact measurements and the professional finish that an iron fence deserves. Get ready to brighten your outdoor living space with this durable and satisfying DIY project!Find more info now
Understanding Wrought Iron Fences
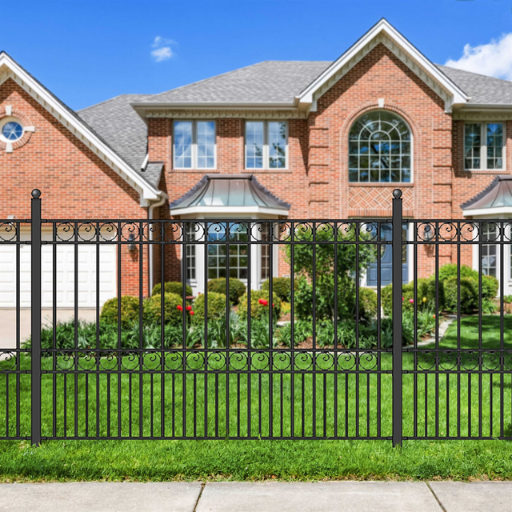
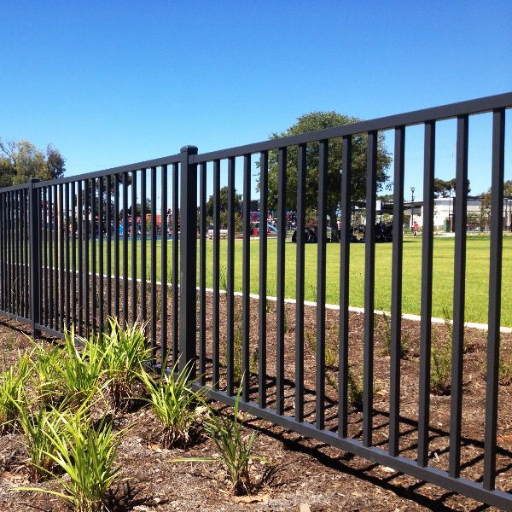
Wrought iron fences are enduring, beautiful, and classic. These fences are made of iron heated to a wooden temperature and then worked into the desired shape, so their structures provide excellent resistance to wear and would continue to withstand any harsh weather conditions. They offer compelling security for your property while enhancing its visual appeal. Also, like many designs, wrought-iron fences can be crafted in various styles with different decorative elements to suit different tastes. These are low-energy needs and a long lifespan, making their purchase a practical and aesthetically pleasing choice for many homeowners.
What is a Wrought Iron Fence?
A wrought iron fence is a sturdy, weather-resistant barrier made by heating and shaping iron, famous for its intricate designs, flexibility in customization, and aesthetic endurance.
Benefits of Installing a Wrought Iron Fence
Durability and Longevity
Wrought iron fences are extremely durable and can withstand adverse weather conditions, including strong winds and heavy rains. While wrought iron does not warp, crack, or become brittle with time like wood or vinyl, it is a long-term investment for homeowners. Some studies reveal that a wrought iron fence can last for decades with very few replacements or repairs if well-maintained.
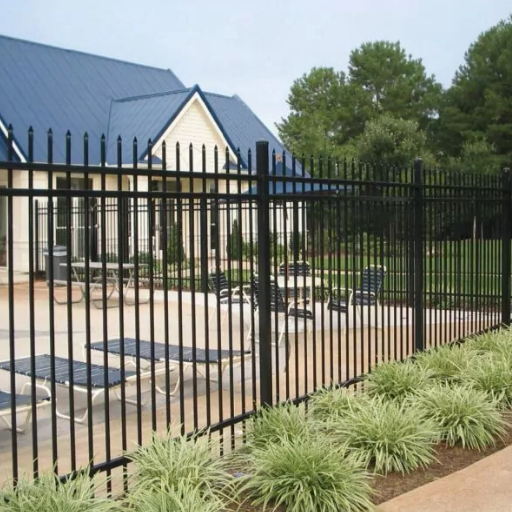
Security
Given its strength, wrought iron serves as a robust barrier for enhancing security. It also acts as a deterrent for intruders due to its strength and impenetrability. Some wrought iron fences are designed with vertical bars and sharp finials on top, which further enhance security.
The Beauty and Customization Features
Recognized for their timeless beauty and elegance, wrought iron fence designs offer as many intricate designs as any other medium, allowing homeowners to customize the appearance according to their tastes or those of an architect with whom the home design dovetails. This unusual combination of functionality, aesthetic appeal, and investment value enhances the property's worth and curb appeal.
Less Maintenance
If protected with proper coatings and finishes, wrought iron fences will exhibit minimal resistance to rusting and corrosion, requiring very little maintenance. Occasional washing and recoating every few years will keep it looking even fresher and prevent it from deteriorating over time.
An Environmentally Friendly Option
Since wrought iron is a recyclable material, it is an environmentally friendly option. In contrast to the process used to cause harm to the environment during the production or disposal of materials, wrought iron can be recycled, reused, and repurposed, thereby cutting on waste and promoting sustainable development.
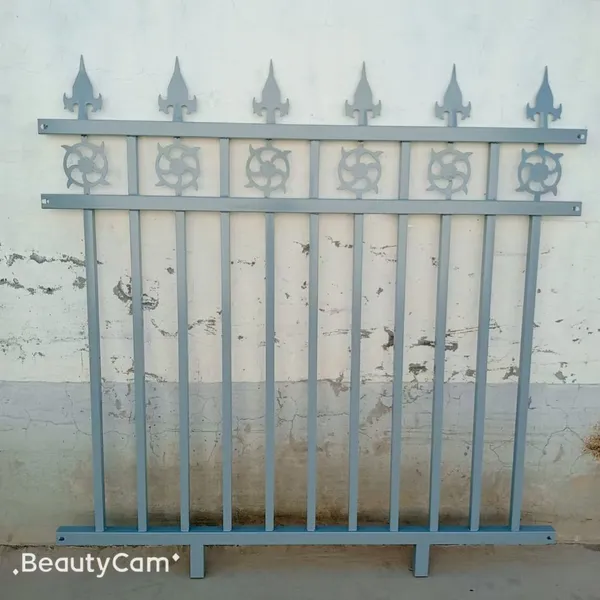
Common Designs and Styles
Wrought iron fences come in a wide range of designs and serve multiple functions, offering various architectural aesthetics and functional applications. Below are some of the common styles:
Flat-Top Style
Works best with minimalistic or very modern houses, where it is just given its simple, clean horizontal line look. Sometimes a flat-top fence can be almost entirely unadorned; at other times, it may have finials or some elegant scrollwork to enhance its looks.
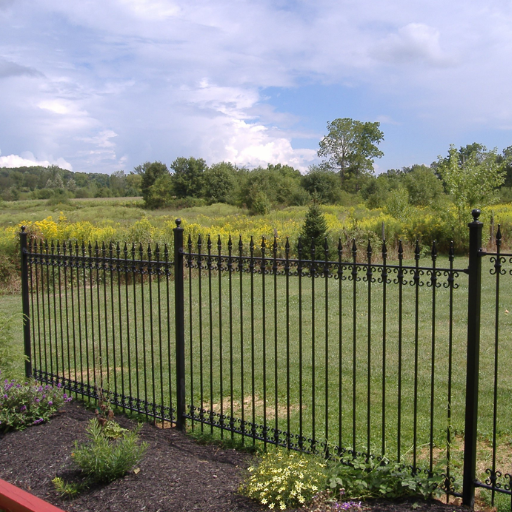
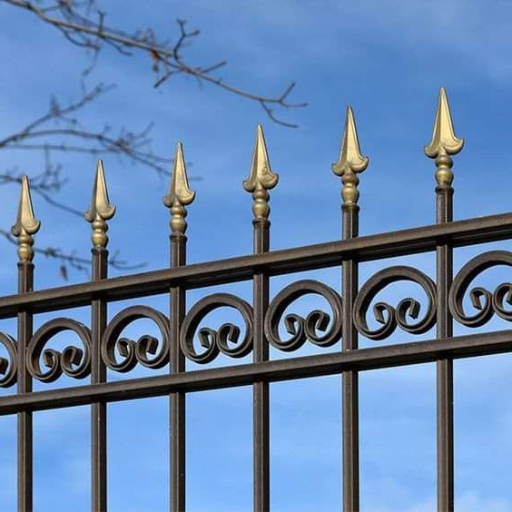
Speared-Top Style
Spear-top fences have an old-fashioned charm and are an effective deterrent for intruders. However, the defendants argue that the top can appear very ornate. With scuffles for the older ones, this style serves as a reminder of the Victorian age and is almost always the go-to for historic or traditional properties.
Arched Style
In all beauty and sophistication, arched wrought fence designs curve at the top. These are often combined with floral motifs or intricately worked panels to render a soft but striking visual statement. They are primarily found in gardens and along walkways.
Ornamental Ironwork
For a very private, hardly subtle, highly decorative option, expect all sorts of swirls, twists, and floral details from these designs. A custom design is a combination of performance and artistic presentation: its designers or manufacturers can assist the homeowner.
Double Rings and Baluster Patterns
This pattern features a circle or decorative element, such as double rings or baluster-type detailing, positioned between horizontal bars. It adds texture and elegance while making the fence beautifully stand out.
Statistical Insights on Popularity
According to the latest data from Google Trends, interest in ornamental wrought iron fences has increased by 30% in the past five years. With searches for "modern wrought iron fences" showing an 18% increase, preference for sleek, contemporary styles is definitely on the rise. Lastly, by valuing personalization and aesthetic value, "custom wrought iron designs" spotted a 25% spike in queries in the last year.
These popular designs, on the whole, lead a nice balancing act of security, style, and sustainability in the industry, all that the walling craftsman needs to make a nice-looking and long-lasting boundary for his client's property.
Preparing for Fence Installation
A successful fence project starts with good preparation, and Google Search Trends sheds light on the areas that users research most, thereby serving as guiding points for homeowners in making decisions. Searches for "fence installation checklist" have increased by 32%, reflecting the growing interest in a more detailed planning and organizing phase before the actual project is undertaken. Consider these steps to run the process smoothly:
Know Local Regulations
Searches for "fencing permits near me" have increased by 22%, highlighting the need to check local zoning laws and obtain the necessary permits. Homeowners should check with their local authority or HOA to verify if there are restrictions regarding the height, materials, or location of a fence.
Set a Budget
The "Fence installation cost calculator" has seen a 28% increase in search volume, indicating a rise in interest in budgeting tools. Plan for the costs of materials first, then labor. While doing so, consider any additional features, such as gates or decorative trims, that might be required or desired.
Choose Materials Carefully
Searching for "environmentally friendly fence materials" has increased by 19%, reflecting a growing awareness of environmental sustainability. Bamboo, composite, or recycled metals put homeowners into an advantageous position to erect fences in an environmentally friendly way but are equally durable.
Prepare the Site
Searches for "how to prepare land for fence installation" are up 15%, signifying the value of property preparation. This could include the removal of debris, demarcation of boundaries, and, perhaps most importantly, recognition of any underground utilities by way of contacting a utility locator service.
Plan the Project for Longevity
"Low-maintenance fence ideas" are up 21%, suggesting that people want fences that are easy to maintain. Coated metals, vinyl, treated woods rank high on the list.
By applying these insights and trends, homeowners will be able to carry out their projects of fence installation in confidence without compromising on practical planning and long-term satisfaction of the new boundaries for their property.
Choosing the Right Materials
Choosing the perfect material for your fence depends on the interplay between beauty, durability, and maintenance. Below are the five common fencing types, together with information and statistics on their benefits:
Vinyl
Vinyl fence is most commonly installed when durability and minimal upkeep are desired. They are weather-proof, insect-proof, and rot-proof; hence an excellent investment in the long term. Reports indicate that vinyl fences can last over 20 years and still retain their appearance if well-maintained.
Metal with Powder Coating (Aluminum or Steel)
Coated metal fences, which include powder-coated aluminum and powder-coated steel, are strong and require less upkeep. Due to its anodic nature and thus non-corrosive properties, aluminum in particular is well-suited for any climate. Market reports predict an ever-growing demand for aluminum fencing, particularly in coastal areas, due to its resistance to humidity.
Treated Wood
Treated wood offers a traditional and natural appearance while protecting against decay, insects, and moisture. Treated wood fences typically last for about 15 years, sometimes even longer, with periodic sealing and staining, so they are usually selected based on classic preferences.
Composite Material
Composite fences use wood fibers and plastic to give the appearance of wood with the strength of synthetics. Many are made from recycled materials, promoting green living and requiring low maintenance, with a lifespan of approximately 25 to 30 years.
Wrought Iron
Wrought iron fencing offers a classic and elegant option for delineating properties. Maintenance-wise, wrought iron fences require more labor due to the formation of rust, but a new generation of coatings is available to improve the durability of wrought iron fences significantly. Data from home improvement convey the idea that wrought iron is especially appreciated in boosting curb appeal of luxury properties.
With knowledge about their characteristics and benefits, homeowners can thus arrive at choices suited to their likings, budgets, and long-term interests.
Tools Required for Installation
Fences, depending on their type, may be made of wood, vinyl, or wrought iron. According to the data and standards, the following may be listed:
Measuring Tools
Tape measure: One must always have a good tape measure to mark accurately the distance between each post and laying out the fence. It should have a capacity of 25-50 feet for marking longer distances.
Level: A spirit level will maintain all straight installations and shall remain level for longer so that it never tilts or warps.
Digging Equipment
Post Hole Digger or Auger: These are used to dig holes to the proper depth required by the size of the fence posts. For most residential properties, post depths should be between 2 and 3 feet, depending on the materials used and the local frost line.
Shovel and Spade: Good when there are specific minor adjustments to be done or tilling holes in tight closed spaces.
Tamping Bar: Used for compacting soil on the side of posts, which ensures reliability.
Cutting Tools
Saw (hand saw or circular saw): Sawing is usually for cutting wooden panels or posts into specific dimensions. For vinyl or metal fences, you may require some cutting tools like a hacksaw for metal or plastic saw blades.
Wire Cutters: Important for chain-link and wrought iron.
Fastening & Assembly Tools
Drill and drill bits: A power drill allows one to assemble for good precision and speed. Ensure the drill bits come in various sizes to accommodate different types of screws.
Screwdriver set: For those manual adjustments and putting screws and bolts where a power drill can't reach.
Hammer and mallet: A hammer is used to strike objects to ensure they remain in place.
Wrench set: To tighten bolts and supports in wrought iron work.
Safety Gear
Gloves: Protect from sharp edges and splinters.
Safety Glasses: Protect your eyes from injury when cutting, drilling, or working with tools.
Ear Protection: When working with really loud power tools, this is highly recommended.
Additional Equipment
Concrete Mix and Bucket: Used for fixing posts into the ground. A fast-drying mix of concrete is ideal for providing stability. According to recent data, it is said that fast-setting concrete lessens installation time by almost 40%.
String Line: Outlining lines of boundary to keep the fence aligned.
Markers or Chalk: To mark the position for posts and cuts.
When applied correctly, these tools will not only streamline the installation process but also enhance the life and stability of your fence. Research also specifies that by using contemporary power tools like laser levels and modern drills can reduce installation time by a good 50% compared to the way old methods of installation have been carried out.
Assessing Your Property and Planning Layout
Before fence installation, it is essential to thoroughly inspect the property and create a layout plan for the work. This ensures the fence meets the user's needs, complies with local laws, and avoids disputes. The five key aspects to consider are:
Property Boundaries: Double-check the property lines to ensure you are not encroaching on a neighbor's land, which can lead to disputes. You may want to refer to your survey or appraise a local surveyor.
Local Regulations and Permits: Familiarize yourself with the local zoning ordinances to ensure compliance with permitting requirements. Regulation restrictions may include fence height limits, setback distances, and materials allowed, among other things.
Purpose of the Fence: Determine the main objective, such as to afford privacy, security, or beauty, or to contain pets and children, for example, to choose style and materials appropriately.
Terrain and Soil Type: Inspect the landscape features to identify slopes or rocky terrain that may hinder installation. Additionally, determine your soil type to help select materials and anchoring strategies for your fence properly.
Utility Lines: Request that utility companies mark key underground lines. By heeding this precaution, you eliminate the risk of damaging essential utilities, such as electricity, water, and gas, while installing the fence.
When you keep these factors in check, your fence installation project will go as smoothly as possible.
Step-by-Step Installation Process
Step | Key Points |
|---|---|
1. Check Codes | Verify local building codes and permits. |
2. Measure & Plan | Mark property lines, plan layout, and flag utilities. |
3. Gather Materials | Collect posts, panels, tools, and concrete. |
4. Set Outline | Use stakes and string to outline the fence. |
5. Dig Post Holes | Dig 2-foot-deep holes, add gravel for drainage. |
6. Install Posts | Place posts, pour concrete, and ensure alignment. |
7. Attach Panels | Secure panels to posts with brackets and screws. |
8. Hang Gates | Install gates, ensuring they are properly aligned and function correctly. |
9. Apply Finishes | Use rust-resistant primer and exterior paint. |
10. Final Inspection | Check alignment, tighten fasteners, and clean the area. |
Setting the Fence Posts
Setting the fence posts properly is crucial in ensuring the fence and its base are strong and enduring. Follow these specific guidelines to obtain professional finishes:
Mark Post Locations: Using a tape measure and stakes, mark the exact location of where each post is to be set. Most fences will have posts spaced anywhere between 6 and 8 feet for adequate support. Double-check all measurements to ensure they are consistent and in line.
Digging the Holes: At each location marked with a stake, a hole needs to be drilled dug with a post hole digger or power auger. The hole size should be one-third the height of the post above ground and an extra 6 inches down for gravel. For example, a 6-foot post would typically require a hole approximately 2.5 to 3 feet deep.
Gravel: Pour in about 6 inches of gravel or crushed rock on top for drainage purposes to prevent wood posts from rotting.
Placing the Posts in Concrete: Place the fence post in the hole, ensuring it is plumb with a level. Fill the hole with a fast-setting concrete mix according to the instructions. Most do set between 20 to 40 minutes, but it is advisable to wait the full 24 hours before attaching any fence panels or rails for best stability. Industry recommendations suggest that a 50- to 80-pound bag of concrete used per post base will provide adequate anchorage.
Allow for Expansion: For frigid climates, ensure that you bury your posts below the frost line. The frost line varies widely depending on where you live, but in many places in the U. S., it averages around 36 inches deep. The reason for this is to keep the posts stable about freeze-thaw cycles.
Constantly Checking the Alignment: Take a string line stretched between corner posts to maintain alignment at all times during the fence installation procedure. Adjust the posts as necessary to prevent waviness and ensure a smooth finish.
Using these steps, along with the latest materials and methods, will ensure that the fence posts are in place and competent to withstand environmental stresses.
Installing the Top Posts
The top posts, when poorly installed, cause instability and blemish the fence's overall appearance. Here is a comprehensive guide prepared with trusted methods and modern-day best practices:
Measure and Space the Posts Correctly: At the start, figure out the exact height and spacing between the top posts. For most standard fences, the top posts range in height from 4 to 6 inches, but may be shorter or taller, depending on the type and intended use of the fence. Use a tape measure to ensure equality for all posts, as any height differences will affect the entire structure.
Choose the Right Materials: The life of top posts will depend on the choice of materials. Pressure-treated wood, vinyl, and metal are common because they all resist weathering and decay. In terms of durability, pressure-treated wood can last as long as twenty years if well cared for, hence a good choice out in the open.
Secure the Top Rails: With the aid of heavy-duty brackets or screws, fix the top rails to the fence posts that have been put up. Serving as a type of horizontal support that ties the posts together, the top rail stops the posts from leaning out with time. Make sure they are level because this will affect the entire fence in both perspective and function.
Weather-Proof: Apply weather-proofing to ensure protection of the top posts from environmental elements, and use a sealant or paint to resist rain, sun, and temperature changes. One study has shown that applying UV-resistant coatings to wood can significantly extend its lifespan by slowing down cracking and warping.
Check on Levels: During steady intervals, check with a spirit or laser level for the correct vertical alignment of the top post and rails. Even the slightest misalignment would create a structural weakness and diminish the appeal of your fence.
By this means, you end up with a good fence, nicely complemented by an attractive finish, which will withstand the test of time and weather. Always place the utmost emphasis on high-quality materials and precise measurements for optimal fence output.
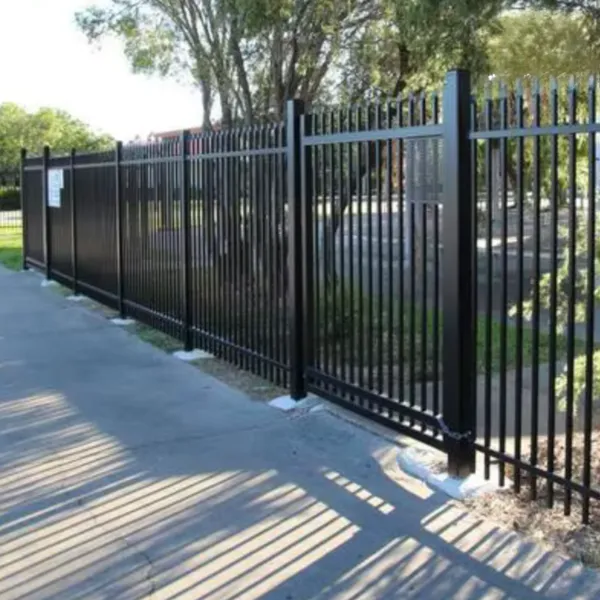
Attaching the Wrought Iron Panels
This is a crucial stage in installing a wrought iron fence system, as it ensures proper stability, durability, and appearance. Use the following steps to secure your panels properly:
Prepare Panels and Posts
Before you start, check the distance between the posts to be sure that the wrought iron panels fit perfectly. Standard wrought iron fence panels are typically 72 or 96 inches wide; ensure your posts are spaced accordingly. If the measurements do not align, you will need to cut your panels to fit using a reciprocating saw specifically designed for metal.
Align the Panels
Put the first wrought iron panel between the posts. Use a level to ensure the panel is truly straight, upright, and horizontal. Any misalignment at this stage will compromise the fence's aesthetic value.
Attach the Panels to the Posts
Using brackets or mounting hardware that usually comes with the fence system, attach the wrought iron panels. Use corrosion-resistant screws to fasten the brackets to the posts securely. Usually, they say place the brackets around 6-12 inches from the top and bottom of the panel for best support.
Add Stability to Taller Panels
For panels taller than 48 inches, consider installing central support brackets in the middle to prevent warping or bowing over time. Statistically speaking, this simple adjustment can increase the fence's life by 20% in windy areas.
Paint or Treat the Joints
Painting or treating the joints to protect screws can help stave off rusting, particularly if the fence is exposed to harsh weather conditions throughout the year. A good metal primer, combined with an outdoor paint, can increase its durability by up to half.
When wrought iron panels are fixed accurately and in accordance with the recommended materials, they stay firmly in place, contributing to a great-looking, low-maintenance fence that will surely uplift your exterior.
Final Touches and Maintenance
The effective upkeep of any wrought iron fence demands proper finishing and a regular maintenance program. Begin by surface preparation, which involves inspecting the surface for imperfections such as sharp edges and weld spatter. File down the rough edges and degrease before applying any coatings.
For enhanced durability against the elements, apply a primer that prevents rust growth, and then coat with an epoxy paint or an outdoor paint specifically designed for metals. Studies show that this can guarantee a lifespan of 20 years before significant deterioration is visible on the surface, particularly in moderate climates. Touch up any chips in the paint as soon as possible, so the metal does not get moisture exposure and rust.
A 3-6 monthly regimen is necessary to maintain the wrought iron, which includes washing it with a mixture of warm, soapy water and a soft sponge to remove dirt and grime. Regular cleaning will ensure that accumulations of corrosive substances do not compromise the fence's aesthetic appeal.
Following maintenance activities, it is advisable to conduct a twice-yearly inspection of screws, joints, and welds to observe any signs of wear or loosening. Where there is something that requires change, replace it; where sealant requires renewal, apply it. Home improvement experts reveal that such rituals can add 30% to the lifespan of a wrought iron fence.
With finishing touches like these combined with a regular maintenance routine, your wrought iron fence will stand years of stature as a durable, striking, and valuable amenity of your luxurious outdoor ambience.
Securing the Fence
Properly securing your wrought iron fence for safety, stability, and lasting strength is a crucial first step in your journey. Each fence post must undergo the most thorough inspection to ensure it is firmly anchored in the ground. Hence, the latest set of data stipulates that concrete footings for fence posts can ensure up to a 50 percent increase in stability compared to any other concrete methods. For security reasons, ensure that all screws, bolts, and brackets are tightened to prevent any malfunction. Over time, vibrations and environmental factors may cause these fasteners to become loose; therefore, periodic checks are deemed necessary.
Gate latch and lock securing remain vital in granting or denying access. Very secure and modern automatic gate locking systems, bestowed with smart technology integration, can be considered. According to sources from Google, smart lock systems can reduce unauthorized fence breaches by up to 40%. Installing anti-climb features such as pointed tops or decorative spikes also adds to the aesthetic appeal of the fence while, at the same time, deterring intrusions quite effectively.
Consider rustproof paints and sealants that will further enhance the protection of the fence's structural integrity against environmental factors. Besides increasing safety for a better appearance, a secure wrought iron fence will also be capable of lasting for many years.
Painting and Protecting Your Wrought Iron Fence
If you are looking to paint and protect your wrought iron fence, start by giving it a thorough cleaning to eliminate rust, dirt, or any loose paint. After that, apply a rust-inhibiting primer that blocks corrosion and allows the paint to stick. Afterwards, you should paint it with high-quality exterior paint intended for metal. For added protection against weather and wear, consider applying a clear protective coating to the top. This will help in preserving both appearance and functionality of the fence.
Regular Maintenance Tips
Routine Inspections
Inspect your wrought iron fence at least twice a year and note any damage, rust, or peeling paint. Detecting it early could help arrest any further deterioration.
Clean the Fence from Time to Time
The fence needs to be washed every 2-3 months with warm soapy water to keep dirt, lands, and remains of the environment at bay. Gently scrub the surface using a soft brush to avoid scratching.
Remove Rust Immediately
If you notice rust spots forming on your fence, take immediate action. Sand down the rusty areas with fine sandpaper, clean the affected area thoroughly, and then paint it over with touch-up paint or primer to prevent the spread of rust.
Repaint Every 3-5 Years
Every few years, touch up your fence with a fresh coat of paint to preserve its attractiveness and provide additional protection from weathering and corrosion. To paint, use best quality paint intended for outdoor metal.
Lubricate the Hinges and Moving Parts
If your fences have gates or moving parts, lubricant should be applied every 6-12 months to ensure the smooth operation of hinges and joints, and to prevent wear.
Where to Buy Wrought Iron Fencing
You can purchase wrought iron fencing from hardware stores, special fencing shops, or online marketplaces. Some good options include:
Home Improvement Stores: Places like Home Depot and Lowe's often offer an assortment of pre-made wrought iron fences in standard widths.
Fencing Specialists: Companies such as Ameristar and Fortress Fence specialize in wrought iron fencing and typically offer customization services.
Online Stores: Websites such as Amazon and Wayfair offer direct shipping of wrought iron fencing to your door.
For highly personalized service and expert advice, consider illegal fencing contractors who can recommend to you the best products for your objectives and install them for you.
Finding an Iron Fence Shop
Utilizing online resources, such as Google Search, to access up-to-date and current information will significantly enhance your results when searching for an iron fencing company. Here are some in-depth steps and tips for obtaining the best options:
Local Search Recommendations:
Using Google Maps or any local directories will bring up iron fence shops in your area. Typing in "iron fence shops near me" would yield real-time results, with reviews, ratings, and business hours. From such results will come shops like "Joe's Custom Fencing" in Dallas, TX, and "Premier Iron Works" in Los Angeles, CA, both of which have earned great reviews in terms of quality and customer service.
Review-Rating Analysis:
Investigate customer reviews from Google My Business, Yelp, or Angie's List. For instance, if a shop has more than 50 reviews and an average rating of 4.5 stars, this indicates a strong reliability.
Look for comments that acknowledge their customer service, punctual delivery, and quality of materials utilized.
Going Online:
Nowadays, a vast majority of iron fence shops have an e-commerce platform where you can order products directly, including CustomIronWorks.com and FenceDepot.com. They also usually list product galleries and material specifications for comparison.
Meanwhile, you can check prices and get a glimpse into the installation service that they might offer with the all-in-one solution.
Materials and Customization:
From their website or live communications, ask about material customization services for wrought iron, which involve special designs from face-to-face consultations or particular art finishes.
Some workshops, such as Big Easy Iron Works in New Orleans, tailor the production of ornamental and decorative iron fencing to your aesthetic preferences.
The Showroom Visit:
When available, a visit to a local showroom may allow you to feel and touch fencing material. Sometimes, shops like "Iron World Fencing Center" offer consultations to help with your decision-making.
Compare Pricing:
Get quotes for similar specs from all those shops to compare prices. For instance, wrought iron fencing typically ranges from $24 to $34 per linear foot, depending on its design complexity and quality.
Using these steps, you will surely be able to identify an iron fence company that meets your needs, ensuring that whatever you pay for will be of the best quality for your project.
Comparing Prices and Quality
When comparing prices and qualities of iron fences, one must compile detailed information to make an informed choice. Here are five points to consider with some typical cost figures:
Material Type
Wrought iron fences are typically priced between $24 and $34 per linear foot, depending on the design complexity. Powder coating could increase the price, but provide better resistance.
Customization Options
A simple design is generally less expensive, whereas a custom ornamental pattern may increase the cost to $50 per linear foot or more. Ask stores about custom work options.
Installation Price
Some companies will charge a separate installation fee, which is typically $15-$25 per linear foot, depending on the terrain difficulty and the work required to install the fence.
Coating and Finishing
Generally, galvanized and powder-coated fences will last longer. Usually, a galvanized finish has an extra charge of 10% to 15% onthe base price, while high-end powder coatings may charge the customer between $3 and $5 per linear foot more.
Warranties and Maintenance
Some stores will provide warranties or complementary maintenance service. Such warranties can be anywhere from 5 to 10 years, depending on the store, and bring added value.
A detailed comparison of these factors between providers can help you better balance cost and quality in your fencing matter.
References
Montana State University Extension: How to Build Fence with Wildlife in Mind - This guide discusses fencing considerations, including installation techniques and environmental impacts.
Louisiana Transportation Research Center: Best Practices for Maintenance of Control-of-Access Fencing - This report examines fencing practices and challenges, offering insights into maintenance and installation.
Federal Highway Administration: Chain Link Fence Notes - This document outlines standards and guidelines for installing chain link fences, which may offer transferable knowledge for rod iron fences.
Frequently Asked Questions (FAQ)
What tools does one need to install a wrought iron fence?
For the real installation of a wrought iron fence, several tools have to be at hand. These include post hole diggers, levels, hammer drills, and concrete mix. If at all possible, keep the brackets and screws for attaching the panels and gates. A string line will mark the path of the fence and help ensure the correct alignment of the fence posts during installation.
How far into the ground should one dig to install a wrought iron fence?
A minimum two feet is required to reach into the earth for setting up your wrought iron fence posts for a very firm installation. This depth is an advisable precaution against the movement of posts by frost or soil movement. One needs to ensure that the local building code is consulted for any stipulations it may have concerning post hole depths.
How exactly do you mix concrete to set your posts?
To mix concrete for setting your posts, begin by reading the instructions on the concrete mix packaging. Generally, mix the dry mix with water in a wheelbarrow or a mixing container until it reaches a consistency that is thick yet still pourable. After your concrete is mixed, pour it into the post holes around the posts to secure them in place.
How do you make sure that your fence posts are plumb and level?
To be sure that your fence posts are plumb and level, have a level on hand and use it to plumb the posts as you place them in the concrete. Next, pour the concrete and adjust the posts as needed while the concrete is still wet. Help hold the posts in position using wooden braces until the concrete is cured completely.
How can wrought iron fence panels be installed?
With wrought iron fence panels, there are several steps involved in their installation. First of all, ensure that your posts are set in concrete and allowed to cure. After the posts are set, fasten the panels to the posts using suitable brackets and screws. Always verify that the panels are level and correctly aligned before tightening the fasteners.
How long does concrete usually take to set for a wrought iron fence?
Concrete typically takes 24 to 48 hours to set sufficiently for you to continue with the installation. However, full curing generally requires waiting at least a week before allowing the posts to bear any significant stress, such as from the attachment of fence panels or gates.
Recently Posted
-
Building a Security Fence: Your Guide to High-Security Solutions
February 5, 2026The security fence functions as the primary defense system of your commercial property, industrial site, and private estate becaus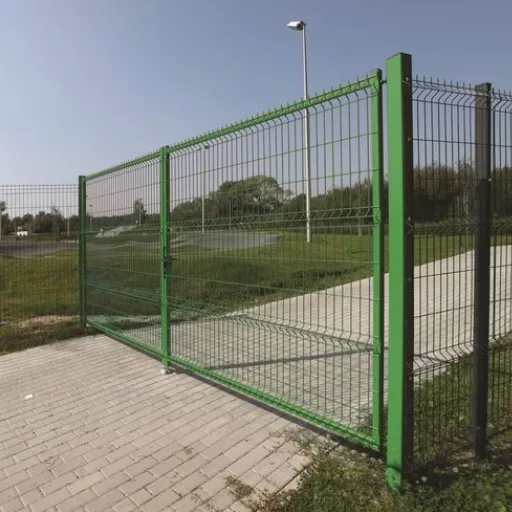 Read More
 -
How to Build a Security Fence: A Comprehensive Guide to Installing Chain Link Security Fences
February 4, 2026Constructing a security fence is an effective way to protect your property, define its boundaries, and enhance your privacy. The v Read More
 -
Iron Yard Fence: The Ultimate Guide to Wrought Iron Fencing for Your Garden
February 3, 2026The design of a garden fence goes beyond establishing property borders because it serves two main purposes by enhancing the visual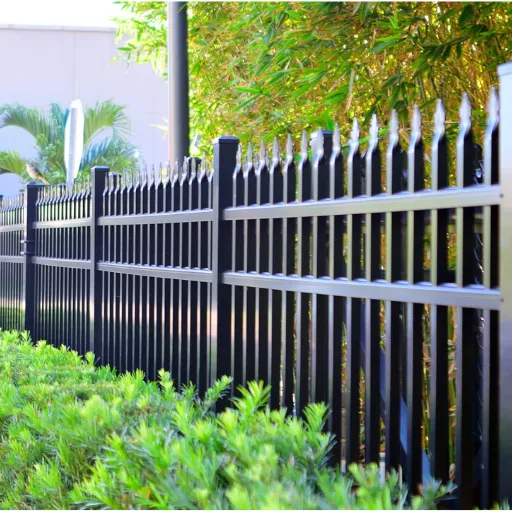 Read More
 -
Cast Iron Garden Fence: The Ultimate Guide to Durable and Decorative Garden Edging
February 2, 2026The cast iron garden fence functions as a boundary that creates an everlasting combination of practical use and aesthetic beauty t Read More

Contact Us
Recommended Products
-
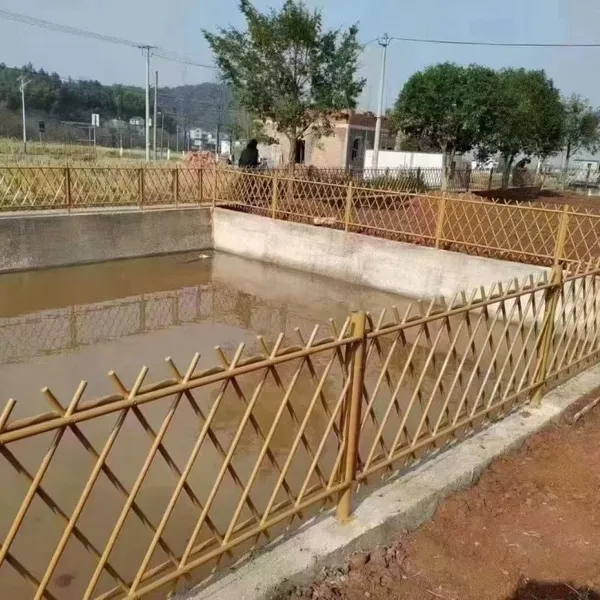
 Durable Imitation Bamboo Fence for High-Traffic Public SpacesNegotiableMOQ: 50 Square Meters
 -
Customizable Imitation Bamboo Fence With On-Site Measurement ServiceNegotiableMOQ: 50 Square Meters
-
Modular Imitation Bamboo Fence Panels for Quick InstallationNegotiableMOQ: 50 Square Meters
-
Imitation Bamboo Privacy Fence With Reinforced Aluminum BaseNegotiableMOQ: 50 Square Meters
-
Commercial Grade Villa Fence for Real Estate Developments and Hotel Perimeter ApplicationsNegotiableMOQ: 10 Sets

-
Industrial Steel Grating Solutions for Oil and Gas Platforms, Compatible With Harsh ConditionsNegotiableMOQ: 10 Pieces
-
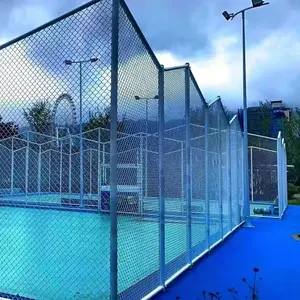
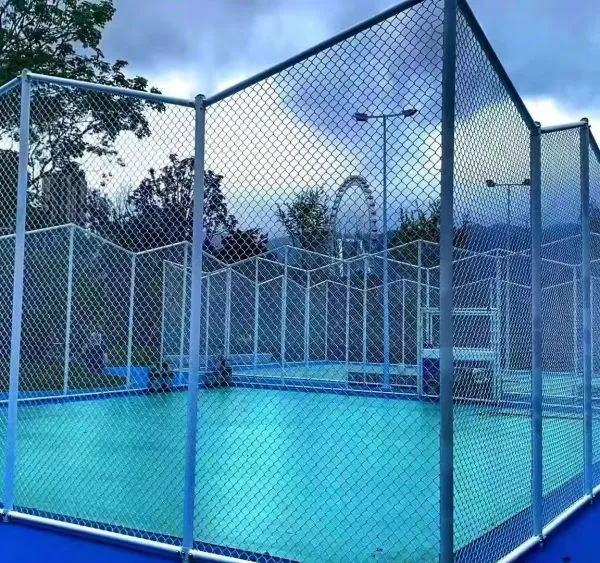
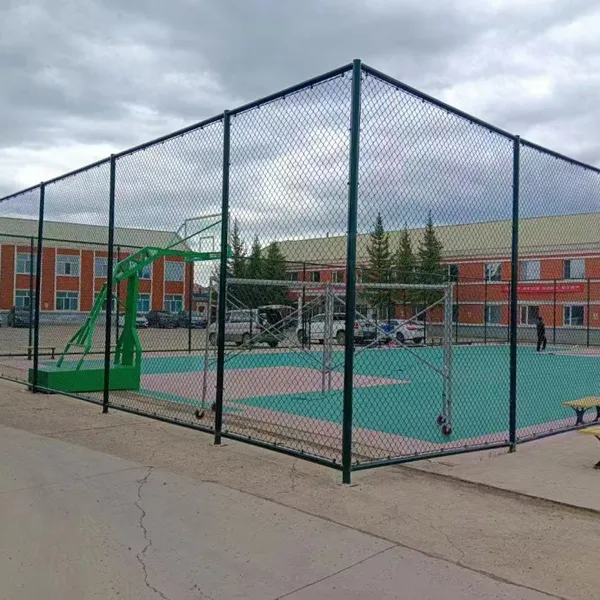
Basketball Court Fence 4M Height, Galvanized Steel Chain Link Mesh for Outdoor Sports Field PerimeterNegotiableMOQ: 50 Square Meters
-
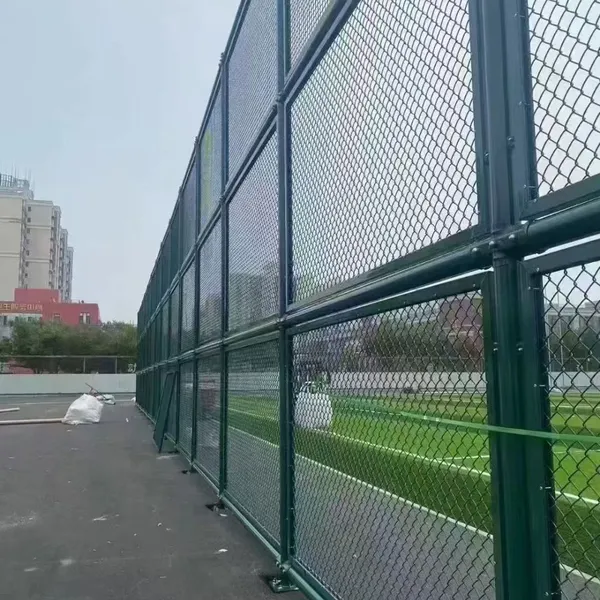
Chain Link Basketball Court Fence Offering Anti-Rust Protection and Long-Term PerformanceNegotiableMOQ: 50 Square Meters
-
European Style Villa Fence Concrete Base Installation Courtyard Boundary WallNegotiableMOQ: 100 Square Meters
-
Galvanized Steel Villa Fence With Powder Coating for Superior Corrosion ResistanceNegotiableMOQ: 100 Square Meters
-
Powder-Coated Basketball Court Fencing With Weatherproof Finish for Long-Term Outdoor ApplicationNegotiableMOQ: 100 Square Meters
-
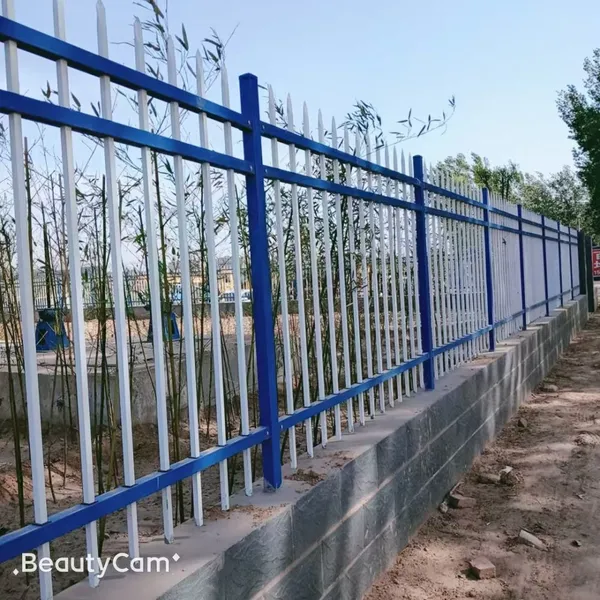
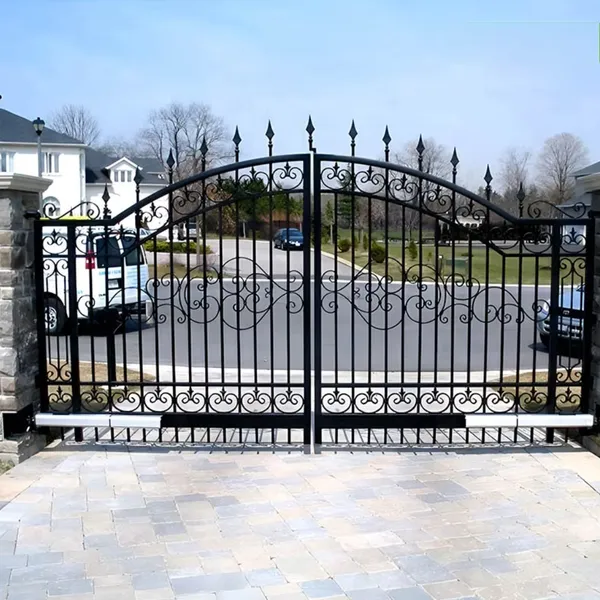
Powder Coated Wrought Iron Main Gate and Garden Fence for HousesNegotiableMOQ: 100 Square Meters
-
Elevate Your Garden With an Artistic Wrought Iron Garden Fence | Uniting Security & EleganceNegotiableMOQ: 100 Square Meters
-
Low-Maintenance Wrought Iron Garden Fence | Durable Powder-Coated Steel PicketsNegotiableMOQ: 100 Square Meters
-
Heavy-Duty Villa Fence: 10 Gauge Steel Construction With Powder Coating for DurabilityNegotiableMOQ: 10 Sets

-
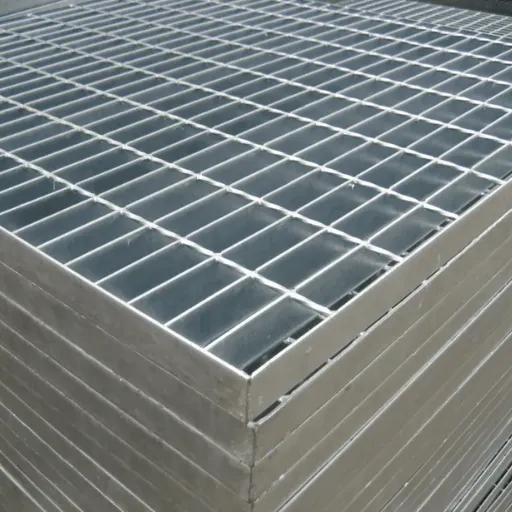
Anti-Slip Steel Grating Panels for Enhanced Safety in Wet and Slippery Work AreasNegotiableMOQ: 10 Pieces
-
Steel Grating for Stair Treads and Catwalks in Commercial and Factory BuildingsNegotiableMOQ: 10 Pieces
-
High-Security Villa Fence With Lockable Gates and Weather-Resistant Finish for Home ProtectionNegotiableMOQ: 10 Sets
-
Galvanized Steel Basketball Enclosure Netting / Ball Containment System With Frame for Outdoor CourtsNegotiableMOQ: 50 Square Meters
-
Vinyl Coated Chain Link Fencing for Basketball, Pickleball & Tennis CourtsNegotiableMOQ: 500 Square Meters