
Fence Installation: Build a Fence in 8 Steps
There are few things as practical as installing a fence to enhance your property, while providing it with privacy, security, and curb appeal. Build a wall to enclose a backyard area, mark property lines, or simply for decoration. A fun project for men and women alike! This step-by-step guide will take you through the entire process, making it approachable and straightforward, even for beginners. In the process from planning to choosing tools and finishing with beautiful details, you'll be privy to all the tips and techniques that make for some excellent fencing: solid, functional, and stylish. Read on to learn the simple eight-step process in making the best fence ever!Find more info now
Planning Your Fence Project
Step 1: Define Your Goals
Decide why you want a fence. Privacy, security, or aesthetics? Knowing your goals will enable decisions regarding the design, materials, and placement of your fence.
Step 2: Check for Local Regulations
Before beginning, it is essential to research zoning laws, permits, and property boundaries. Most areas have restrictions on height, placement, or materials used for the fences. Contact local government or HOA to be sure.
Step 3: Set a Budget
Set a reasonable budget for the materials, tools, and additional labor that may be incurred. Having a budget will limit choices and serve as a guard against overspending during project activities.
Step 4: Measure and Layout Planning
Measure the area where you plan to erect fences. Use these measurements to determine the amount of material required and to create a layout design. Mark post positions for consistency and alignment.
Understanding Your Property Line
Before setting up a fence, you must check where exactly the property boundaries lie so that you do not run into disputes with neighbors or fall foul of local laws. You can find this information by referring to a property survey or plat map, which are typically provided with the purchase of a home. Free documents can often be retrieved from local county records offices if you do not have these on hand.
One may also use a platform such as Google Maps to get a rough visualization of property boundaries; however, for accurate measurements, it is recommended to hire a surveyor. Professional surveying costs vary depending on the property's size and complexity, typically ranging from $300 to $700 in the United States.
Be aware of any local laws or HOA regulations that may impact the placement of your fence. In fact, some municipalities may require that the fence be placed a certain distance away from the property line, along with restrictions on height and material. It would also be a good thing if you ask for your neighbors' consent about boundary fences beforehand, as this will contribute significantly in building good relations and avoiding disagreements down the road.
Choosing the Right Type of Fence
Selecting the right type of fence depends on a host of factors like the purpose of your property, aesthetic appeal, budget, and also climate or its maintenance requirements. Here are some of the standard fence types for you to ponder over and reach an informed decision:
1. Wood Fencing
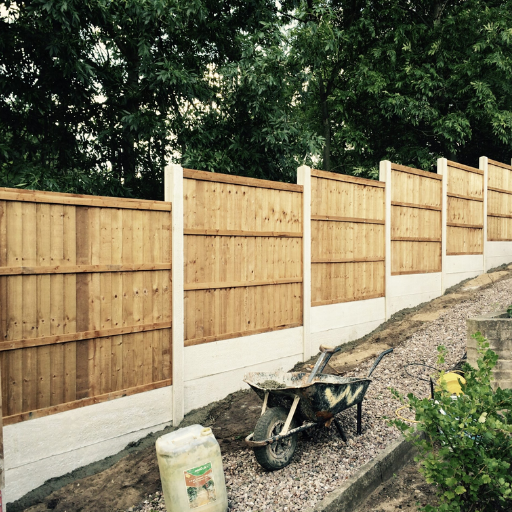
Timeless and versatile, wood fencing offers an aesthetic that ranges from privacy to decorative. It is an average-cost fence, which ranges from $17 per linear foot to $45, depending on the type of wood used and the design considerations. Popular choices include cedar, redwood, and treated pine, all of which are known for their longevity and resistance to decay. Wood requires regular maintenance; staining or sealing should be done to maximize its lifespan.
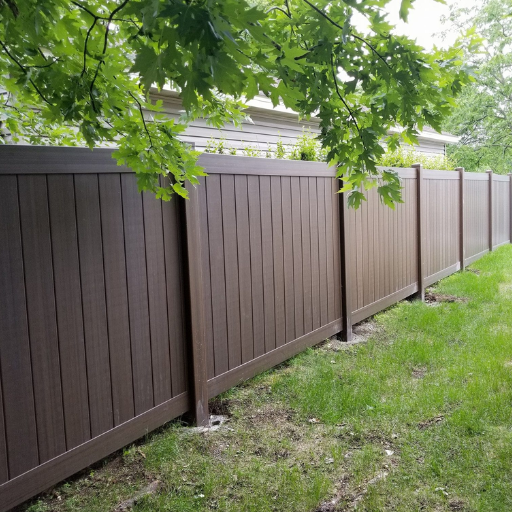
2. Vinyl Fencing
Vinyl fences have gained popularity due to their ease of maintenance and long-lasting durability. Available in a variety of colors and styles, vinyl fences resist weather effects, insect attacks, and rot. Prices for vinyl fencing range between $20 and $40 per linear foot. Although initially costly, vinyl fences save homeowners money in the long run, as they require minimal maintenance. Best fit for suburban areas or families with children who want a durable yet clean look.
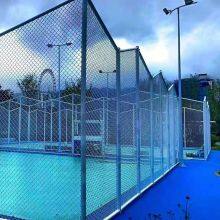
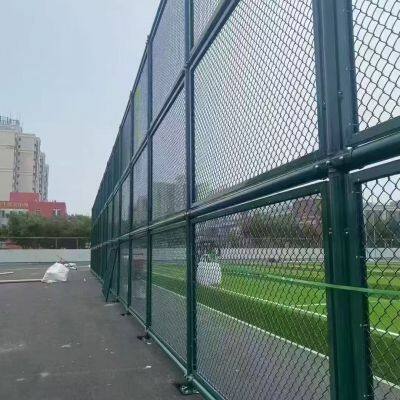
3. Chain-Link Fencing
For the budget-conscious, chain-link fencing is a practical choice. Chain-link fencing is generally viewed as functional, providing security and utility rather than aesthetic appeal. Costs range from $10 to $20 per linear foot, and the durability of chain-link fences, with minimal maintenance, makes them one of the preferred choices for industrial properties, backyards, or animal enclosures. However, they do not provide much privacy unless they are allowed to be upgraded with slats or coverings.
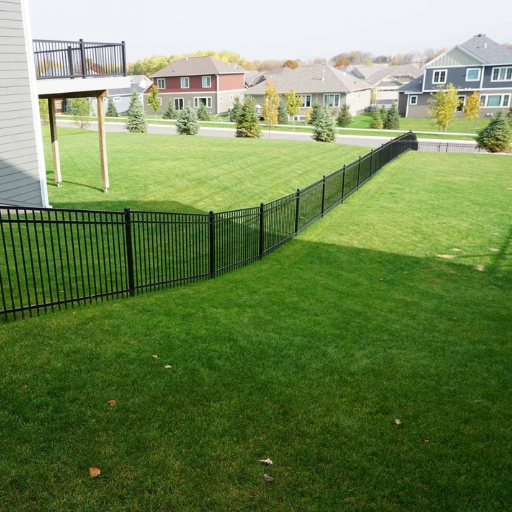
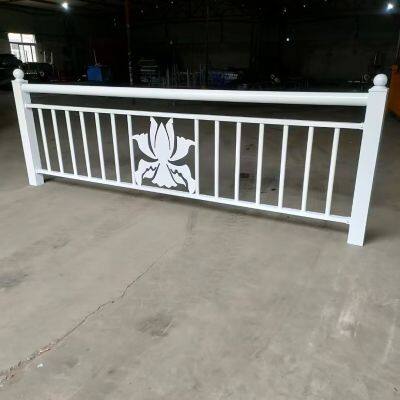
4. Aluminum and Steel Fencing
Aluminum and steel fences are valued for their strength and beauty. They tend to be installed to adorn or fence enclaves. Aluminum is rust-resistant and lightweight, whereas steel is heavier and requires protection from rust. Aluminum fence prices range between $30 $50 per foot, and those of steel range between $35 $60 per foot. Both install for decades, requiring minimal maintenance.
5. Composite Fencing
Composite fencing consists of a mixture of wood fibers and recycled plastic, providing the appearance of wood with the durability of vinyl. Environmentally friendly and high resistance to rot, insects, and weathering, composite fencing is on the more expensive side, generally costing between $25 and $45 per linear foot. However, investing in it is worthwhile due to its extended longevity, coupled with low maintenance costs.
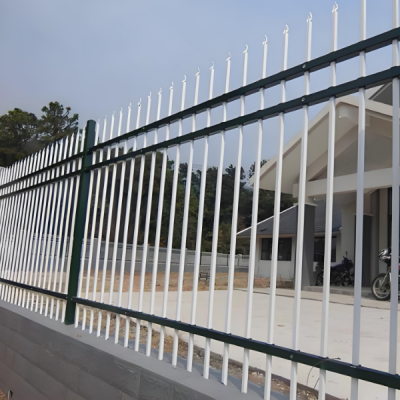
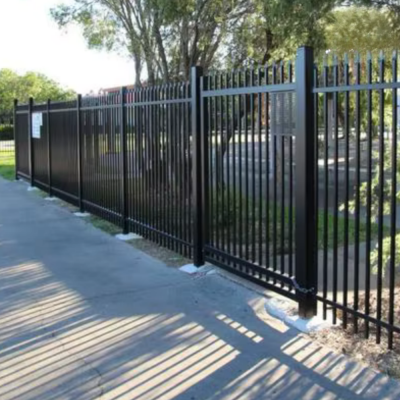
6. Wrought Iron Fencing
Wrought iron fencing is known for its dignified and elegant presentation and thus considered for both the decorative value and the security of the property. Because it is typical for historic properties or upper-class residences, wrought iron fencing is the most expensive, costing anywhere from $30 to $100 per linear foot. It requires regular upkeep such as painting to prevent rusting.
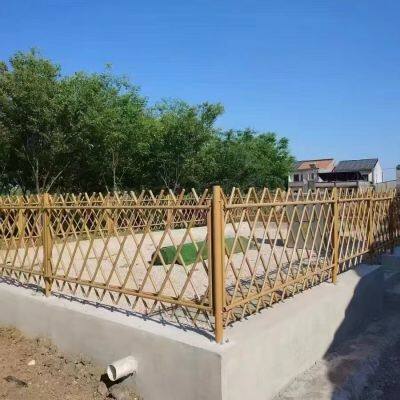
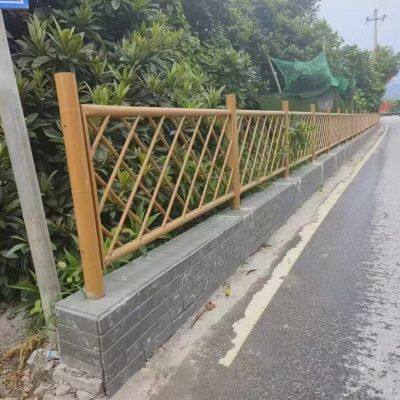
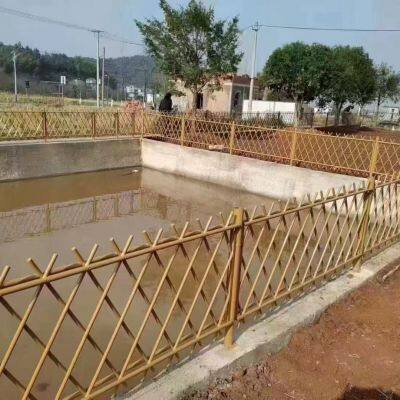
7. Bamboo Fencing
Bamboo fencing is an eco-friendly option for those looking to incorporate tropical or Zen styles of landscaping. Bamboo fence installation can be searched for either by individual poles or rolled panels. Bamboo may not have the price tag of other fences, $10 - $30 per linear foot, a bamboo fence might just be short-lived when subjected to cruel weather conditions.
Points to Consider in Fence Selection:
Purpose: Identify whether the fence is meant for privacy, security, decoration, or boundary marking. Different fences have different advantages in terms of these points.
Budget: Have a clear budget in mind that includes not only installation costs but also potential long-term maintenance costs.
Local Climate: Prepare for how weather conditions, e.g., humidity, rainfall, or even extreme temperatures, will treat your fence material over time.
Resale Value: With the correct choice of fence and professional installation, you can maximize both curb appeal and market value for your property.
By carefully evaluating all these areas, researching your options, and selecting a fence that is functional for your needs and fits the character of your property, you will be extremely well worth the effort!
Researching Local Building Codes
Before proceeding with your fencing project, verify that you comply with local building codes to ensure adherence to the law in your area. The regional codes might include aspects such as height restrictions, setback requirements, and materials allowed to ensure that they do not compromise community aesthetic or safety standards. For example, most residential areas do not allow fences taller than six feet for privacy fencing and four feet for front yard fences. Some cities may also have setback requirements, specifying the minimum distance between fences and property lines or public sidewalks.
If applicable, property owners should also consider any HOA regulations, as these may impose additional requirements beyond the municipal code. Many HOAs dictate aspects of fence design, color, and material to achieve visual harmony within the neighborhood. Failure to comply with these rules may result in severe penalties or require modification of the fence post installation.
For the latest and most accurate updates, it is recommended to check with local government offices, municipal websites, or consult the zoning boards. There are also specific online aids, such as Google Maps and civic planning tools, that can help locate property boundaries and easements, which are particularly relevant when planning a fence. For example, recent local rules in various cities across the U.S. may require approvals or special permits for a fence placed near utility easements or public rights-of-way. Avoiding these will create undue delays and, often, lawsuits. Hence, enforcement and adherence to these codes will ensure the smooth conduct of construction activities.
Materials and Tools for Fence Installation
Materials and tools needed for installing a fence:
Materials:
Fence posts (wood, metal, or vinyl, depending on preference)
Fence panels or pickets
Concrete for putting in posts
Nails, screws, or other fasteners suitable for the fence material
Coating or sealant for a wooden fence
Tools:
Post-hole digger or auger
Level
Measuring tape
Shovel
Drill or hammer
Saw (only if adjustments to panels or pickets are needed)
Once you make sure that everything is set with the right materials and tools, the installation flows smoothly without sudden interruptions.
Selecting Fence Materials
The fencing materials that should be chosen should be durable, functional, and aesthetically pleasing. Here are some popular fencing materials, with factors that you should consider when selecting one:
1. Wood
Wood is a traditional choice for fencing, lending it a natural and timeless appearance. Some popular wood types include cedar, redwood, and pine. Cedar offers it with natural resistance to decay and insects, while pine treated with pressure is relatively cheaper and stronger. Wooden fences should be maintained, though; staining or sealing will go a long way to protect them from weather damage. Prices average $15-$40 per linear foot, varying with the type of wood and design.
2. Vinyl
Compared to wood, vinyl fencing is a good choice for its low maintenance and long-lasting properties. It cannot rot, is resistant to pests, and is weather-resistant. Infinity has different styles and colors that truly imitate wood choice with no maintenance required. The initial investment is relatively high, averaging between $20 and $45 per linear foot, yet retention may ultimately lead to increased savings.
3. Metal (Aluminum, Steel, and Wrought Iron)
Metal fences command strength, security, and a modern look. Aluminum is lighter and less prone to rust, whereas steel is more durable. Ironwork, meanwhile, is renowned for its ornamentality; however, it is more expensive to install and requires regular maintenance to prevent corrosion. Metal fences are priced from $20 to $60 per linear foot, depending on the product and the complexity of the design.
4. Chain-Link
Chain-link fences are an ideal-use option for security and boundary definition. They commonly consist of galvanized steel, which helps protect them from corrosion and rust, and are frequently employed in residential, commercial, and industrial settings. Chain-link fence prices vary from $10 to $20 per linear foot, making them pretty economical.
5. Composite
Composite fencing is made from a mixture of wood fibers and plastic, giving it the appearance of wood while offering better durability. It is resistant to rot, insects, and fading, and requires minimal maintenance. More expensive fences in the composite category cost around $25 to $55 per linear foot, but they do offer long-term advantages and sustainability benefits because many of them are made from recycled materials.
6. Bamboo
Bamboo is another environmentally friendly and sustainable fencing option. It imparts a unique and natural look to any outdoor design. Bamboo fencing must be treated against harsh weathering and is the least durable of fence materials in tougher climates. The price ranges from $12 to $30 per linear foot.
7. Concrete or stone
Concrete and stone fences are maximally durable and highly secure. The higher price of $30 to $100 per linear foot, depending on design complexity and materials used, would be worth it for these options, which offer reduced privacy and custom looks.
Considerations:
Climate: Ensure the material you choose is suitable for local weather conditions. For instance, metal will rust if kept in salty coastal conditions, whereas wood will generally warp in humid climates.
Maintenance: You can save time and money by choosing vinyl or composite fencing options.
Budget: Consider both the installation cost and the ongoing maintenance cost together for a clearer selection.
Purpose and Style: Is the fence around for privacy, security, or just decoration? Regardless, choose a material that suits your style.
Considering and weighing these factors against each other, along with the pros and cons of each material, leads to well-fitted fencing that suits your needs while enhancing your property's appearance.
Essential Tools for DIY Fence Installers
Planning is crucial for a successful do-it-yourself fence installation. Everyone will need to partner their planning with a correct set of tools for a seamless and durable output. Here are five must-have tools for each DIY fence installer:
Post-Hole Digger or Auger
A post hole digger or powered auger will dig the deep and precise holes for your fence posts. Essentially, holes should be approximately one-third of the total height of the post and wide enough to ensure the post remains stable. One may be able to use manual equipment in soft soil. However, when it comes to harsh or rocky terrain, a powered auger will save a significant amount of time and labor.
Level
For a solid and professionally built fence, ensure that fence posts and panels are perfectly plumb and level. The bubble level or laser level can go a long way in helping achieve perfect alignment during installation.
Measuring Tape and Marking Tools
To maintain consistency in the spacing of your posts and fence panels, accurate measurements must be taken. Carry with you a long measuring tape that measures even beyond 100 feet. Use chalk or stakes for marking your fence line for smooth placement.
Power Tools (Drill/Driver)
A well-functioning power drill or driver could be of great help in quickly driving screws and fasteners. When attaching fence panels, gates, or mounting hardware, this would speed up the process and make it quite easy.
Saw (Hand Saw or Circular Saw)
Saws are essential for cutting wood to size when making adjustments to fence panels or posts. Its main difference lies in that a circular saw can cut large pieces very fast, while a hand saw will cut less quickly but more accurately.
Having identified some of the essential tools, the work can become both manageable and exciting, with your fence being both functional and beautiful.
Cost Considerations for Your Fence Project
An understanding of the costs associated with the project is crucial while planning the fence. These will vary according to several factors, such as materials, labor, the area size to be fenced, and any customizations specific to the construction project.
Material Cost
Materials form the most significant portion of the fencing budget, and their prices vary significantly depending on the material you choose. For example:
Wood Fencing (like cedar or pine): Normally $10 to $30 per linear foot. Natural wood has its own charm and numerous uses, but it may require maintenance to prevent weathering.
Vinyl Fencing: $20-$40 per linear foot. Although it may be slightly more expensive to install, it requires minimal maintenance and is highly durable.
Chain-Link Fencing: This cost-effective option ranges from $8 to $15 per linear foot and may be a suitable choice for efficient applications.
Wrought and Aluminum Iron Fencing: These luxurious materials can cost anywhere between $30 and $70 per linear foot, providing a high-end decorative look.
Labor Costs
Labor charges can range from $5 to $15 per linear foot, depending on the intricacy and type of fence installation, once you hire professional fence installers. This elevates the price from the customer's standpoint while ensuring technical competency by providing an efficient and correct installation.
Size of Area
This also plays a role in determining the amount of fencing required, which ultimately affects the costs. To put it simply, enclosing a backyard-sized space would cost somewhere between $1,500 and $4,000, depending on the material and labor costs in your area. Bigger properties or irregularly shaped plots require more fencing material and labor effort, thus becoming more expensive.
Permits and Regulations
Some areas may require you to get permits before proceeding to erect a fence. Permit fees range from approximately $20 to $150, depending on the requirements of your local government. Keep that in mind when calculating your total budget, and consider the extra expenses that may arise from inspections or conformity modifications.
Maintenance Costs
Long-term maintenance is another key aspect to consider. Wood fences might require staining or sealing every few years, costing $200 to $300 per maintenance. Materials like vinyl or aluminum are relatively low-maintenance and can save you money in the long run.
Join These Customizations
Here are the additions of gates, latticework, or any other decorative elements that fall under customizations, which could increase the total price. Gates, if you want to know, cost anywhere from $150 to $1,000 each, depending on size, material, and intricacy.
Therefore, by carefully planning and weighing these factors, one can stretch their budget toward getting a suitable and affordable fence solution. Local materials and labor prices will help you gather information to further curb your project cost by comparing quotes.
Preparing for Installation
Site Assessment and Measurements
During this process, the assessment of the property aims to establish the boundary lines and their implementation, ensuring that everything remains in accordance with local zoning regulations. This is chosen as an opportunity to measure the area for the fence, so that the total linear footage can be confirmed. Considerable care is taken during measurement to minimize waste and avoid unexpected costs.
Obtain Necessary Permits
Check with your local council if a permit is required for your fencing project. It may save you from fines or the delay of your fence installation if it is contrary to local codes.
Prepare the Installation Site
Ensure the installation site is clear of debris, plant matter, and any obstacles that could hinder the installation progress. Stake the fence layout with the string to establish the exact position of the posts and panels.
Gather the Required Materials and Tools
Ensure you have all the necessary materials and tools, including fence posts, panels, concrete mix, a post-hole digger, and a spirit level. Materials should be cross-checked for design and measurements according to the planned installation for a smooth installation.
Measuring and Marking the Area
Precise measurements and clear markings ensure successful fence installation. Start by taking a vertical measure along the length while measuring the area to be fenced with the measuring tape. This measurement should correspond to his or her design plan for the fence. If the project involves a standard 6-foot panel fence, then, divide the total length of the fence by the width of each panel-i.e., usually a six-foot panel-to compute the number of panels needed. Always factor in gate opening locations when working the lengths.
Next, stake and string the fence line, marking out post locations along that string. Posts are typically spaced 6 to 8 feet apart, depending on the type of fence to be installed. Mark the detailed post locations with spray paint or marker flags. Verify that the corners have the proper 90-degree angles using a framing square or the 3-4-5 method for right angles.
Finally, recheck all measurements and markings for accuracy before proceeding, as it will be easier to make corrections and save on costs later if needed. The string should be tightly fitted and level, as it will guide the installer toward aligning a visually straight fence.
Digging the Post Holes
I would begin drilling post holes using a post hole digger or an auger at each location marked along the string line. The holes should be drilled to the appropriate depth, which is typically one-third the height of the post along with a few inches to accommodate gravel for drainage at the bottom. Then the diameter also has to be sufficient to not only keep the post in it but to allow for some concrete on the side to hold it in place. Following the location markings guarantees proper alignment and a sturdy substrate for the fence.
Setting Fence Posts Properly
Setting fence posts solidly is a key to making a fence sturdy enough to withstand environmental pressure over time. Once the post holes are dug, they take their footing. In each post hole, start with about 4-6 inches of gravel. This layer helps with drainage. It prevents water from pooling around the base of the posts and, with time, infecting or rotting them. The gravel layer also compensates evenly for the weight of the post.
Set the fence post in the hole, ensuring it is positioned vertically. Using a level is highly helpful to ensure it is perfectly upright. Now, mix the quick-setting cement and pour the mixture into the post hole, around the post, to fix it. According to standard practice, a standard fifty-pound bag of concrete should be sufficient to set one fence post in a hole with standard dimensions. Fill the hole to about 2-3 inches below the ground surface level with concrete. Cover the concrete with soil or grass to give it a nice appearance.
When setting the concrete, it is essential to follow the manufacturer’s instructions regarding the water-to-mix ratio strictly. For example, most quick-set concrete products must set with one gallon of water to one 50-pound bag of dry mix. After setting, let it cure for at least 24-48 hours before installing any fence panels or applying any weight.
Increased wind load and soil type will count against stability. If the fence is located in an area with higher wind, consider drilling post holes deeper (e.g., posts buried to 1/2 their above-ground height, rather than the standard 1/3). Testing the stability of every post before advancing to the next stage is a sure way to cement the longevity of the fence.
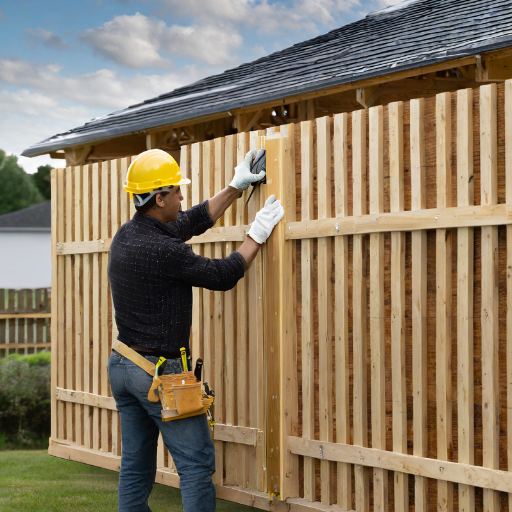
Building Your Fence
Step 1: Measure and Plan
Measure the entire length of the fence area and mark the places where the fence posts will be placed. Setting out a string along with stakes will ensure the fence line is straight. Lastly, verify the boundary marks before proceeding with construction.
Step 2: Installing Fence Posts
Dig holes for the fence post at equal distances, ensuring they are at the appropriate depth for stability. Place the posts inside the holes, ensuring they are level, then fill the holes with concrete. Allow 24 to 48 hours for the concrete to set before starting to fix fence panels.
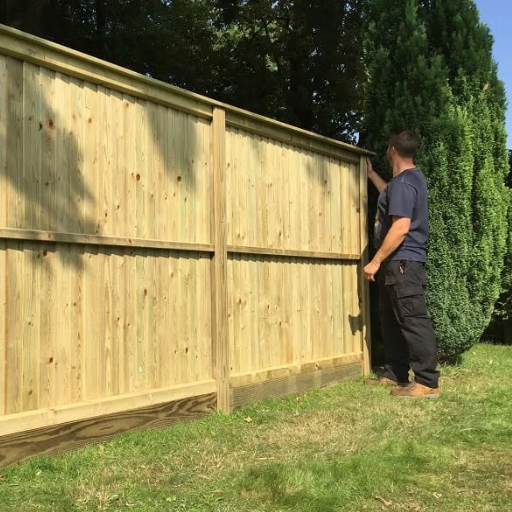
Step 3: Attaching Fence Panels
With the posts set in concrete and sturdy, attach the fence panels to the posts using screws or nails, depending upon your choice of fencing. Continue to check the alignment to ensure it remains even and level throughout the process.
Step 4: Finalizing The Results
Complete the final inspection to check for any loose panels or potential gaps and make necessary adjustments. If possible, apply a weatherproof coating to provide additional protection to the fence and extend its lifespan.
Attaching Pickets to the Rails
When attaching the pickets onto the rails, give attention to detail for proper finish and the permanence of both the installation. Spread out the pickets evenly on the rails for a clean look. Industry standards typically recommend 2 to 3 inches of space between each picket, but local codes or personal design interpretations may prescribe a different spacing. To maintain equal distances, use a spacer, such as a block of wood.
Secure the first picket with screws or nails at one end of the rail. Keeping it plumb, check with a level, and then fasten completely. Attach the next picket, using the spacer to ensure the gap remains consistent. Continue with the same method until all pickets are secured in place. A 6-foot-wide fence panel usually requires anywhere between 13 and 15 pickets, depending on the width and spacing of the pickets.
To maintain the structural integrity of the fence, use only galvanized or weather-resistant screws since fasteners left unprotected may rust over time. As an additional suggestion, it is best to pre-drill pilot holes to prevent splitting of the wood, especially if the pickets are made of hardwood or treated lumber. Once all the pickets are installed, give the alignment a thorough check and make any finishing adjustments for neatness and security.
Ensuring Stability and Aesthetics
To ensure the stability of your fence, start by securing the posts, as these posts are considered to be the backbone for the entire operation. In general, posts should be placed so that one-third of their length is below grade, but a minimum depth of 2 feet should be observed for fences under 6 feet tall. Recent codes stipulate that concrete is the most reliable method for securing a fence post for long-term durability. A slump-free concrete mix may set within 20 to 40 minutes, expediting installation time.
When it comes to aesthetics, symmetry always prevails. Use a string line and a level to ensure that the installation is in a perfect straight line and consistent all the way through, with even picket gaps of 1/2 inch for optimal air circulation while maintaining privacy. Current residential architecture trends exhibit a clear preference for finishes that harmonize well with the architectural style in question. Neutral stains and weathered woods appear to be the most common finishes, as they synergistically complement outdoor living areas.
Of equal importance for stability and aesthetics is waterproofing. A high-quality sealant or paint should be applied after construction to prevent moisture ingress and UV damage, and also to protect against pests that would continue to damage the fence over time. Data from maintenance experts indicate that a sealed wooden fence would last 50% longer than one that goes unsealed. To keep the fence looking checkout-worthy, check back in every one to three years for a reapplication of the protective finishing present, varying with the intensity of the local environment.
Common Mistakes to Avoid
Skipping Proper Preparation
This is a common error during fence erection and maintenance when there is no enough or standard preparation for materials and the site. Using untreated or undried wood will surely degrade over time, resulting in warping and cracking. Additionally, there will be structural instability if the site is not leveled correctly and the post spacing is not accurately measured. Fence evaluation studies have revealed that non-standardly installed fences tend to deteriorate 30% earlier compared to a standard installation.
Using Wrong or Low-Quality Materials
Accepting lower-quality woods and nails, buying cheaper nails and woods, can save money for today, but it shrinks the life expectancy of your fence. Use pressure-treated lumber of the highest grade and galvanized screws and nails to resist the consequences of weather and storm attacks. A recent study suggests that fences made from premium materials typically last an average of 15 years, whereas fences made from inferior products last only 7-10 years.
Ignoring Drainage Concerns
Bad drainage at fence posts is another central oversight. Water accumulation at posts leads to rapid rot of wood and renders the entire structure unsafe. It is recommended to ensure that the ground around the post is sloped to allow water runoff and that a base of gravel or concrete is added. Reports mention that this will increase post-life by as much as 40%.
Not maintaining the Fence regularly.
Failure to inspect and service your fence regularly can reduce the need for avoidable repairs and expenses. In just a few lines, this explains how small fences with loose fasteners or minor rot, if ignored, can become larger. Data from maintenance experts indicate that fences with annual or biannual inspections require 25% fewer major repairs during their lifespan.
Not Adjusting to Climate-Specific Considerations
Different climate zones pose different challenges for wood fences. For example, high-humidity areas require stronger sealants against moisture attacks, while IPVs demand UV-resistant coatings. Ignoring such a climate-specific issue could result in premature fading, cracking, and insect infestations. Maintenance tailored to local conditions enhances longevity and reduces replacement costs.
Avoiding these common mistakes is the first step one can take alongside proper preparation, quality material, and unwavering maintenance to significantly increase the wood fence's lifespan and preserve its beauty.
Maintenance and Upkeep of Your Fence
The proper maintenance of a fence will enhance its longevity and aesthetics. Here are five essential tips on keeping a wall in tip-top condition:
Regular Cleaning
Dirt, mold, and mildew accumulate with time, particularly in damp climates. Wash your fence at least twice a year with soapy water and a gentle brush, or use a power washer for tough grime.
Inspect for Damage
Regularly inspect the fence to detect any damage, such as cracks, rotten wood, warping, or loose boards. Minor issues treated on time save you big bucks later.
Sealing and Staining
Seal or stain your wood fence every 2 to 3 years to protect it from moisture, UV rays, and insect damage. Sealing also beautifies your fence.
Protect Against Pests
Watch for termites or any wood-boring insects. Use pest-resistant wood, install insect barriers, or treat your fence periodically with green pest repellents.
Clear Vegetation
Keep grass and other vegetation from growing alongside your fence, for they tend to trap moisture and accelerate the decay of wood. Maintain some clearance around your fence to ensure sufficient airflow, keeping it safe.
Following these steps will help keep the wooden fence sturdy and beautiful for many years.
Regular Inspections and Repairs
Conducting routine inspections is one of the key measures to preserve the proper functioning and maximum longevity of your wooden fence. It is recommended by the authorities that an inspection ought to be done at least every six months or immediately after significant weather disturbances. Look out for signs of wear and tear, such as cracking or splitting of wood, loose nails, rotting posts, or insect damage. According to a recent study, untreated wood fences, when exposed to the elements, may decay up to 70% faster compared to those undergoing some form of maintenance.
If you find any loose or rusted nails, replace them with galvanized or stainless steel nails to prevent further rust. Cracks and splits of a smaller nature can be filled with good wood filler or outdoor sealant to halt further damage. Cases in which the fence posts tend to rot should be dealt with at once by either replacing the affected section or reinforcing it with concrete.
Maintaining the fence will also help reduce overall costs over time. According to home improvement analysts, investing in minor renovations and upkeep now can save one-third of their money later on when bigger problems set in due to neglect. Making sure to stay on top of fence inspections actively will provide a sturdy and gorgeous wooden fence for many years.
Weatherproofing Your Fence
Keeping wooden fences protected from the weather is paramount to extending their lifespan and maintaining their beauty. In other words, weatherproofing guards against damage from rain, snow, and UV rays, preventing rot, warping, and fading. So here are five viable ways to weatherproof your fence:
Apply a Waterproof Sealant or Stain
You can create a barrier against moisture ingress and UV damage by sealing your fence with a waterproof sealant made for wood or a weather-resistant stain. Experts recommend reapplying the sealant every 2 to 3 years for optimal protection.
Paint Your Fence with Outdoor Paint
Exterior paint of good quality provides an additional layer of protection against rain and sunlight. Select paints that are specifically formulated for outdoor wood to ensure good durability and long life of the finish.
Install a Top Cap or Drip Edge
Installing a top cap or drip edge on your fence will help protect the upper edges from direct rain or snow, which can enhance water absorption and cause rot.
Keep Vegetation Away
Trim back any plants, vines, or bushes growing too close to your fence. The vegetation can hold moisture against the wood for long periods, gradually causing it to decay or mold.
Inspect and Repair Regularly
Adopt a schedule to inspect your fence regularly and identify minor problems, such as small cracks, loose boards, or slight splinters, that can be addressed before they develop into bigger issues. Repairs done promptly also go a long way in making any weatherproofing treatment much more efficient.
Following this advice, your fence will remain sturdy, attractive, and weather-resistant over time.
When to Call a Fence Contractor
Sometimes, fixing and laying a fence is easy. However, there are some cases when professional help should be sought. A fence contractor knows how to do the job efficiently, with the training, tools, and experience to deal with all issues. Here are a few significant instances when you should be considering calling a fence contractor:
Extensive Damage or Deterioration
If your fence is leaning or the wood is rotting extensively, it may be an issue that requires more than just routine maintenance. A professional contractor will analyze the damage and advise you on whether a repair is possible or a complete replacement is necessary. Also, it has been found that about 30% of homeowners resort to complete fence replacement after severe storm damage as repair might not just be economical.
Foundation Issues
Ground movement or soil erosion can leave your fence posts very unstable. Such are the issues that these contractors typically resolve by resetting the posts or laying deeper foundations for greater long-term stability.
Code Compliance and Permits
Mostly, your fence building and replacement will be subject to local regulations and permits. To ensure the structure complies with zoning laws, your contractor will do so on your behalf. For instance, a quick look-up reveals that in cities like San Diego, the backyard fence height limit for fence structures must not exceed 6 feet without a special permit.
Specialized Materials or Designs
If you plan to install a custom design or in high-end materials like wrought iron, aluminum, or composite, then you will want an experienced contractor to ensure quality craftsmanship. With the latest trends indicating that composite fencing—a mixture of wood fibers and plastic—is gaining popularity due to its durability and ease of maintenance, a professional will surely know how to work with it.
Large-Scale Projects
For larger projects, such as enclosing a large yard or installing a security fence, these contractors have the manpower and equipment to complete the job efficiently and effectively. Most contractors installed projects at least twice as fast as the average DIY effort and most often deliver long-lasting results due to their proper expertise.
Electrical or High Tech Additions
Professional installers are essential for any electrically charged fence or gate, as well as automated gates that incorporate security systems. Poor installation of these types of systems can pose serious safety hazards or even be an infringement of electrical codes.
Hiring a professional fence contractor will ultimately save you time, money, and headaches. Ensure you research reputable contractors operating in your area, obtain quotes for comparison, and read online reviews about those contractors to make an informed choice.
References
"What next? Some practical suggestions for future studies on fence ecology"
Published in Wiley Online Library, this article discusses the ecological impacts of fencing installations and provides a comprehensive analysis of related studies.
"A fence runs through it: A call for greater attention to the influence of fences on wildlife and ecosystems"
Published in ScienceDirect, this paper reviews the functions, designs, and ecological implications of fencing, highlighting knowledge gaps and research needs.
"Fence ecology: Frameworks for understanding the ecological effects of fences"
Published in BioScience, this article provides a typology of fence impacts and discusses biases in the literature on fencing.
Frequently Asked Questions (FAQ)
What is the fence installation process?
The typical process involved in installing a fence requires mold planning, material selection, and inspection for local regulations. Before measuring and marking the property lines, dig the post holes and set localized post concrete. However, the attachment of the fence panel depends on the type of fence. In the case of a wood fence, vinyl fencing, or a metal fence, they may be subjected to different installation methods.
How do I select the appropriate fence height?
The height of your fence depends mainly on its intended function. For example, private fences stand between six and eight feet tall. Some zoning laws may also limit the maximum height for any wall in the area; therefore, this regulation should also be taken into consideration. Otherwise, violators might be fined.
Do I need a building permit to install a fence?
In almost every location, an approved building permit is required to erect a fence. Community building codes and regulations typically define the requirements for erecting fences, including the allowed height and materials. Before you begin your installation project, it is essential to consult with your local authority to ensure compliance with regulations.
Could I put up a fence myself?
Many homeowners build their own fences with DIY efforts. As long as you have the possession of an appropriate set of tools, namely a post hole digger and drill, and the necessary materials, dry-set concrete, wood fence panels, or others, you should be able to build and install the fence successfully. However, before installing fences, it is essential to be transparent about the entire installation process to avoid common mistakes.
What do I need for building my fence?
Among the critical fence building equipment and materials that you need are: a post hole digger, a level, a tape measure, concrete mix, and any material required for your fence, including wood, vinyl, or metal panels. The installation will go much smoother if you have all the right tools at your disposal and, in the end, will enable you to build a fence that will last and look good.
How do I care for my fence after it has been installed?
Maintaining your fence will guarantee a long life. Check for damages regularly, clean the surface, and apply stain or sealant where needed, especially on wooden fences. Vinyl and metal fencing will maintain their new look with an occasional wash of soapy water. Proper maintenance will ensure that your fence continues to enhance your outdoor space.
What other factors about utility lines should I bear in mind while installing a fence?
When installing a fence, it is necessary to locate all utility lines that may be lying beneath your yard. Calling in the local utility companies to come and mark the lines can save you from accidentally damaging them during the installation process. This will further ensure a safe installation and compliance with local regulations.
Recently Posted
-
Building a Security Fence: Your Guide to High-Security Solutions
February 5, 2026The security fence functions as the primary defense system of your commercial property, industrial site, and private estate becaus Read More
 -
How to Build a Security Fence: A Comprehensive Guide to Installing Chain Link Security Fences
February 4, 2026Constructing a security fence is an effective way to protect your property, define its boundaries, and enhance your privacy. The v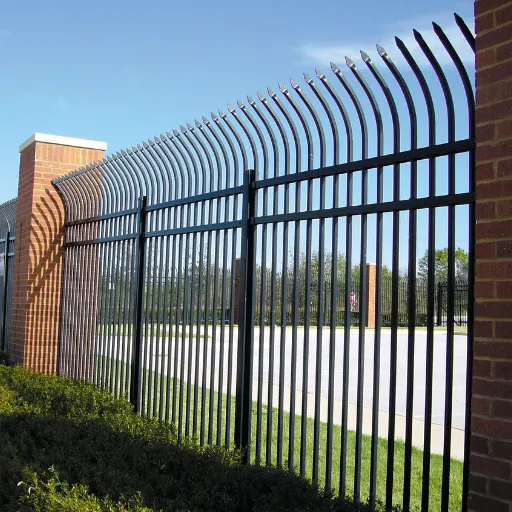 Read More
 -
Iron Yard Fence: The Ultimate Guide to Wrought Iron Fencing for Your Garden
February 3, 2026The design of a garden fence goes beyond establishing property borders because it serves two main purposes by enhancing the visual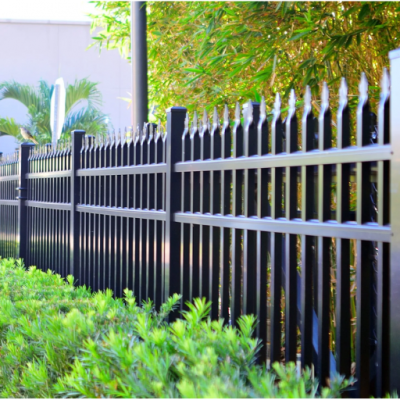 Read More
 -
Cast Iron Garden Fence: The Ultimate Guide to Durable and Decorative Garden Edging
February 2, 2026The cast iron garden fence functions as a boundary that creates an everlasting combination of practical use and aesthetic beauty t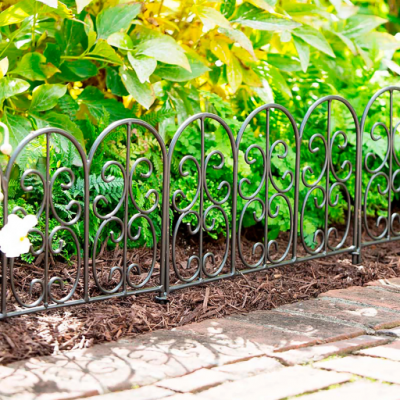 Read More

Contact Us
Recommended Products
-
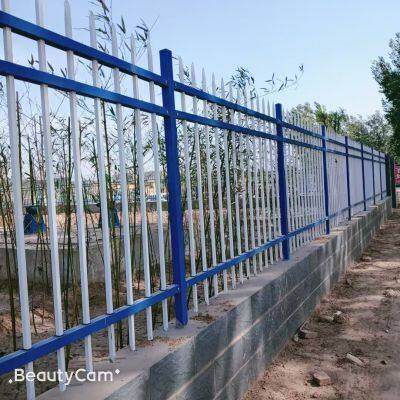
 Durable Imitation Bamboo Fence for High-Traffic Public SpacesNegotiableMOQ: 50 Square Meters
 -
Customizable Imitation Bamboo Fence With On-Site Measurement ServiceNegotiableMOQ: 50 Square Meters
-
Modular Imitation Bamboo Fence Panels for Quick InstallationNegotiableMOQ: 50 Square Meters
-
Imitation Bamboo Privacy Fence With Reinforced Aluminum BaseNegotiableMOQ: 50 Square Meters
-
Commercial Grade Villa Fence for Real Estate Developments and Hotel Perimeter ApplicationsNegotiableMOQ: 10 Sets

-
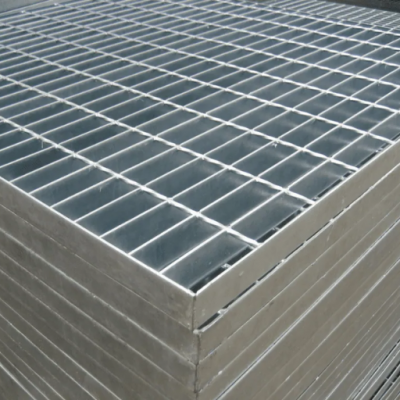
Industrial Steel Grating Solutions for Oil and Gas Platforms, Compatible With Harsh ConditionsNegotiableMOQ: 10 Pieces
-
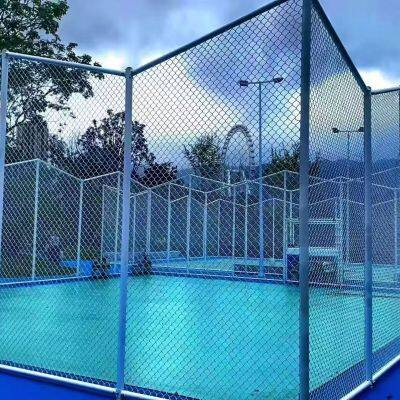
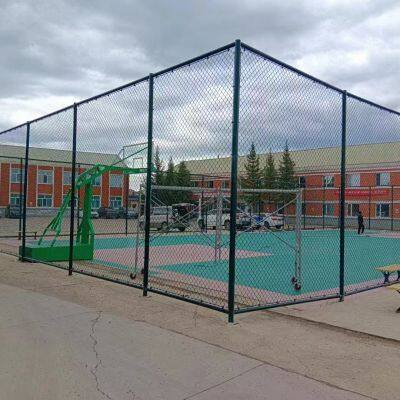
Basketball Court Fence 4M Height, Galvanized Steel Chain Link Mesh for Outdoor Sports Field PerimeterNegotiableMOQ: 50 Square Meters
-
Chain Link Basketball Court Fence Offering Anti-Rust Protection and Long-Term PerformanceNegotiableMOQ: 50 Square Meters
-
European Style Villa Fence Concrete Base Installation Courtyard Boundary WallNegotiableMOQ: 100 Square Meters
-
Galvanized Steel Villa Fence With Powder Coating for Superior Corrosion ResistanceNegotiableMOQ: 100 Square Meters
-
Powder-Coated Basketball Court Fencing With Weatherproof Finish for Long-Term Outdoor ApplicationNegotiableMOQ: 100 Square Meters
-
Powder Coated Wrought Iron Main Gate and Garden Fence for HousesNegotiableMOQ: 100 Square Meters
-
Elevate Your Garden With an Artistic Wrought Iron Garden Fence | Uniting Security & EleganceNegotiableMOQ: 100 Square Meters
-
Low-Maintenance Wrought Iron Garden Fence | Durable Powder-Coated Steel PicketsNegotiableMOQ: 100 Square Meters
-
Heavy-Duty Villa Fence: 10 Gauge Steel Construction With Powder Coating for DurabilityNegotiableMOQ: 10 Sets

-
Anti-Slip Steel Grating Panels for Enhanced Safety in Wet and Slippery Work AreasNegotiableMOQ: 10 Pieces
-
Steel Grating for Stair Treads and Catwalks in Commercial and Factory BuildingsNegotiableMOQ: 10 Pieces
-
High-Security Villa Fence With Lockable Gates and Weather-Resistant Finish for Home ProtectionNegotiableMOQ: 10 Sets
-
Galvanized Steel Basketball Enclosure Netting / Ball Containment System With Frame for Outdoor CourtsNegotiableMOQ: 50 Square Meters
-
Vinyl Coated Chain Link Fencing for Basketball, Pickleball & Tennis CourtsNegotiableMOQ: 500 Square Meters